Omega Tip
For this week’s tip, we’ll dive into the details of Serial Communication on the Omega’s UARTs. First of all, UART is an abbreviation for Universal Asynchronous Receiver/Transmitter. It is a device used for serial communication between two devices. The Omega2 comes with two UART devices, they are:
UART0– configured to provide serial access to the Omega’s command lineUART1– can be used freely to communicate with other devices
You probably know that serial communication is established only between two devices unlike I2C or SPI which are bus-based protocols. If you want to learn more about insights of the UART communication, well, you’ve come to the right place!
So let’s dive in! Generally speaking, UART has no master-slave architecture and allows you to set the transmissions speeds, aka Baud Rate, of your data. If you’ve connected to your Omega via serial before, you probably remember that we set the baud rate to 115200 bps (bits per second), meaning that the time spent holding each bit high or low is 1/115200bps.
Connecting Serial Devices
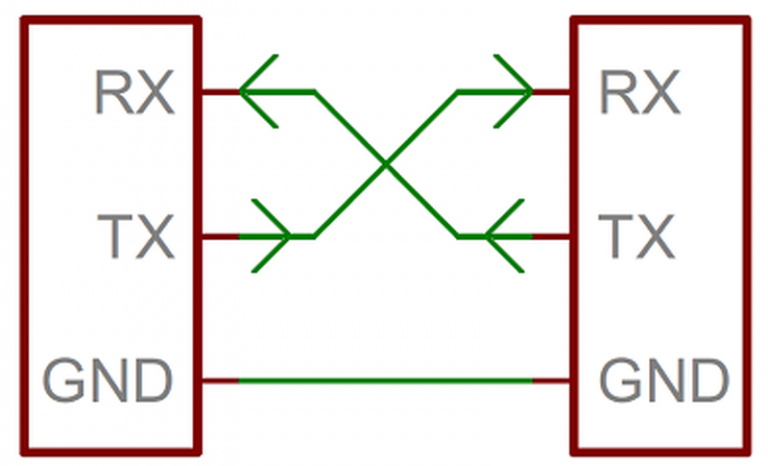
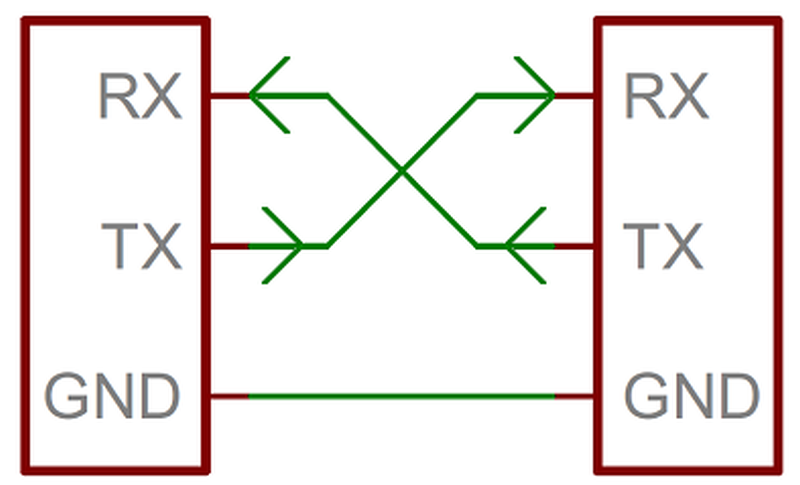
Communication on a UART is done by using two data lines: a Transmission (TX) and a Receiving (RX) lines, as well as a Ground connection. Let’s take a closer look. The Transmission line (TX) on a device A will send data to the Receive line (RX) on the device B and vice versa. Please refer to the diagram below:
The pinout diagram is also available for you to see where the UARTs are located on the Omega:
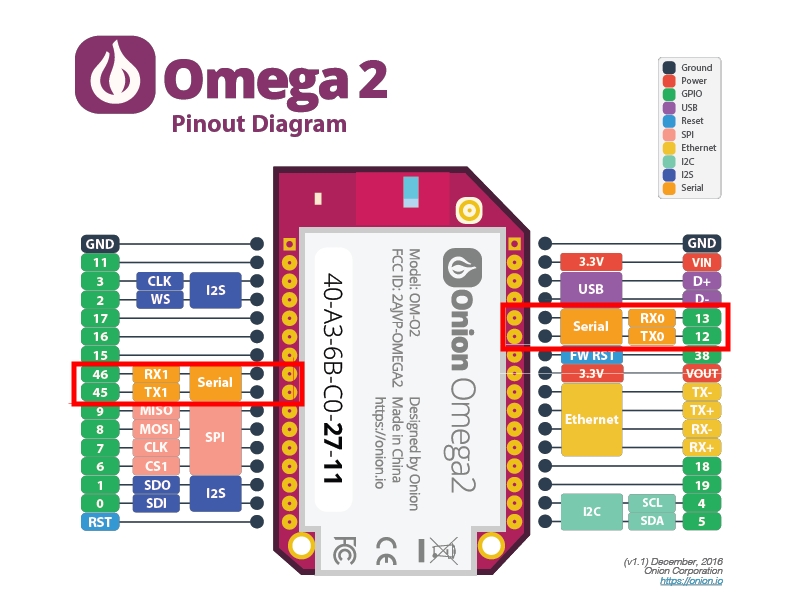
Pins RX0 and TX0 are used for UART0 and RX1 and TX1 are used for UART1.
Communicate to Serial Device
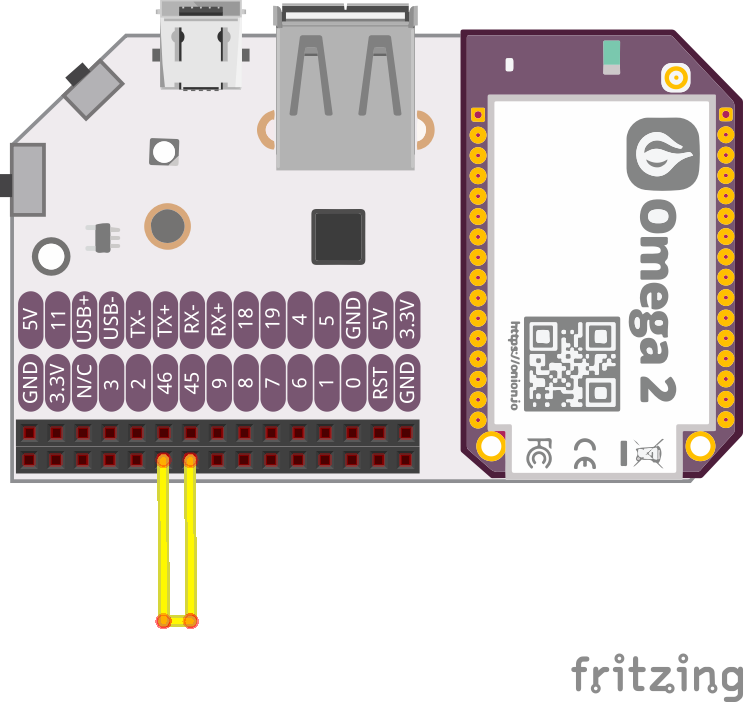
Now we’ll discuss how to send data and receive serial data from the command line on your Omega. For the purposes of this example, we’ll be connecting the TX1 and RX1 pins, effectively making the Omega talk to itself! So before we proceed we’ll need to make sure that we have RX1 and TX1 connected with jumper wire. If you are connecting the Omega with an external serial device, which will be the most common use, it’s very important to have a common ground between the two devices.
So now that we have established a physical connection between the RX and TX lines of UART1, let’s move on to using it. On the Omega’s file-system, /dev/ttyS1 represents the UART1 device. As you may remember, we’ve used this device previously for all serial communication.
Now, open two separate SSH sessions to your Omega so that we can see it talking to itself:
- In one terminal, run:
cat /dev/ttyS1to listen to any incoming data on UART1 - In the other terminal run:
echo “Hello Omega” › /dev/ttyS1to write data to UART1
When at first you issue the cat command, it will wait for input data to be printed. When the echo command is sent, you will notice that the message you sent appears on the first terminal running the cat command!

If you’ve been following along with our weekly tutorials, you will recognize the cat /dev/ttyS1 command from our December 2017 articles: Reading Analog Sensors with Arduiono Dock 2, MQTT Servo Controller and Realtime Potentiometer Position Webpage.
Going Further
This provided an overview of how to connect Omega to another device via Serial, aka UART. Now that you know this, you can quickly write scripts that can interact with all sorts of different devices. Once you feel that you’ve done everything you can with the command line tools, it’s most likely time to start using Python to communicate with serial devices. Take a look at our article on using the Python PySerial module for more details.