The second bullet of this week’s 2-Bullet Tuesday! Check out the first bullet here. Subscribe to receive the newsletter on the 2-Bullet Tuesday page!
Omega Tip
In this week’s tip, we will explore using the microcontroller on the Arduino Dock 2 as a co-processor for the Omega2. In this case, the microcontroller will read an analog voltage value from a sensor and communicate this to the Omega. This is handy since the Omega itself cannot accept analog inputs.
From a high-level, the microcontroller will read the analog voltage input and, upon the Omega’s request, will transmit the reading to the Omega serially via the UART. In short, we will read an analog value from a TMP36 temperature sensor, convert the voltage value to a human-readable temperature, transmit it to the Omega, and print the actual temperature on the command line.
Let’s dive in. We will need the following components:
- Omega2 or Omega2+
- Arduino Dock 2
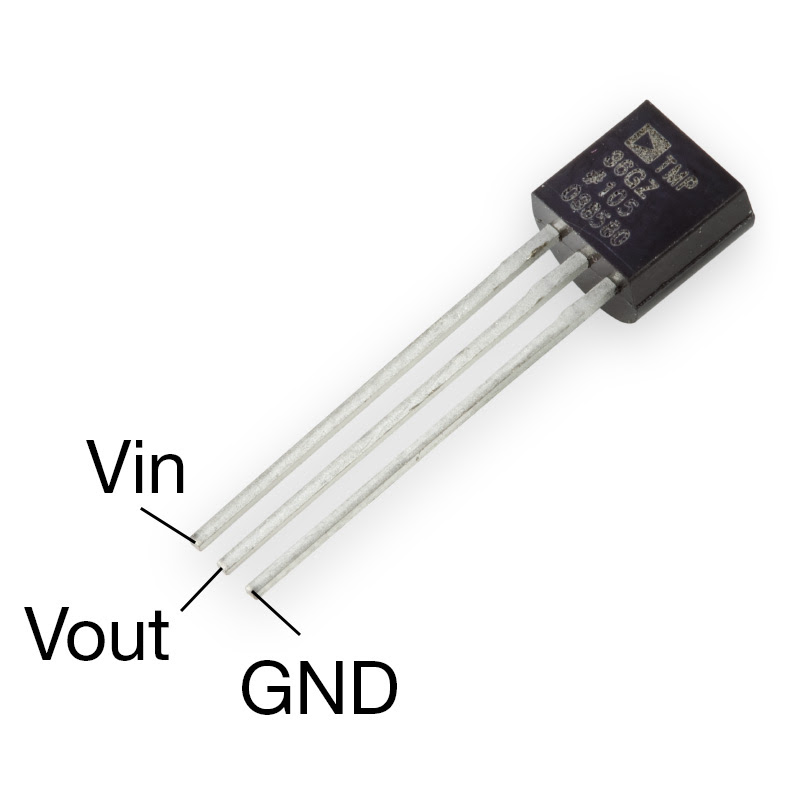
- TMP36 Analog Temperature Sensor
- 3x Jumper wires
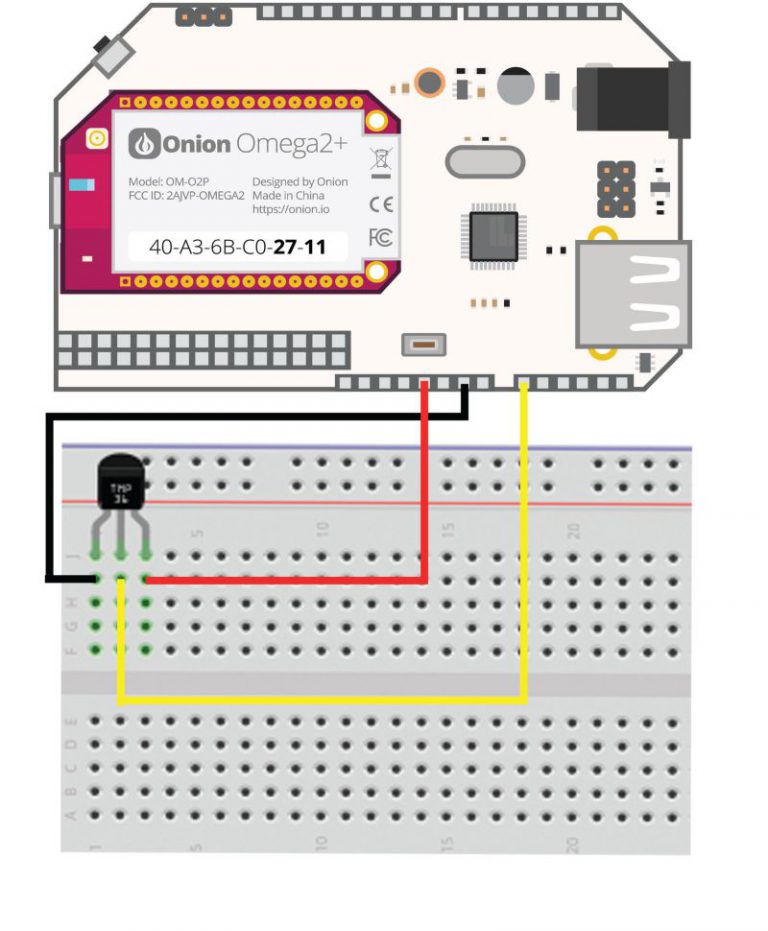
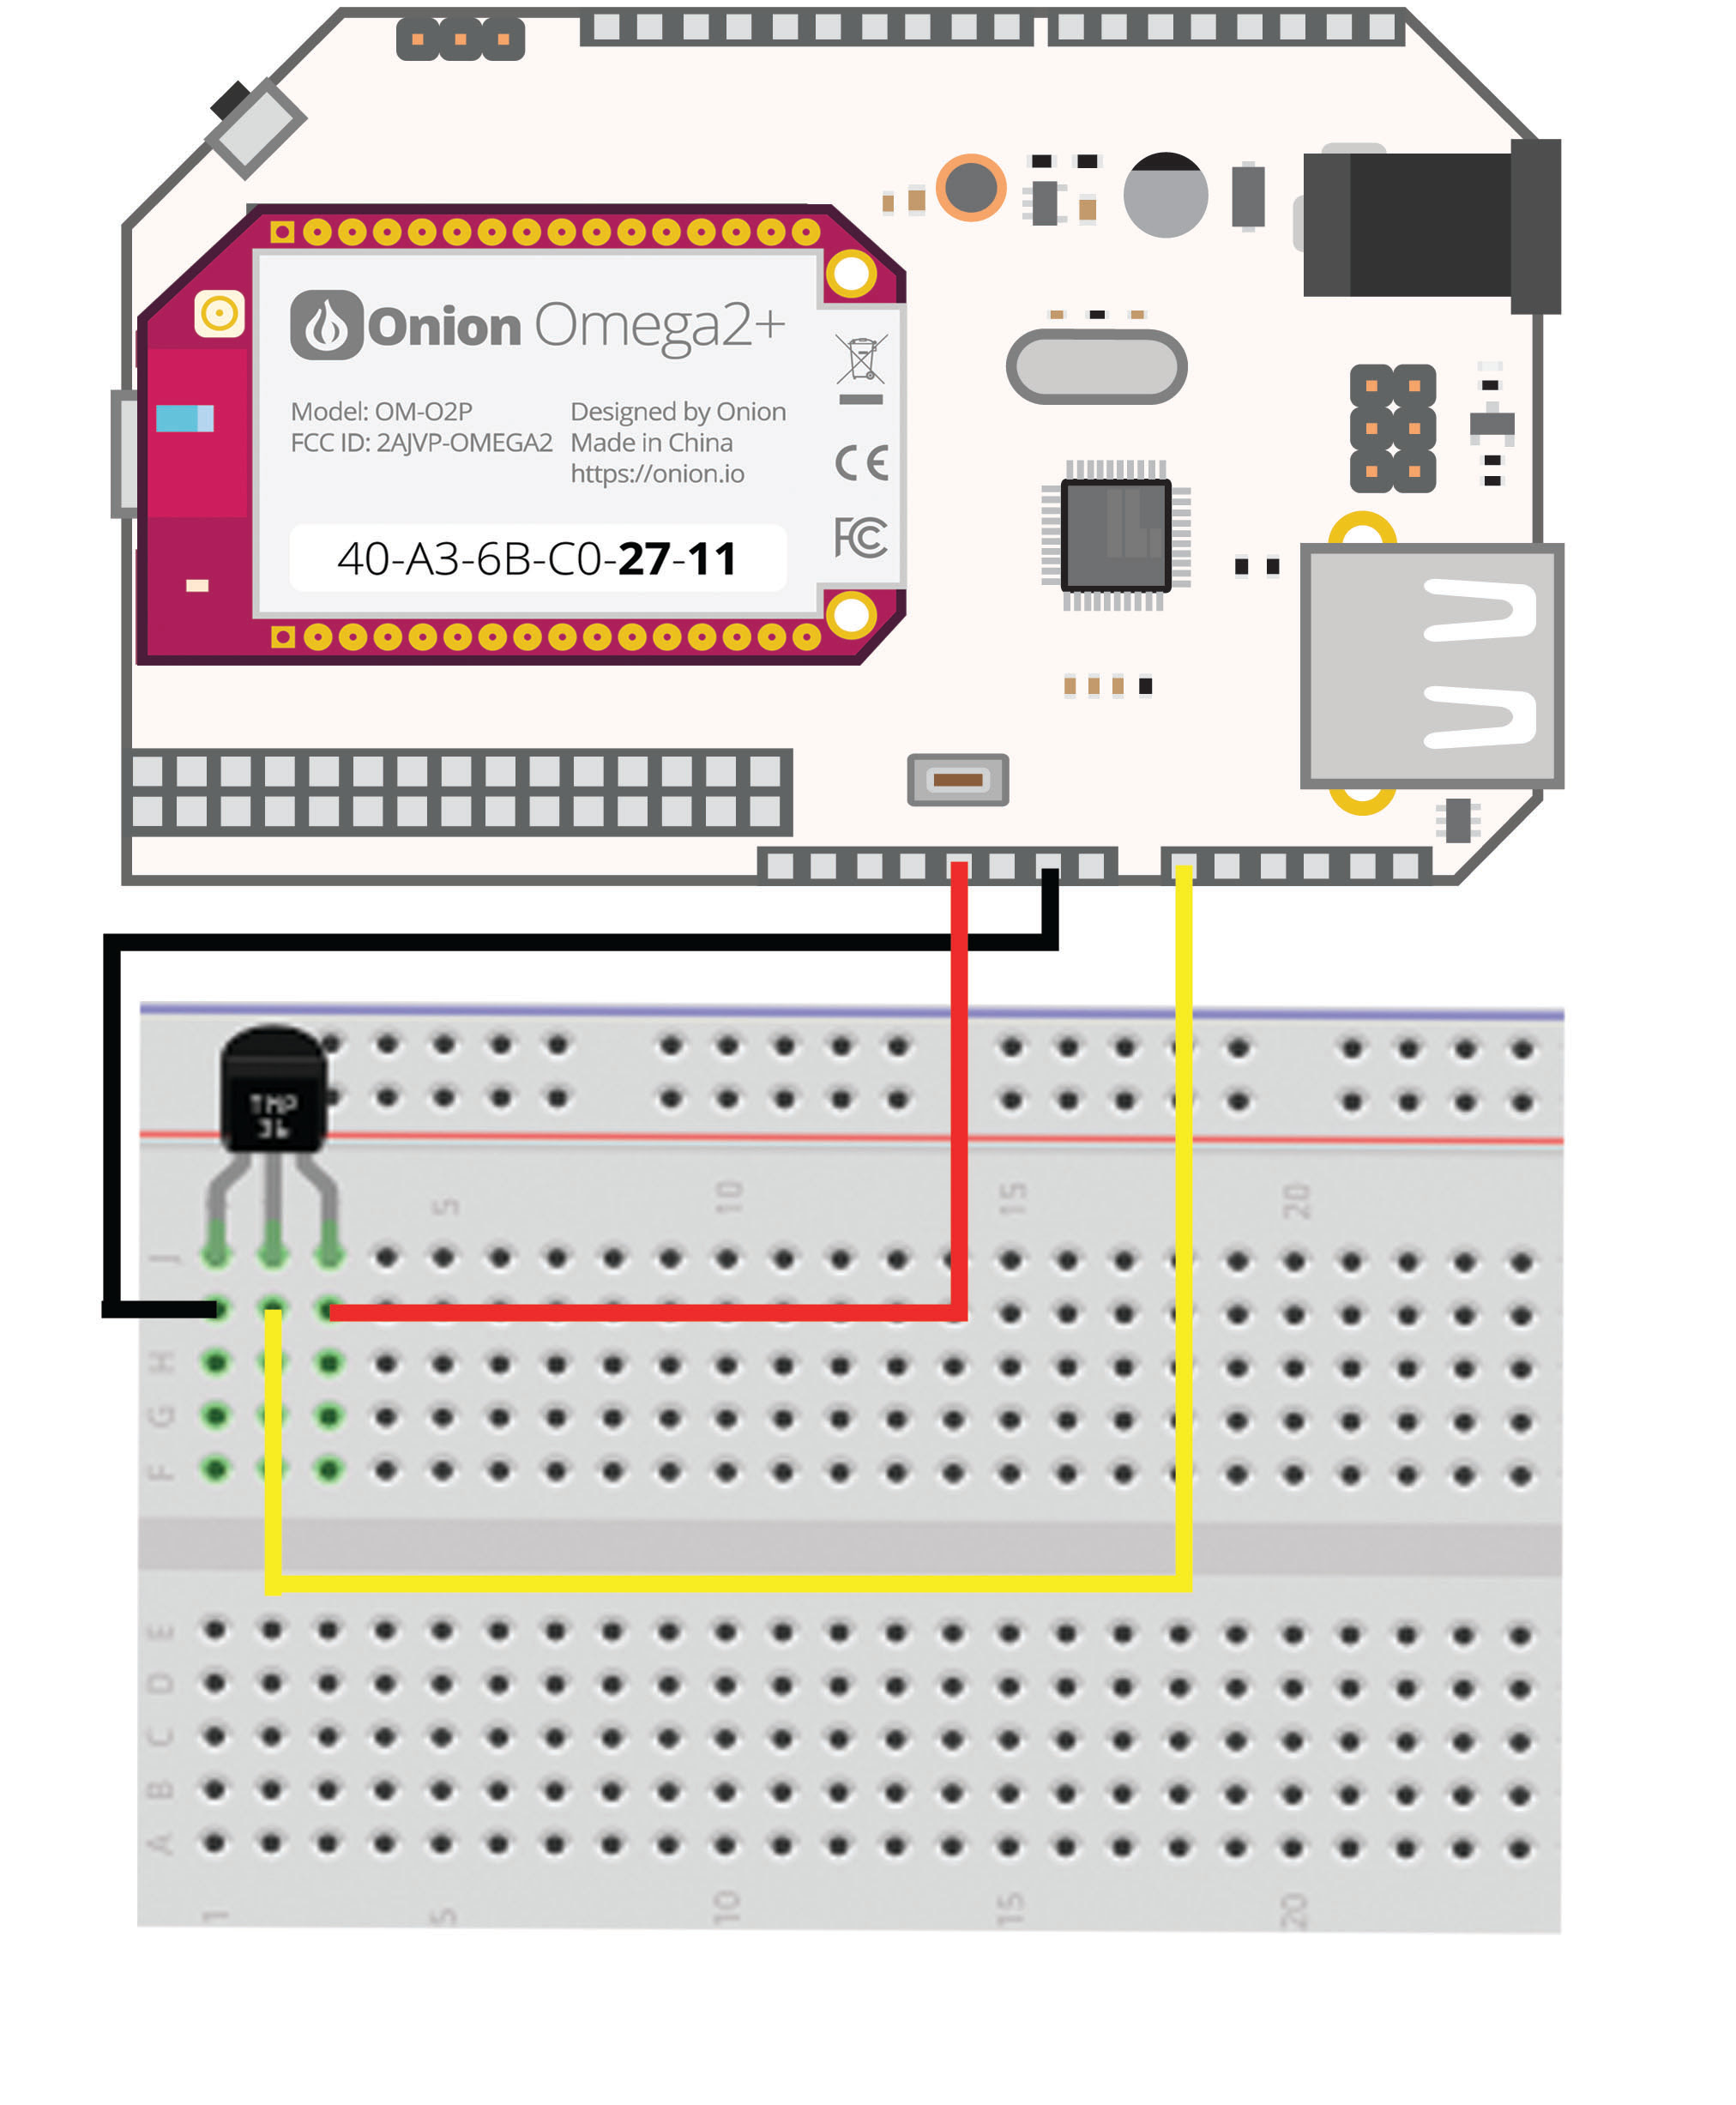
We’ll be connecting the temperature sensor to an analog pin of the ATmega microcontroller, and we’ll reference it to VCC (5V) and GND so we can make sure the data is accurate. Now let’s wire everything up!
- Plug the Omega2 into the Arduino Dock 2 and power it up
- Plug the TMP36 onto the breadboard
- When looking at the flat side of the device, connect the right pin to
GND, the middle pin toA0, and the left pin to5V VCC(See the diagrams)
And you’re all set! Now we’ll write Arduino Sketch C code to do the following:
- Read the sensor’s analog voltage
- Convert the voltage to Celsius and Fahrenheit temperatures
- Send the reading to the Omega through the Serial UART when it is requested
So here we are:
The next step is to flash this sketch to the Arduino Dock 2; please refer to our guide on how to flash the Arduino Dock wirelessly. When the flashing is done, in order to get the data from the microcontroller, you will need to send the specific character specified in the code.
The screen command will allow you to send and receive data on the serial port. The predefined input is the r character. First, you need to install the screen utility by issuing:
opkg update
opkg install screen
Take a look at our Docs to learn more about the screen utility. Afterwards, you can run screen /dev/ttyS1 9600 and press the r key on your keyboard:
0.71 volts
21.29 degrees C
70.32 degrees F
You can hit r button as many times as you want to send the request to get a temperature reading from the sensor. To end your screensession, press Ctrl + a, then k, and then y to return to the command prompt.
Alternatively, if you would like to access the temperature readings programmatically, you can write a Python script that uses the serial module. Take a peek at the code below:
However, you will need to install the pySerial python module in order use import serial in the code. To do so issue the following commands on your Omega:
opkg update
opkg install python python-pyserial
By running the Python program you can ‘talk to the Arduino’ and retrieve the temperature readings from the sensor. Just copy the code to a file on your Omega and execute by running the following:
root@Omega-F04D:~# python get_response.py
0.71 volts
20.80 degrees C
69.44 degrees F
And there you have it! You can use this code to make your very own microcontroller communication scripts.
Let’s sum up what was covered in this week’s tip:
- Using the microcontroller as a co-processor that does its own work: obtain data from the analog sensor
- Converting the voltage level into Celcius and Fahrenheit temperature readings
- Communicating the results to the Omega – using either the
screenprogram or a Python script
Essentially, the microcontroller listens to the sensor, then tells the Omega what the temperature reading was when the Omega asks for it.
Thank you for reading! Next week, we’ll cover more ways for the Omega and microcontroller to communicate, stay tuned!
Have a wonderful rest of the week!
Let us know what kind of stuff you would like to see featured on 2-Bullet Tuesday! Send a tweet to @OnionIoT with your suggestions!