HI EVERYONE!
Welcome back to 2-Bullet Tuesday, where we’ll share useful tips and awesome stuff sent in by Omega2 users all around the world. Check out very creative projects and tutorials that will benefit your day!
Favorite Project
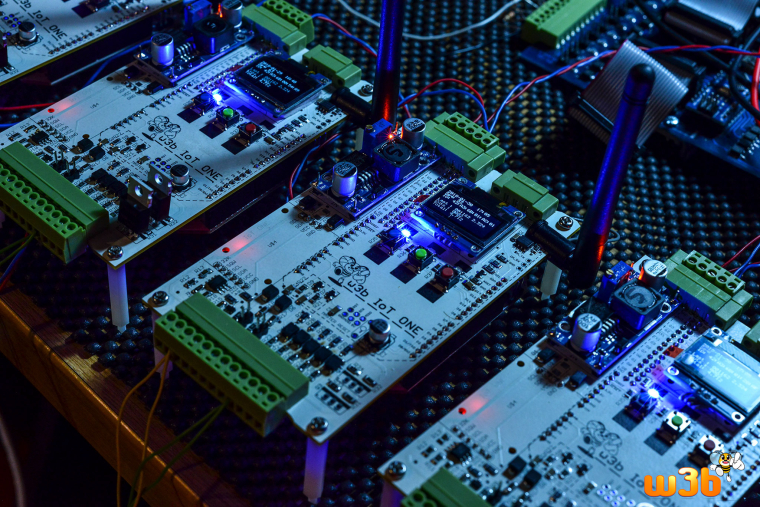
Paul Cousins is back with an awesome update to his industrial machine monitor project: a move from a prototype to a PCB! The Omega2 & Arduino Dock2 plug into Paul’s custom designed PCB, named the IoT ONE.
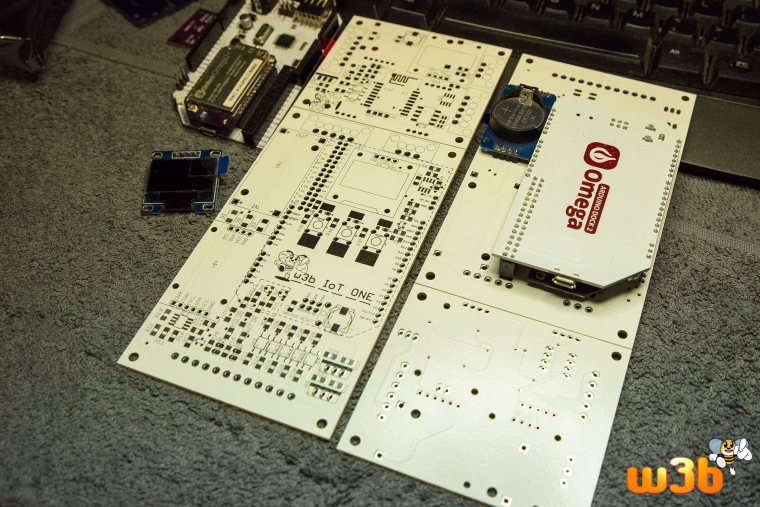
Just like the prototype version, the device logs the GPS location and data about the sheet metal cutting activities of the machine to which it is attached. This PCB allowed Paul to add 2x analog/4-20ma inputs, 4x digital inputs, 2 FET outputs, a RTC chip, and an RS485 port.
There are six complete boards ready to be deployed in their permanent homes. Awesome project Paul, we dig the design and the name!
Connecting your Omega to AWS IoT with a Single Command
We’ve put together a guide on how to setup your Omega to connect to AWS IoT as a ‘Thing’ with a single command! We’ll guide you through:
- Getting everything ready on the AWS IoT console in your browser
- Running the setup command on your Omega
- Updating the device’s state on AWS IoT
- (The Omega will be sending a Valentine’s day message to AWS IoT ❤️)
You’ll be up and running in no time, able to take advantage of the awesome rules engine and integration with other AWS services to make your very own IoT projects with the Omega!
The guide focuses on connecting the Omega to AWS IoT, we assume that you’re already familiar with how MQTT works and how AWS IoT works, specifically Device Shadows. We recommend taking a peek at the AWS IoT overview if you’re not yet familiar: https://aws.amazon.com/iot-core/.
Setting up AWS IoT
Let’s dive in! You’ll need an Amazon AWS account, if you don’t have one already, go to https://aws.amazon.com/ and sign up.
Then navigate to the AWS IoT service, you’ll be greeted with something like:
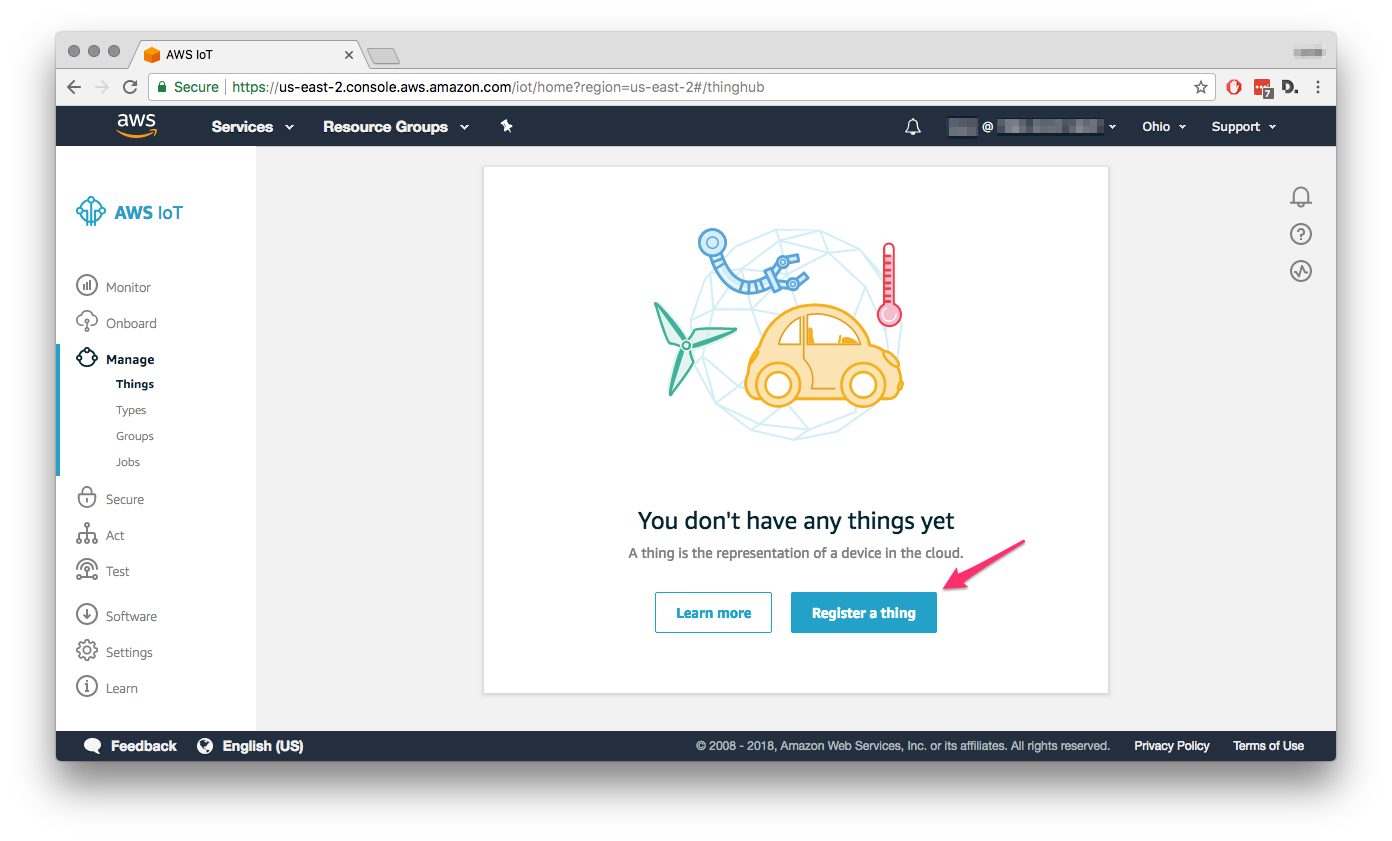
Hit the Register a thing button and we’ll get started.
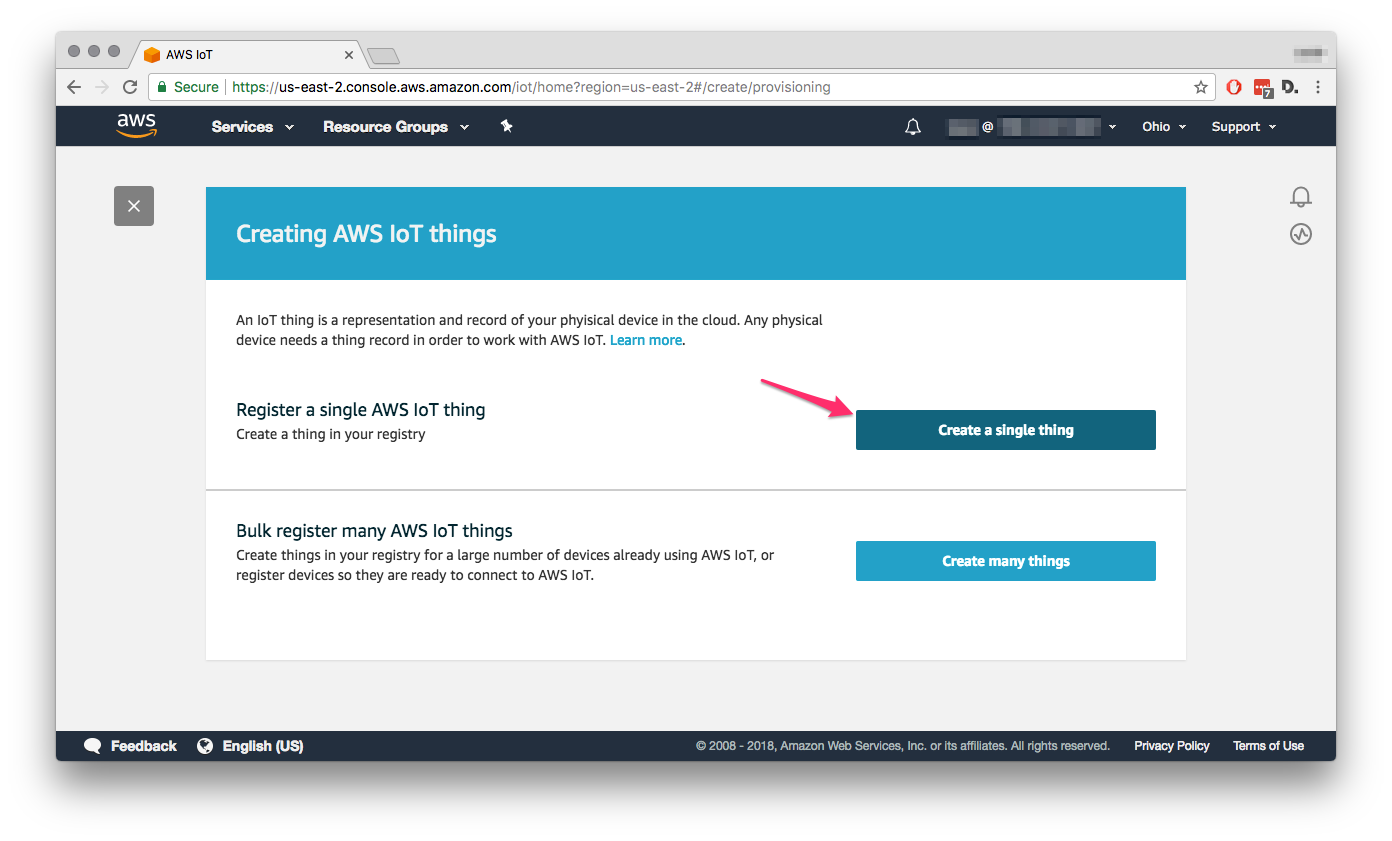
We’ll only need a single Thing for now so, hit Create a single thing. You’ll then be prompted to give your new Thing a name, we decided to name it after the Omega we’re using:
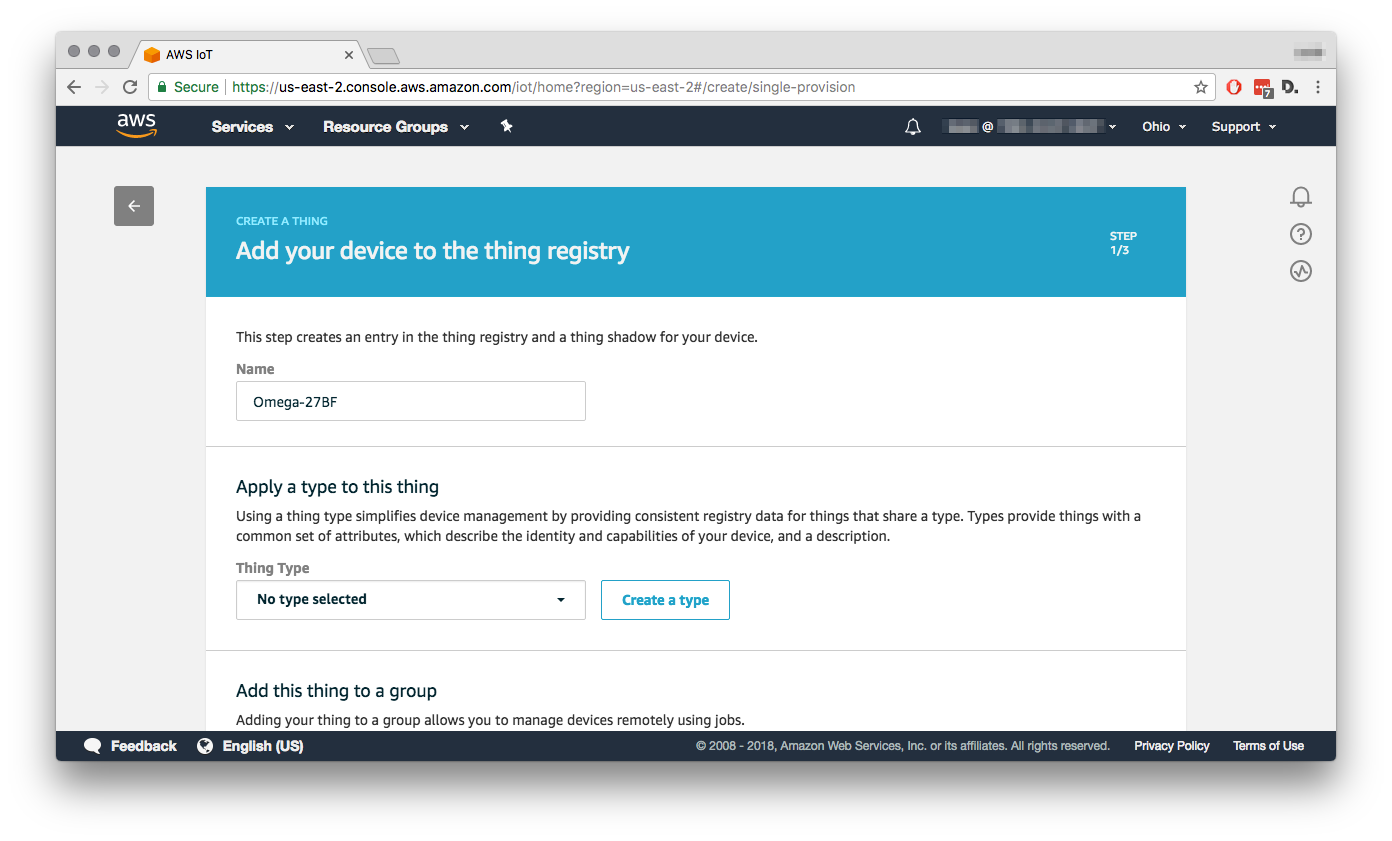
For now, you can skip the rest of the settings, you can always go back and edit them later. Scroll to the bottom and hit Next. Our next step will be to create a means of authenticating your Omega’s communication with AWS IoT. We’ll use their very nice One-Click certificate creation:
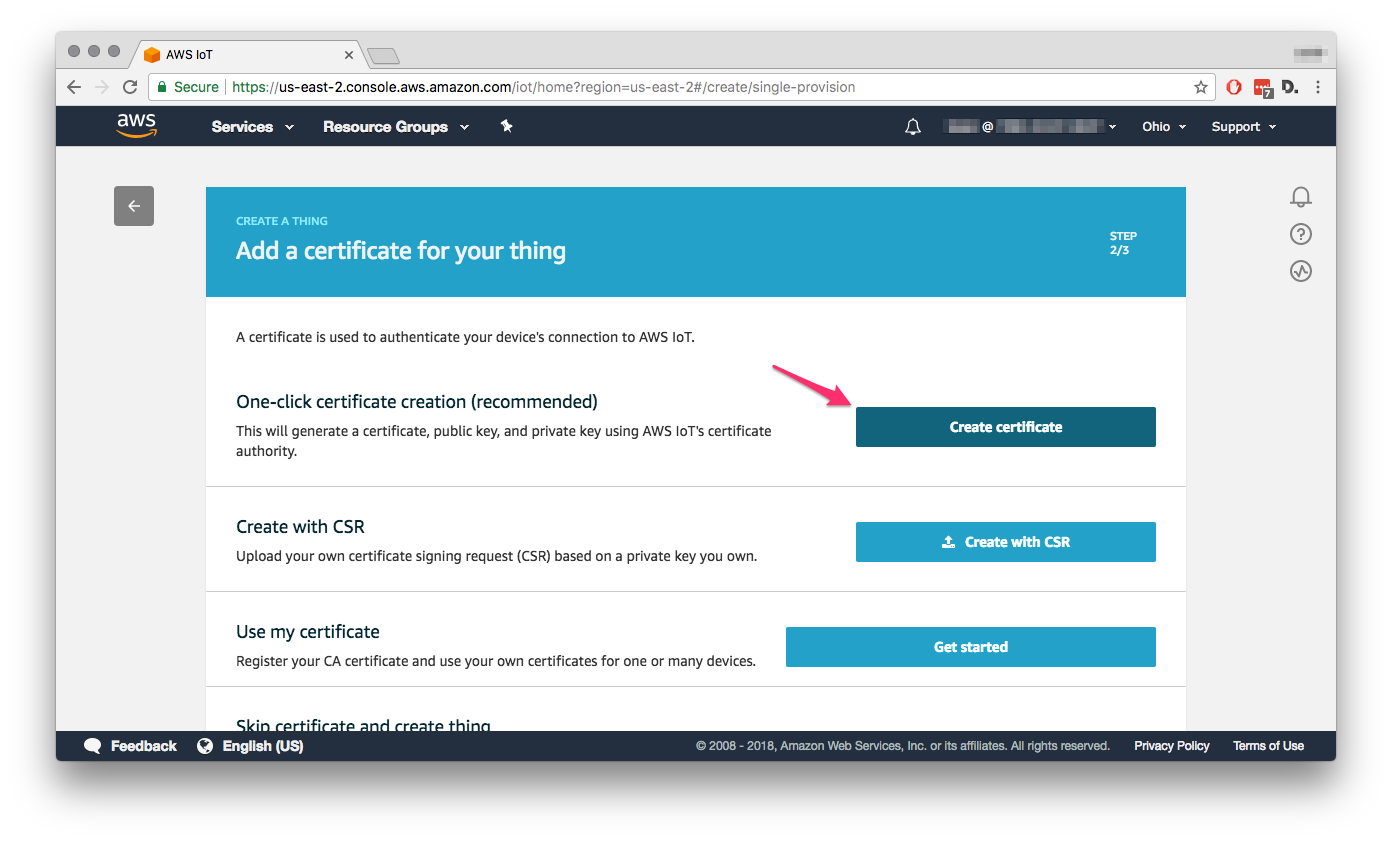
This will generate a certificate, and public and private keys. You’ll want to download the certificate and private key to your computer, then hit Activate so the certificate is enabled:
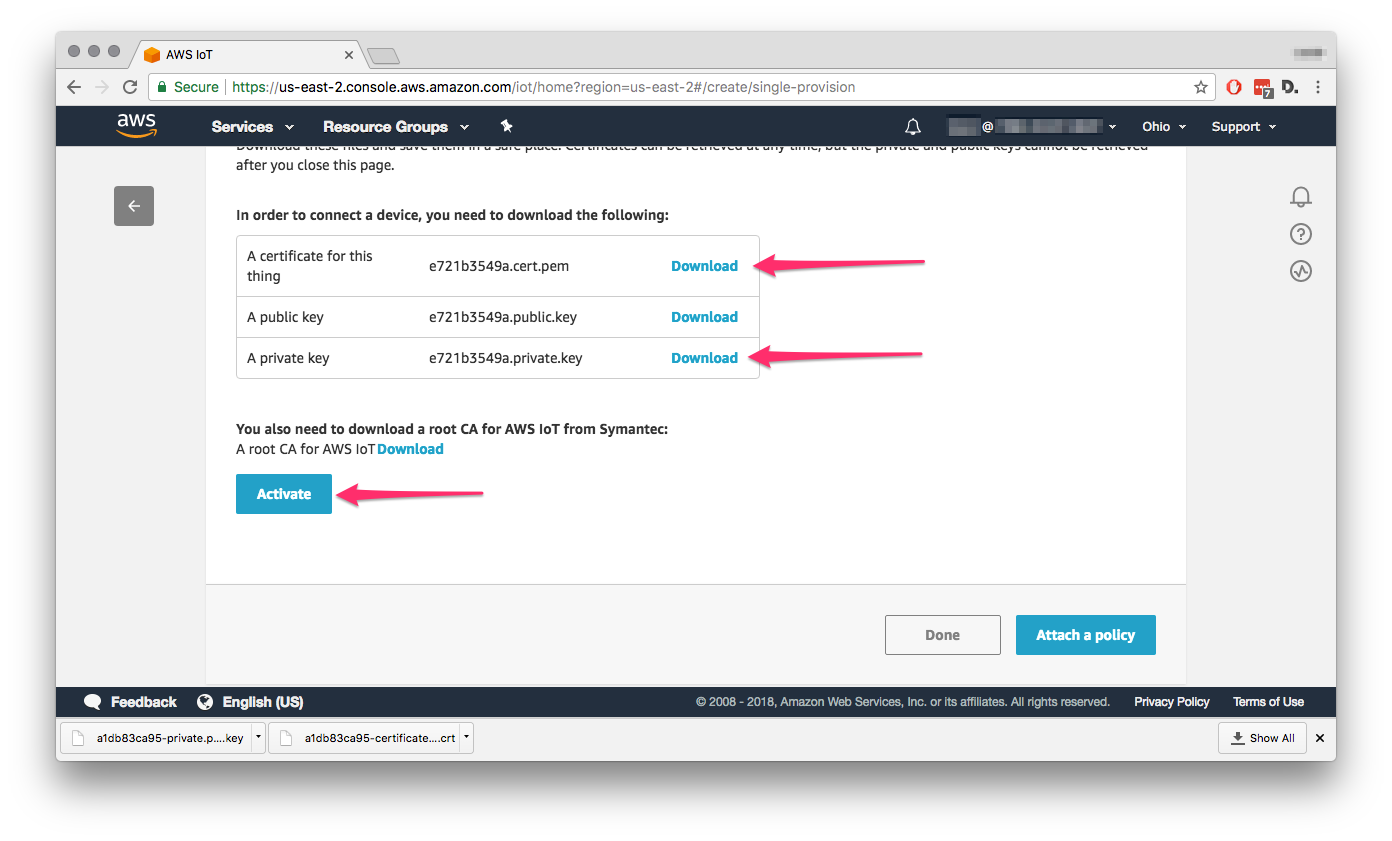
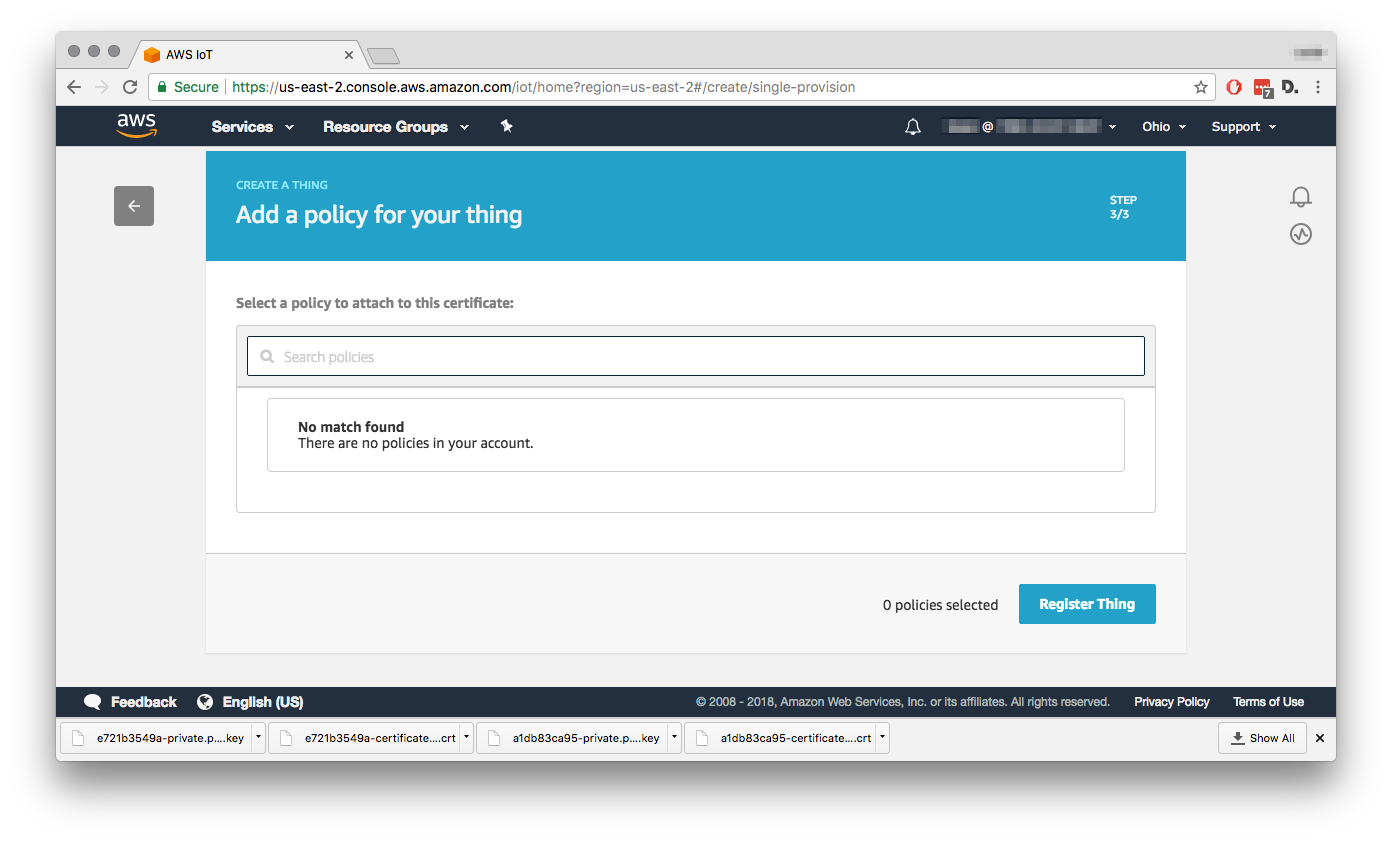
Once you hit Attach a policy, you’ll be taken to an empty policy screen. It’s a little odd that you can’t create a policy right here but that’s ok, hit Register Thing and we’ll circle back.
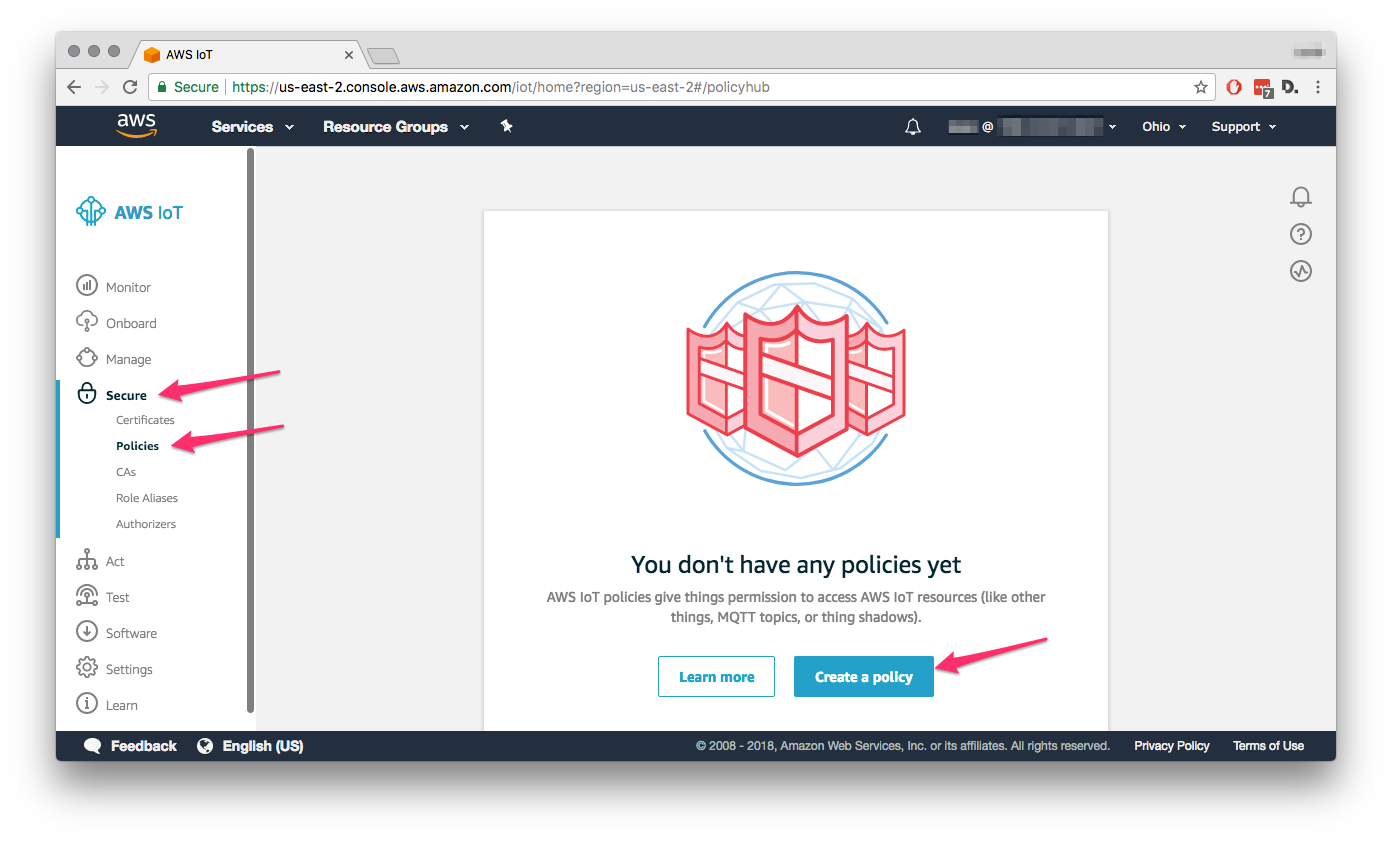
Now our Thing has been created and we’re back to the main AWS IoT console. We still need to create a policy to give permission to the certificate we just created, so navigate to the Secure menu and then the Policies sub-menu, and hit Create Policy:
Give your policy a name (we chose to name ours something super creative: omega-thing-policy) and hit Advanced Mode to copy our policy in. Before you do that, note that you’ll have to modify our policy to suit your AWS account and the AWS region you’re using. Replace [YOUR AWS REGION] with the region you’re using (we used us-east-2 for this guide) and replace [YOUR AWS ACCOUNT NUMBER] with … your AWS account number, it will be visible on the upper right side of the AWS console, next to the Support and Region drop-downs.
{
  "Version": "2012-10-17",
  "Statement": [
    {
      "Effect": "Allow",
      "Action": "iot:Connect",
      "Resource": "arn:aws:iot:[YOUR AWS REGION]:[YOUR AWS ACCOUNT NUMBER]:client/${iot:ClientId}"
    },
    {
      "Effect": "Allow",
      "Action": [
        "iot:Receive",
        "iot:Publish"
      ],
      "Resource": [
        "arn:aws:iot:[YOUR AWS REGION]:[YOUR AWS ACCOUNT NUMBER]:topic/$aws/things/${iot:Connection.Thing.ThingName}/shadow/*"
      ]
    },
    {
      "Effect": "Allow",
      "Action": [
        "iot:Subscribe"
      ],
      "Resource": [
        "arn:aws:iot:[YOUR AWS REGION]:[YOUR AWS ACCOUNT NUMBER]:topicfilter/$aws/things/${iot:Connection.Thing.ThingName}/shadow/update/*",
        "arn:aws:iot:[YOUR AWS REGION]:[YOUR AWS ACCOUNT NUMBER]:topicfilter/$aws/things/${iot:Connection.Thing.ThingName}/shadow/get/*"
      ]
    },
    {
      "Effect": "Allow",
      "Action": [
        "iot:GetThingShadow",
        "iot:UpdateThingShadow"
      ],
      "Resource": [
        "arn:aws:iot:[YOUR AWS REGION]:[YOUR AWS ACCOUNT NUMBER]:thing/${iot:Connection.Thing.ThingName}"
      ]
    }
  ]
}
The policy needs to be attached to our certificate. In general, the permissions of devices that authenticate with a certificate are set with the attached policy. Our policy is made to be generic and reusable, so you can have many certificates and use this policy with all of them
For the curious, here’s a brief overview of the permissions set by our policy:
- Allows MQTT connections from clients with a client ID that matches the Thing name
- A small but important note, this means only a single MQTT connection to AWS IoT can be made with this certificate
- Allows the connected device to receive messages from and publish to all MQTT topics under your Thing’s shadow
- Allows the connected device to subscribe to all of the
shadow/updateandshadow/gettopics for the Thing - Allows the connected device to retrieve and update the Thing’s shadow
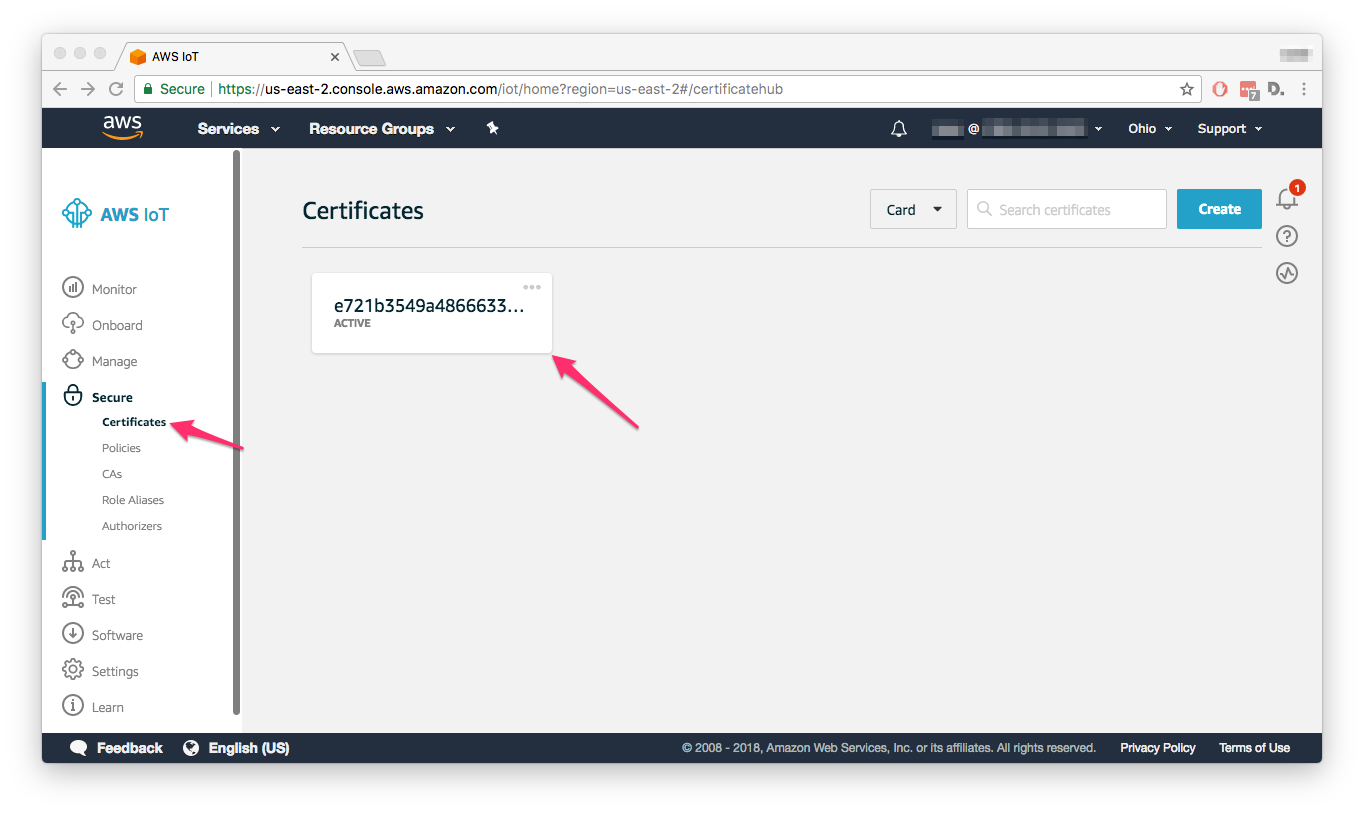
Now that your policy is created, we’ll need to attach it to the certificate. You should have been taken back to the Policies view, click on the Certificates sub-menu and then on your certificate:
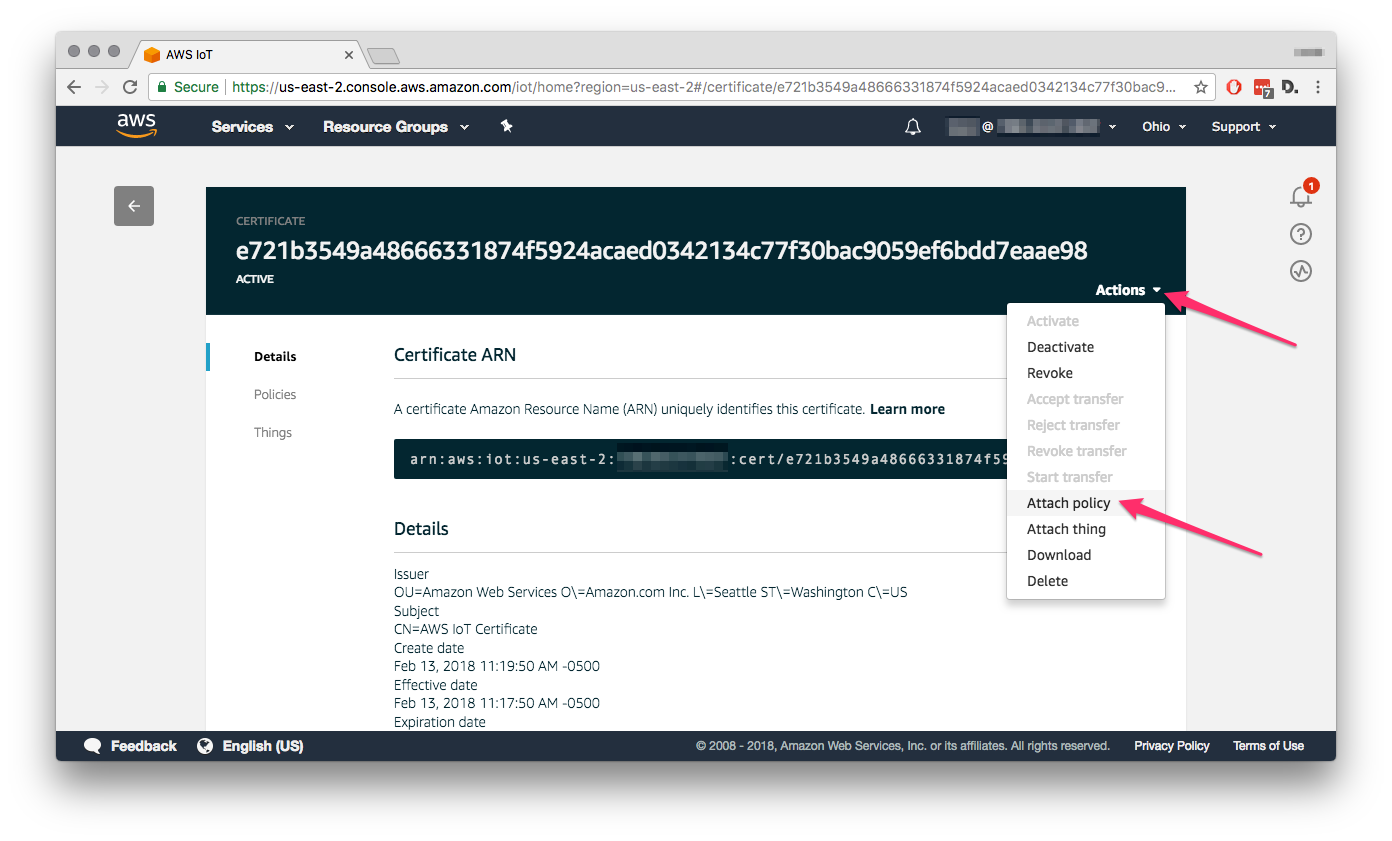
In the certificate view, click the Actions drop-down menu and then Attach Policy:
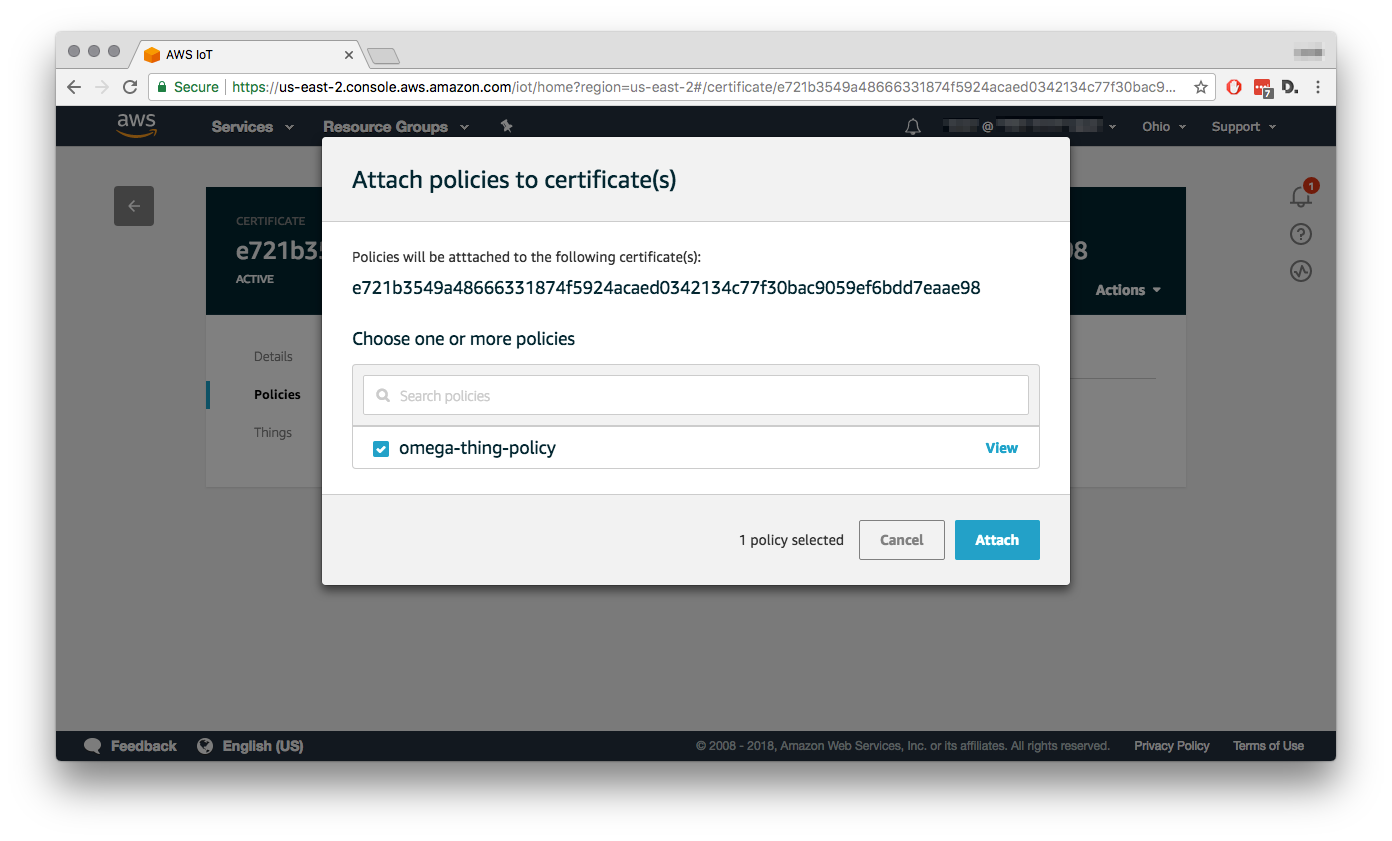
Select the omega-thing-policy and hit Attach:
Ok, we’ve set everything up on AWS IoT, let’s move to the Omega!
Setting up the Omega
First, you’ll need to make sure your Omega is connected to a WiFi with internet and is on the latest firmware. See our first time setup guide for details.
Next, we’ll need to transfer the certificate and private key files to the Omega. We used the rsync command to transfer the files to the /root directory on the Omega, but there’s a variety of ways to accomplish this, see our guide on transferring files to the Omega for more details.
Now we’re ready to download and run the script:
wget -qP /tmp https://raw.githubusercontent.com/OnionIoT/Onion-Scripts/master/awsiot_setup.sh; sh /tmp/awsiot_setup.sh ; rm /tmp/awsiot_setup.sh
This will install the required Mosquitto MQTT tools and take input from the user to configure the MQTT connection.
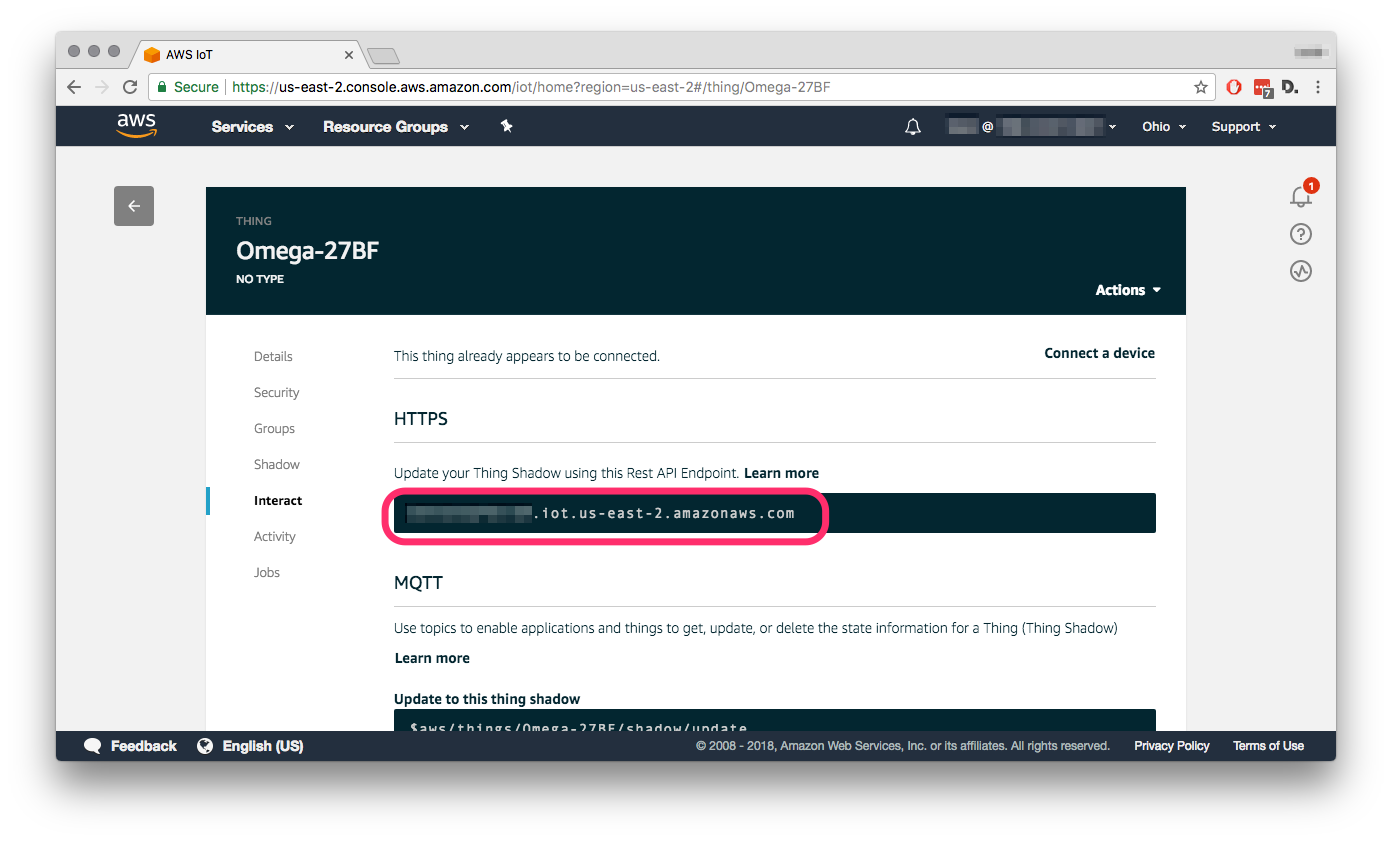
The first required input is the AWS IoT endpoint with which the MQTT connection will be made. This IoT endpoint is unique and specific to every AWS account. To find this for your account, go to your Thing in the IoT console, select the Interact sub-menu and copy the endpoint under Rest API Endpoint:
The rest of the inputs are fairly straightforward:
- Enter the Thing name,
Omega-27BFin this case - Then the path to the certificate file
- And finally the path to the private key file
This will configure the MQTT connection and output some examples for subscribing and publishing to AWS IoT shadow topics:

This last bit is pretty useful, so it will be copied to a file: /root/aws-topics.txt
So now you’re all set up and connected to AWS IoT!
Testing the Connection
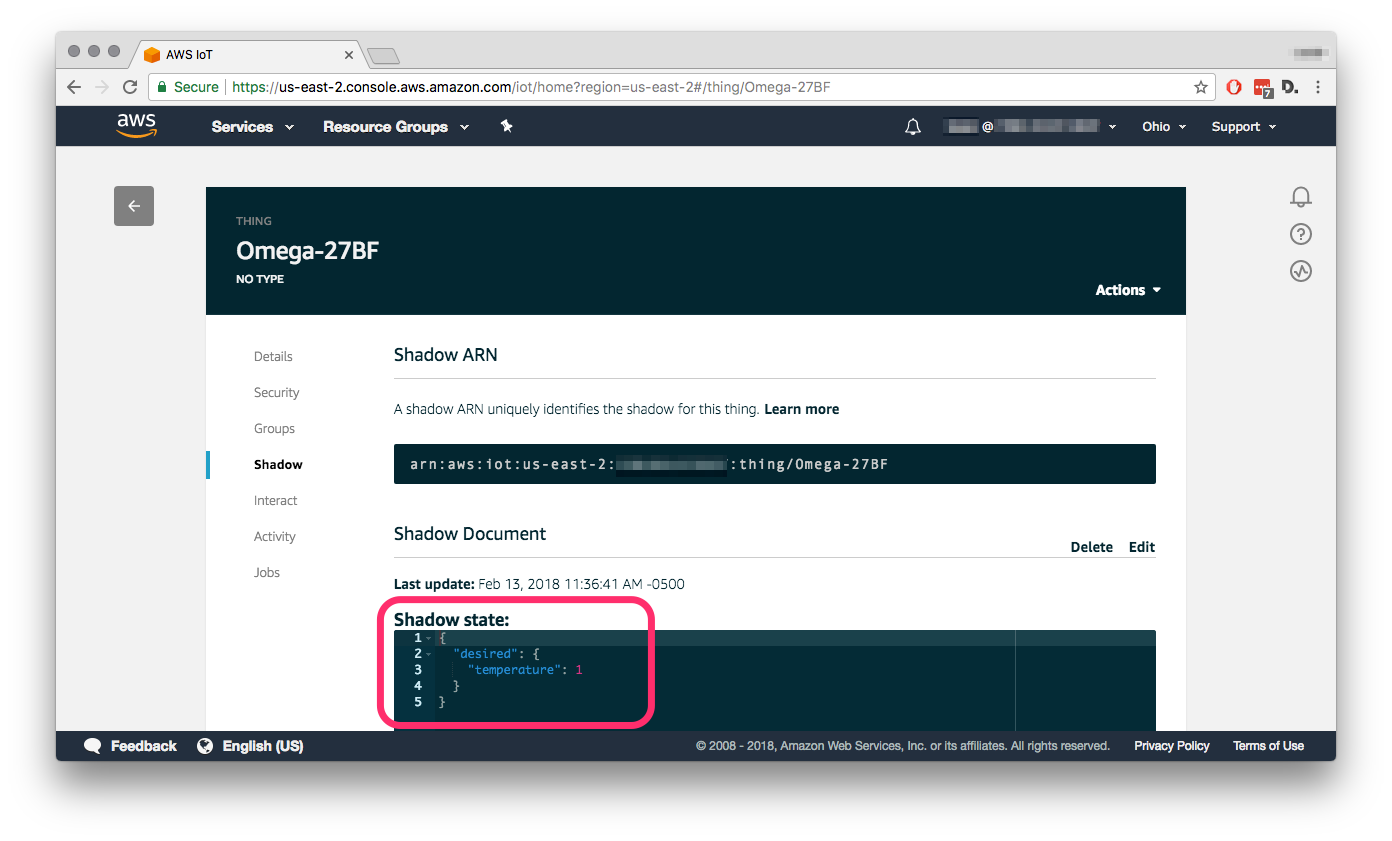
Let’s test our connection by updating the Thing’s device shadow using the Omega:
mosquitto_pub -t \$aws/things/Omega-27BF/shadow/update -m '{"state": {"desired": {"temperature": 1 }}}' -q 1
If everything has been configured correctly, you can see that your Thing’s shadow has been updated on the AWS IoT console:
And that’s it, you’re connected to AWS IoT! Pretty sweet, isn’t it? Stay tuned for more tips on interacting with AWS IoT. In the meantime, you can send a nice Valentine’s day message from your Omega to AWS IoT:
mosquitto_pub -t \$aws/things/Omega-27BF/shadow/update -m '{"state": {"reported": {"will": "you", "be":"my", "valentine":true }}}' -q 1
To learn more about Omega2 and AWS connectivity, please follow these tutorials:
Happy hacking! ❤️