Welcome back to this special edition of 2-Bullet Tuesday, where we’ll share useful tips and awesome stuff sent in by Omega2 users all around the world. Check out creative projects and tutorials that will supercharge your IoT development!
Omega News!
We are proud to announce the latest addition to the Omega2 family, the RFID & NFC Expansion. This Expansion brings contact-less RFID and NFC communication to the Omega ecosystem. It supports reading and writing with several NFC and RFID protocols at 13.56 MHz. The Expansion is based on the popular PN532 NFC Chip and communicates with the Omega serially via UART1.
We’ll guide you through the installation process and the hardware setup. Then we’ll jump into reading and writing to the included Mifare Ultralight RFID Tag.
![]()
So, let’s get started!
Installation of the tools
In order to use the RFID /NFC Expansion, we’ll need to install the nfc-exp package:
opkg update
opkg install nfc-exp
This package also installs the nfc-utils and xxd utility that we’ll use later on. When the installation is done, the following utilities will be installed:
- nfc-emulate-forum-tag4
- nfc-jewel
- nfc-list
- nfc-mfclassic
- nfc-mfultralight
- nfc-read-forum-tag3
- nfc-relay-picc
- nfc-scan-device
These programs can be accessed from the command line and you can use them to control your RFID/NFC Expansion. You can also see the usage of those programs by running them with just a -h argument. Today, we’ll guide you through using these commands to work with the included Mifare Ultralight tags!
Hardware Setup
The RFID & NFC Expansion features a 13.56 MHz stripline antenna and an Expansion Header, so other expansions are stackable on top. In order to use it, plug the Expansion into a Dock that has Expansion Header pins (Expansion Dock, Power Dock 2, Arduino Dock R2) and you are all set to go!
Please note: During the boot process, the Expansion draws a lot of current. We recommend connecting it to a Dock while the Omega is powered off. If the Omega is powered on, the large current draw may cause the Omega to reboot.
Scanning for Nearby Tags
We’ll start from the command nfc-list that is used to scan for the tag to find out the type of the tag and its UID (Unique Identification Number). So, tap your tag to the Expansion and run the nfc-list command:
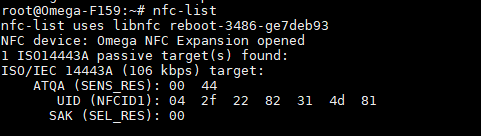
From the output, we can see that the UID consists of 7 Bytes. Since its a unique ID, we can use this to identify cards for access control systems or to trigger different actions.
Reading Data from the Included Mifare Ultralight Cards
The RFID tag that comes with the Expansion is a Mifare Ultralight card. It has 64 Bytes of EEPROM Memory that includes 7 Bytes of UID, 4 Bytes of One Time Programmable Memory, 1 Byte of Internal Memory, 2 Bytes of Lock Bytes and 48 Bytes of Used Defined Data. Tap the card to the Expansion and issue the following command:
# nfc-mfultralight r dump.mfd
If the tag was in range, you should see the something like the following:
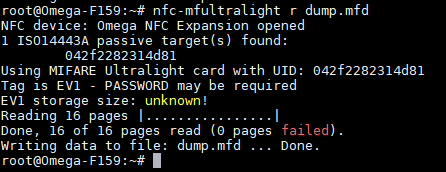
This will write the contents of the card to the dump.mfd file in a binary format. You can see the contents of the .mfd binary file using the xxd utility:
xxd dump.mfd

Here is comes, first row is called Manufacturer Block that consists of 16 Bytes of manufacturer data and other 3 blocks (next 3 rows) holds the programmable data.
Modifying the Data and Writing it Back to the Card
Now we can modify the data that we just read and write this back to the card. So here’s the deal:
- Convert the
.mfdbinary into hex that’s easier to edit - Edit the hex using any code editor (e.g vim, nano, etc)
- Convert the hex back to the
.mfdfile - Write the new
.mfdbinary to the card
Again, we’ll use the xxd utility to convert the .mfd to hex file:
xxd dump.mfd > dump.hex
Now, open the dump.hex file with any text editor that you’d like (e.g. Vim, Nano, etc.). We’ll be modifying the user blocks (2nd, 3rd and 4th blocks of the card). For example, you can convert any text to hex format and place it in the data blocks. Let’s write “Hello World!” to our card. The hex value of that text is as follows:
4865 6c6c 6f20 576f 726c 6421 0a
Just replace the text that is written in the 2nd block (starts with 0000010:) with the given text, save it, and convert back to the .mfd format:
xxd -r dump.hex dump.mfd
The last step is to write the updated data to the card. Use the following command to do so:
yes N | nfc-mfultralight w dump.mfd
The first part of this command will automatically answer No to all questions posed by the utility:
Write OTP bytes ? [yN] Write Lock bytes ? [yN] Write UID bytes (only for special writeable UID cards) ? [yN]
If you read the card again, you’ll see that it now holds the data we just wrote:

Isn’t that just great?
Going Further
You can find more info about the Expansion Hardware and more details on Using the Expansion in our Documentation. And the Expansion is now available on the Onion Online Store as well as from our retailers! Now it’s your turn to make some awesome NFC and RFID projects!
OnionOS
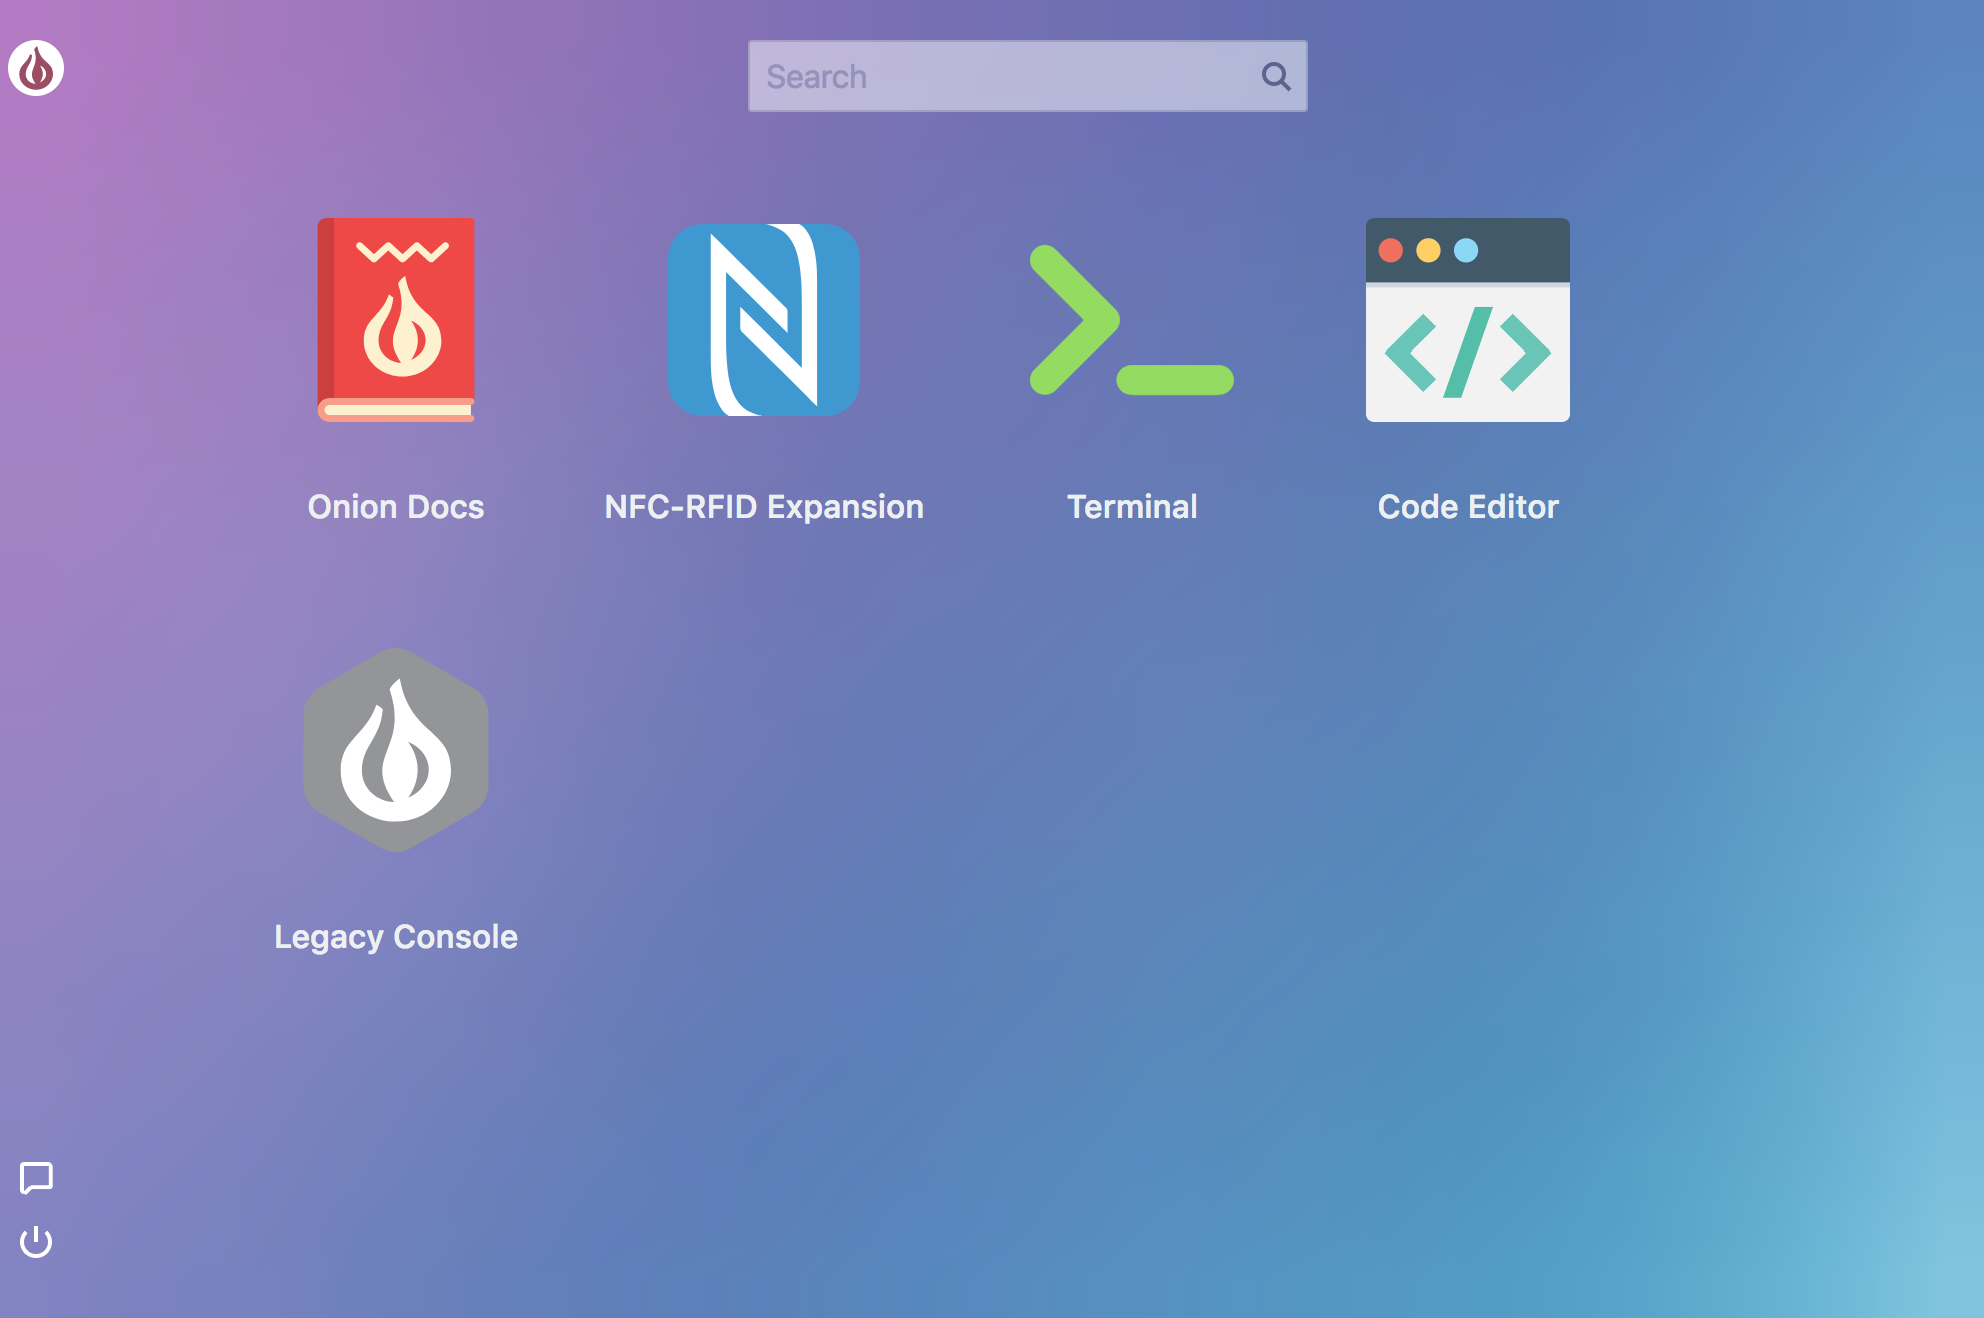
We have another super special announcement for you this week: we would like to introduce you to the next generation evolution of the Console, the brand new OnionOS! OnionOS is a web-based, graphical user interface for the Omega2 family, with a number of apps that can be used to configure and control your device.
The OnionOS is hosted on your Omega and can be accessed from pointing a browser to the Omega’s webpage at: http://Omega-XXXX.local/ where the XXXX are the last four digits from the your Omega’s sticker. Note that you’ll need to be on the same network as your Omega to access the OnionOS.
We’ll walk you some of the goodies and then through installing OnionOS on your own device!
See our Getting Started Guide for more details on using OnionOS.
What’s New?
We really liked the Console, and know it was well liked in the community as well. We took everything that was good about the Console and built OnionOS from the ground-up! It’s lighter, faster, and best of all, flexible. By flexible, we mean that it’s very easy to create additional Apps. We’re still ironing out the CDK (Console Development Kit) and will open it up to our fans in the coming weeks.
Let’s take a look at the core features first: OnionOS is meant to make development easier, so it provides a modern Code Editor:

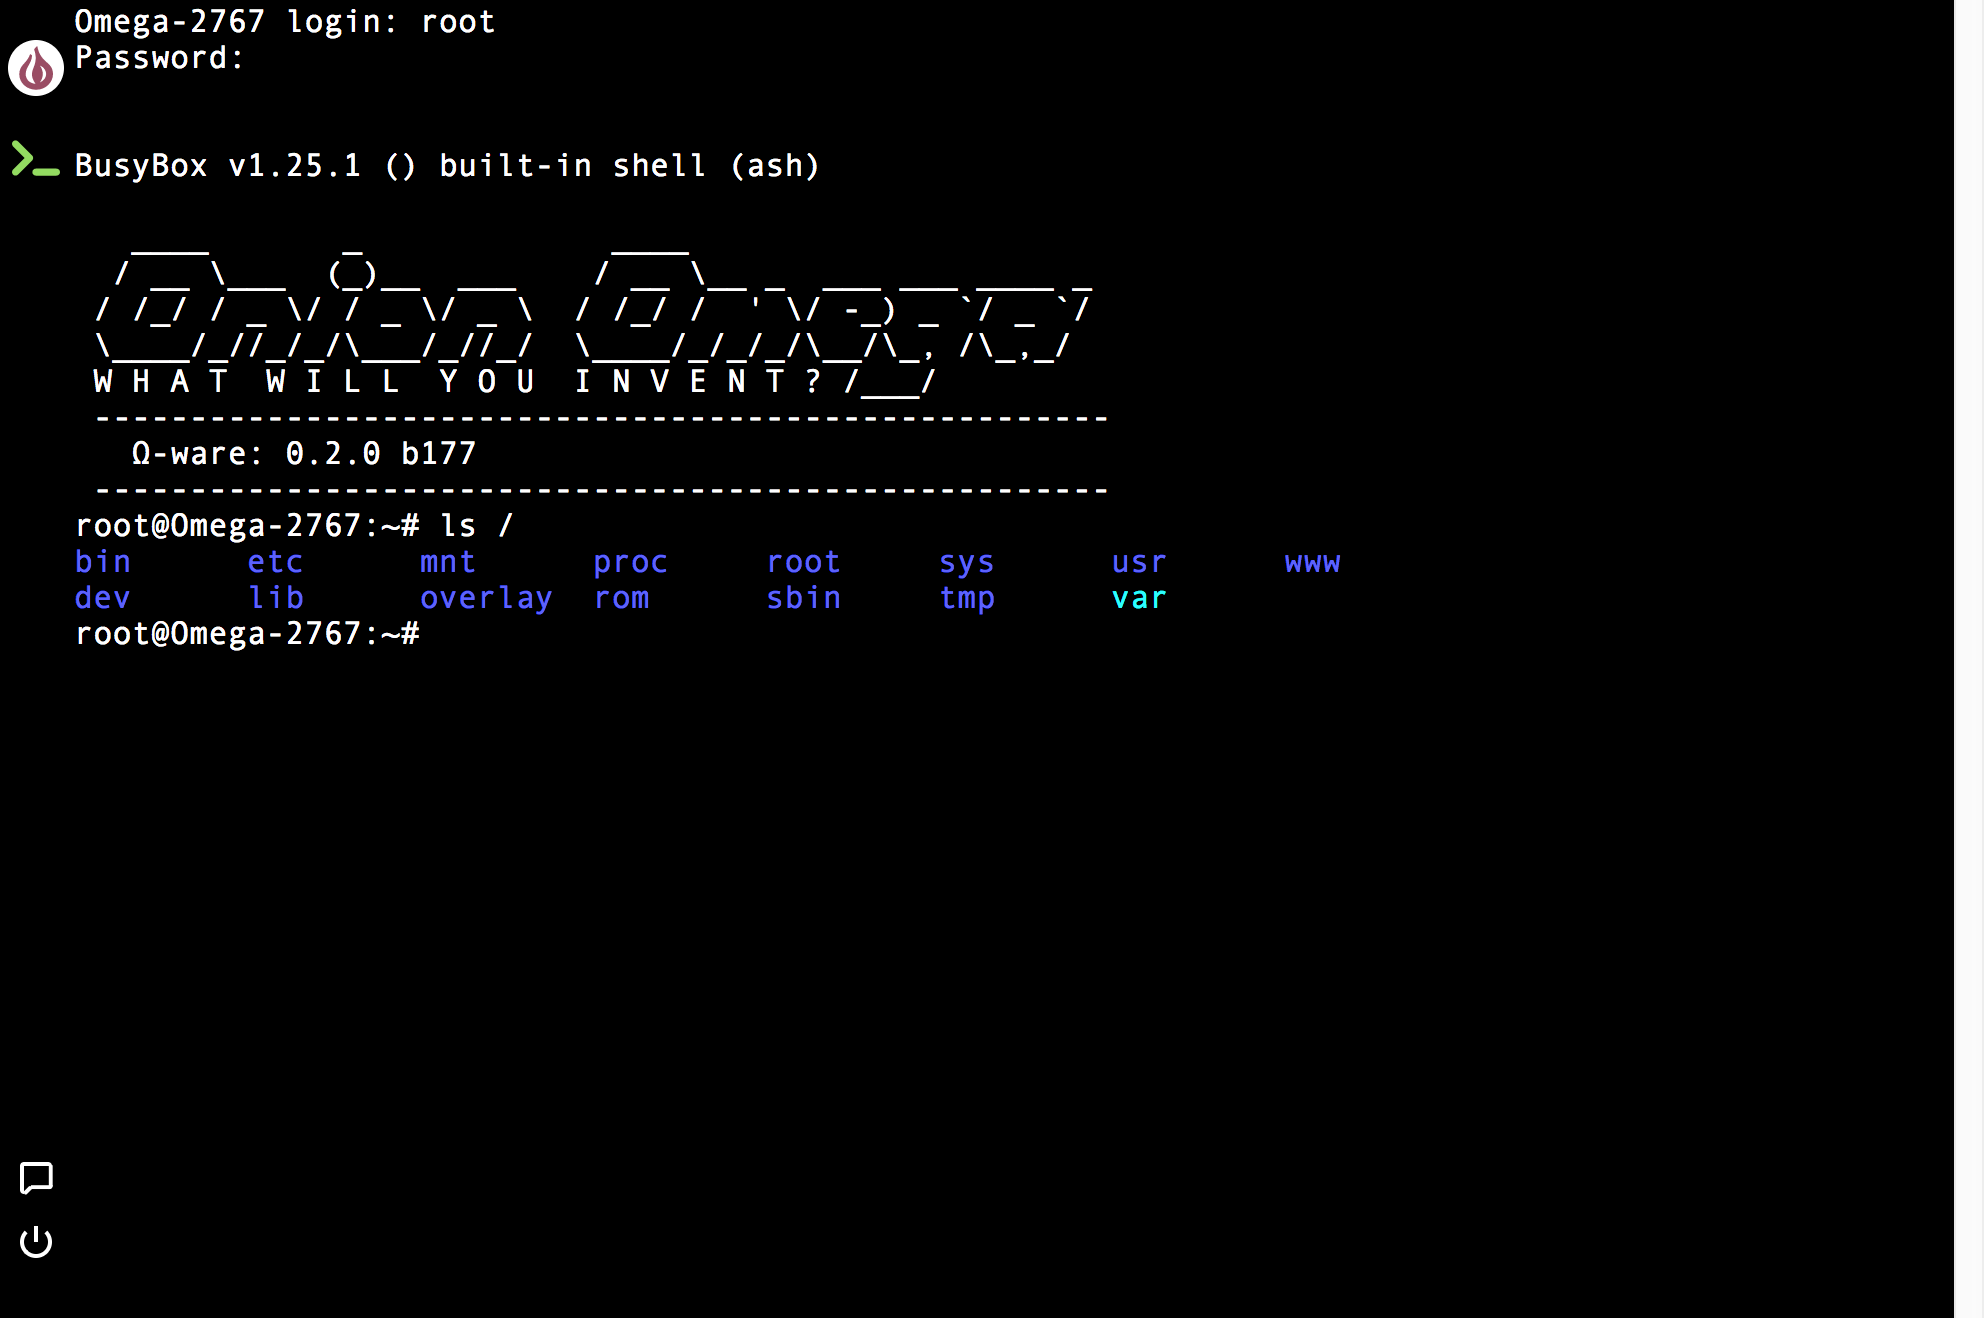
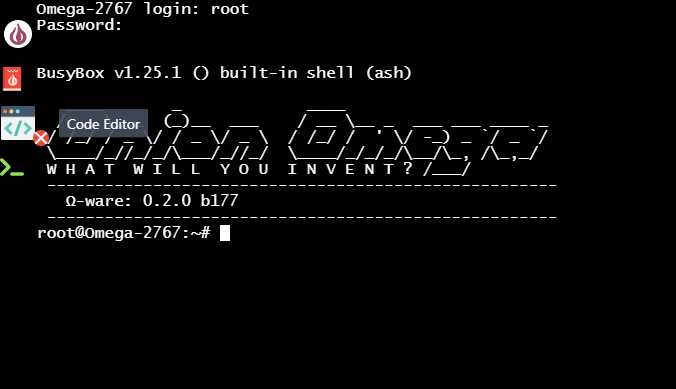
And a fully fledged Terminal:
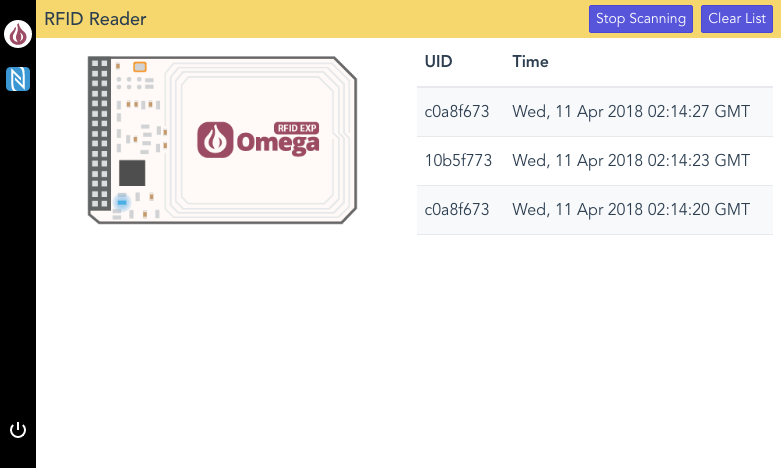
We’ve also included an App for the brand new NFC-RFID Expansion. It will display the Unique ID of any compatible RFID tags that comes within range of the Expansion’s antenna:
Navigation will feel familiar to longtime Omega users: open Apps will appear in the sidebar, you can switch between open Apps by clicking the sidebar App icon, and the home screen can be reached with a click of the Onion logo.
A new addition is the ability to close Apps: hover over the sidebar App icon and click the small X icon that appears.
Not everything from the Console is available for OnionOS just yet, so we’ve made the Console accessible with a single click!
Installation
We’e sure you’re anxious to test drive OnionOS for yourself, here’s how:
opkg update
opkg upgrade base-www
opkg install onion-os
/etc/init.d/rpcd restart
Once OnionOS is installed, point your browser to http://Omega-XXXX.local/ (where the XXXX are the last four digits from the your Omega’s sticker) and take a look around! We strongly recommend trying out the Code Editor, using it alongside the Terminal App makes for a great development experience with your Omega.
October 16, 2018: We’ve put out more updates for OnionOS that you don’t want to miss, read more here.
See our Getting Started Guide for more details on using OnionOS.
Do make sure to let us know what you think and if you have any ideas on how we can make it even better!
As always, happy hacking!