First Time Setup
This guide will help you set up your Omega2 LTE for the first time. We’ll cover:
- Powering up the Omega2 LTE
- Using the Setup Wizard to have it connect to your WiFi network and update the software
- Connect to your 4G LTE cellular data network
If you experience issues at any point in the process, try checking our Troubleshooting guide, or our guide on First Time Setup using the Command Line.
Unboxing and Getting the Hardware Ready
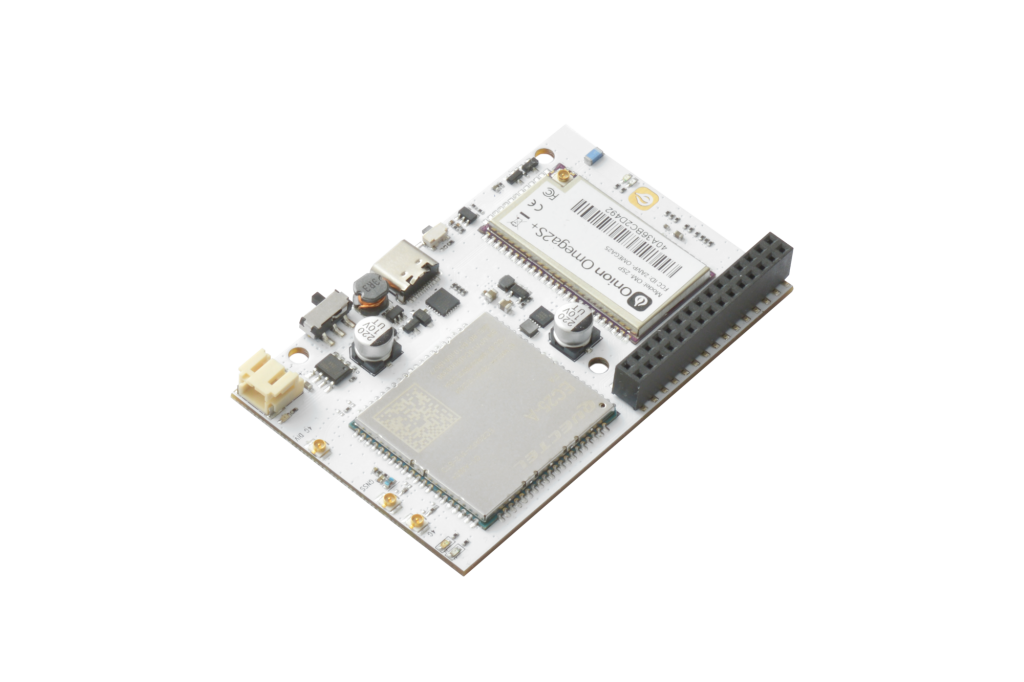
Unpack
Unpack the Omega2 LTE
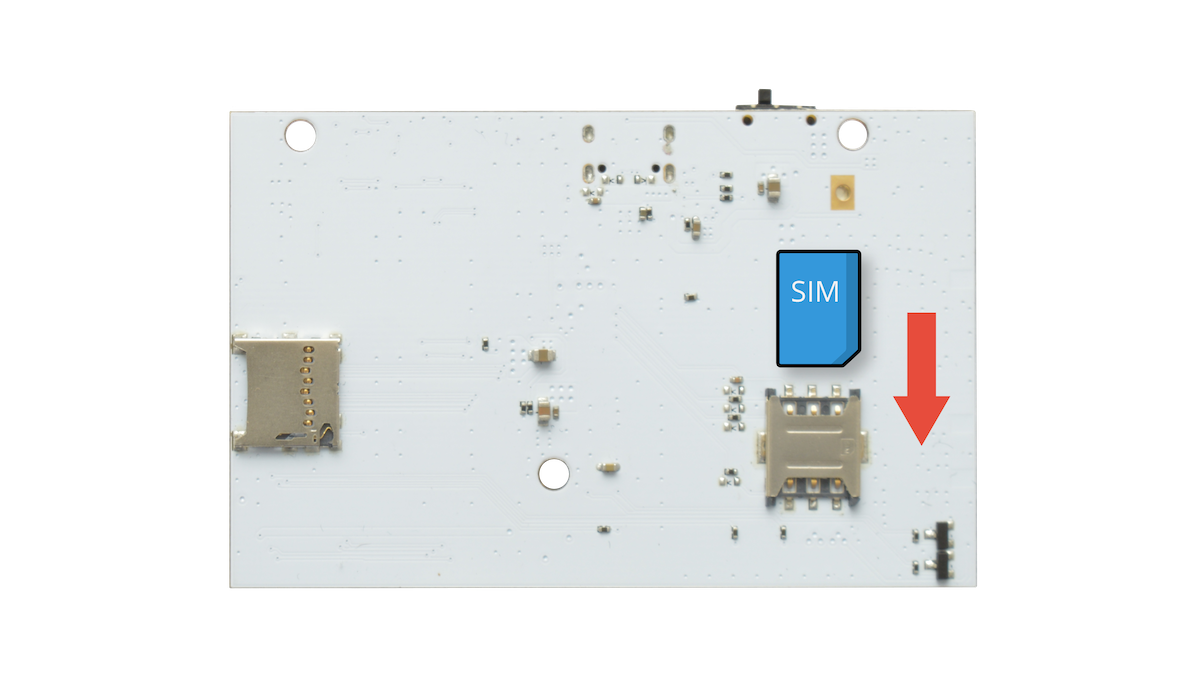
SIM Card
Insert your NanoSIM Card in the slot on the bottom
Provide Power
In general, the Omega2 LTE can be powered through the USB Type-C port or a LiPo battery. For the first time setup, we strongly recommend using a USB Power source to make sure the setup process is not interrupted.
You can power it with your computer or any wall adapter
Power On!
Turn on the Omega2 LTE using the switch.
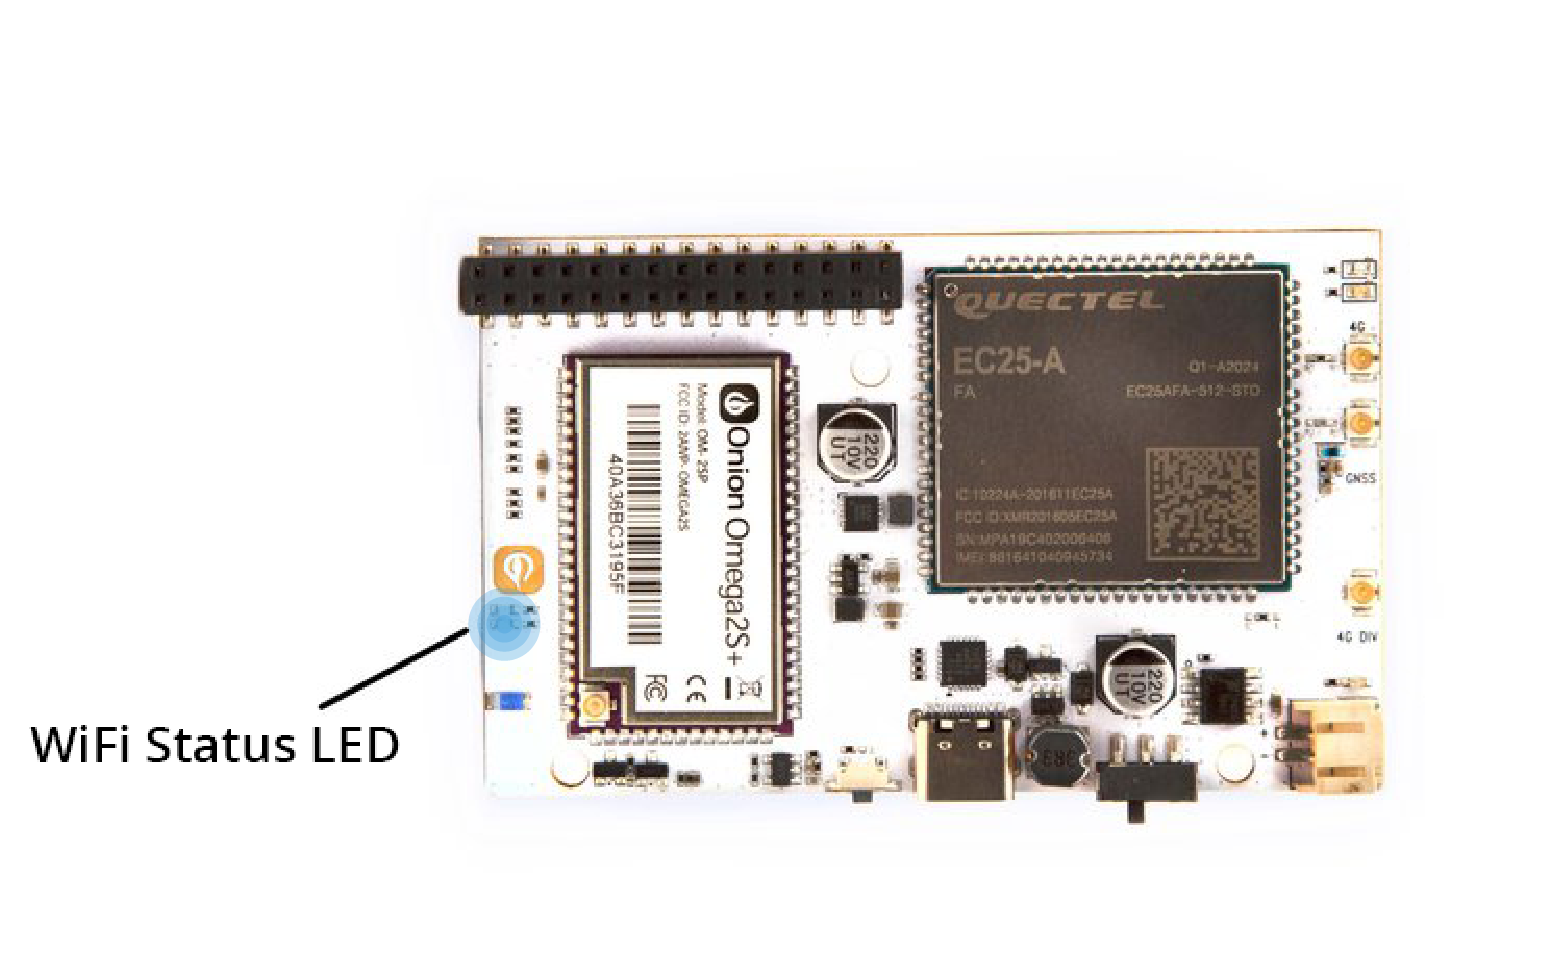
Wait till it boots
The amber Omega status LED beside the Onion logo should turn on and then start blinking after about 10 seconds. In about a minute, the LED will stop blinking and remain solid, this means that the Omega has completed its boot sequence!
Using the Setup Wizard
Some Computer Configuration
Your computer may need some additional programs to access the Omega through a browser:
- If you are using Windows, install Apple’s Bonjour Service
- If you are using Mac OS X, you’re all set to go
- If you are using Linux, the Zeroconf services should already be installed and you will be good to go
The Omega’s Name
Let’s find your Omega’s name before going any further.
There’s a sticker on the shielding of the Omega2S module on the Omega2 LTE
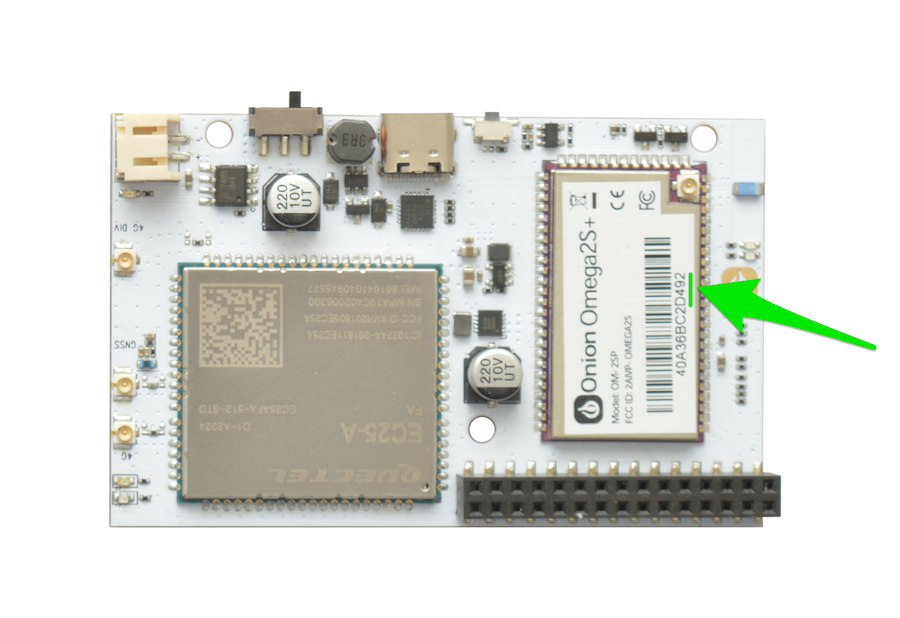
The text printed below the bar code is the Omega2 LTE’s unique MAC address, we’re interested in the last four digits. Your Omega’s name is Omega-XXXX where XXXX are the last four digits from the sticker.
So the Omega from the picture above is named Omega-D492
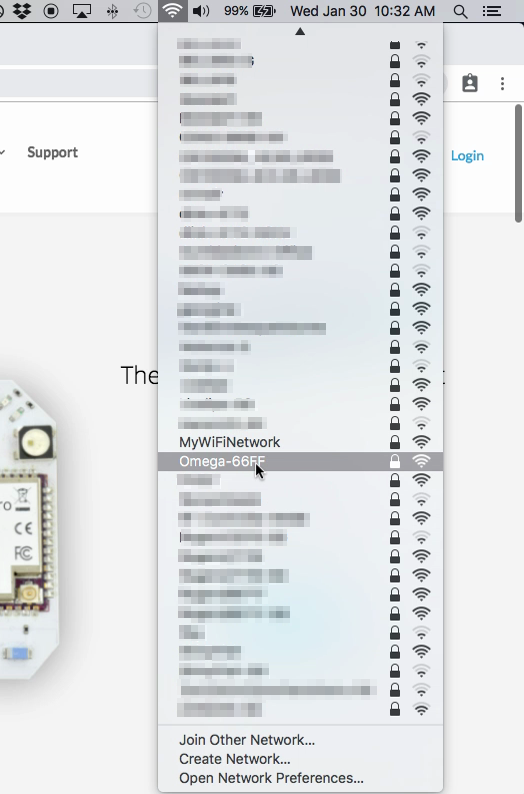
Connect to the Omega’s WiFi Network
The Omega hosts it’s own WiFi network access point. Lets connect your computer to it. The WiFi network is named the same as your Omega and the default password is 12345678
The Setup Wizard
Open your favourite browser and navigate to http://omega-XXXX.local/ where XXXX are the same characters from the network name above. If the page doesn’t load, you can also browse to http://192.168.3.1
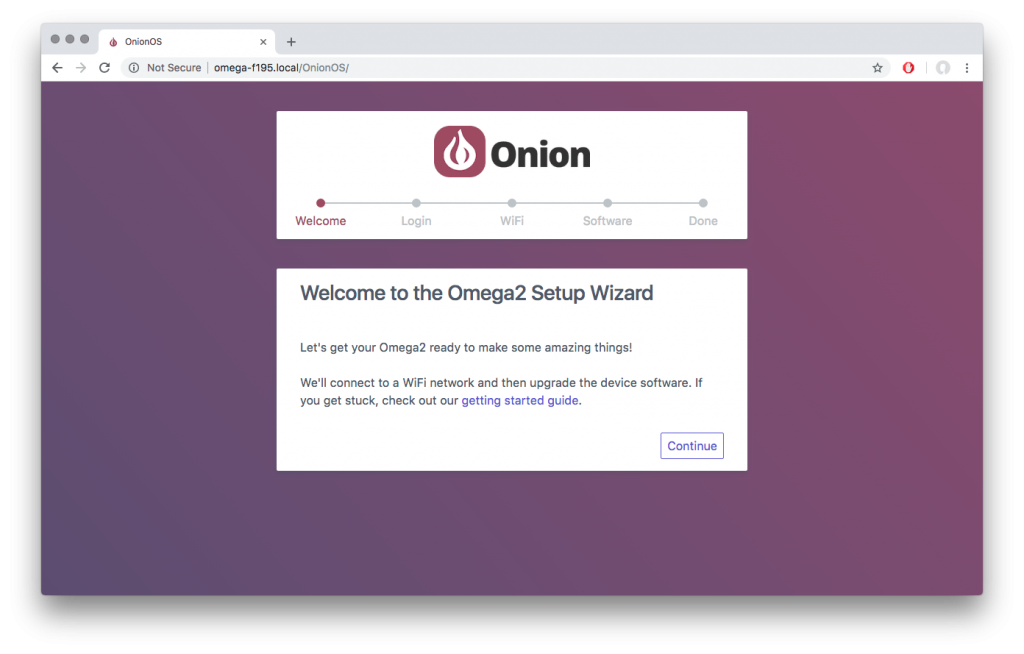
You have now arrived at the Setup Wizard, hit Continue to get started:
Login with the Omega’s default credentials:
username: root
password: onioneer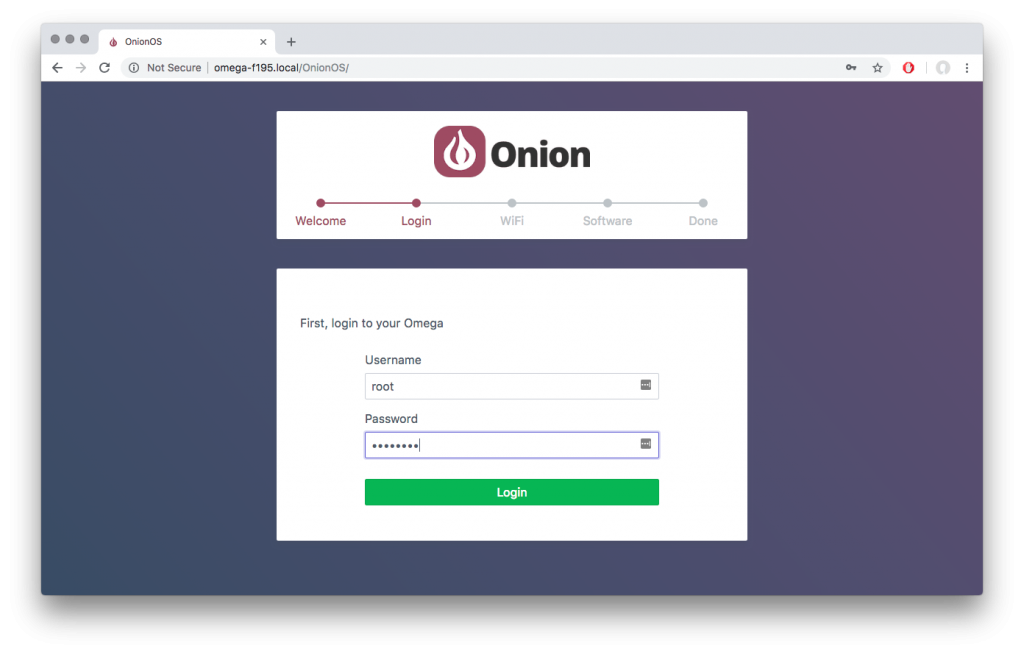
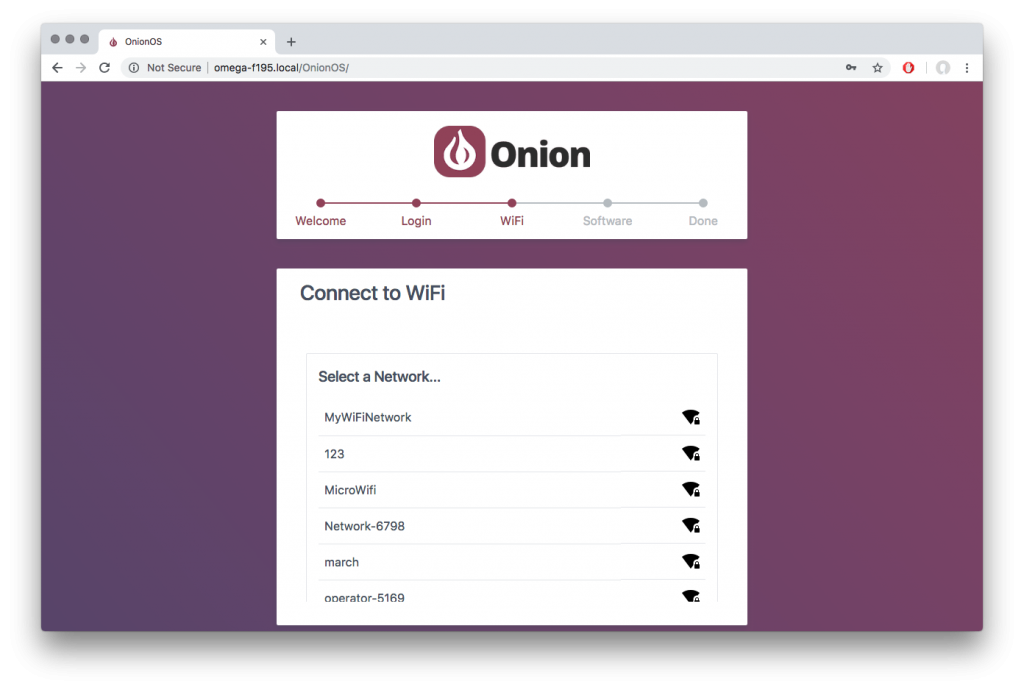
Connect to WiFi
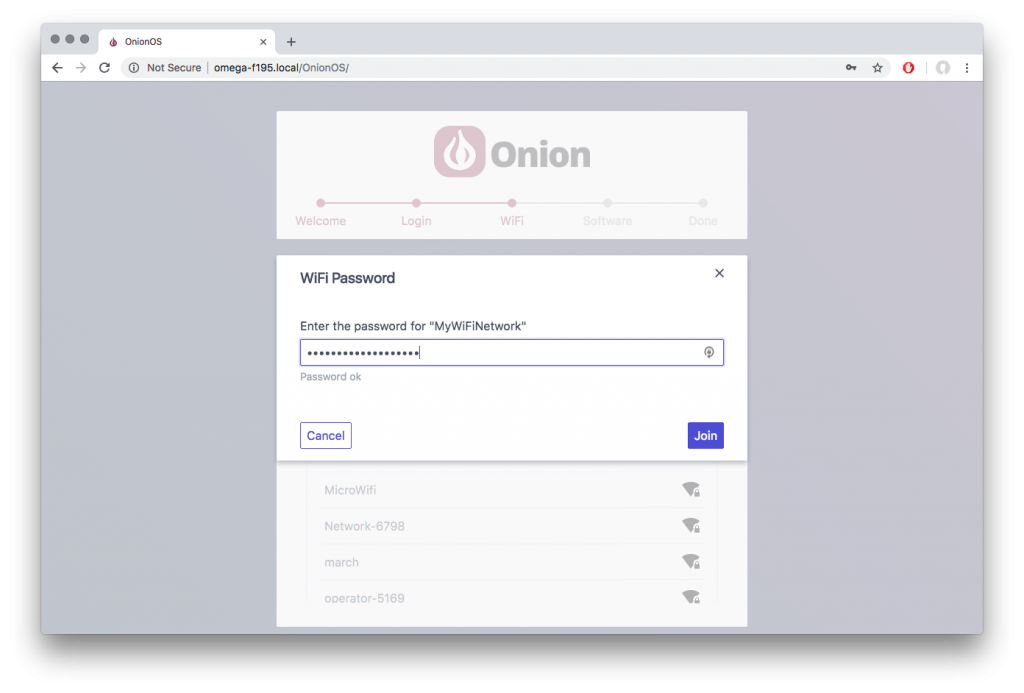
After you’ve logged in, the Omega will scan the environment for available networks and will show the results in a list. In our case, we want to connect to the WiFi network (creatively) named MyWiFiNetwork, so we’ll go ahead and click on it:
This will open a prompt to enter the network password, if the network requires a password:
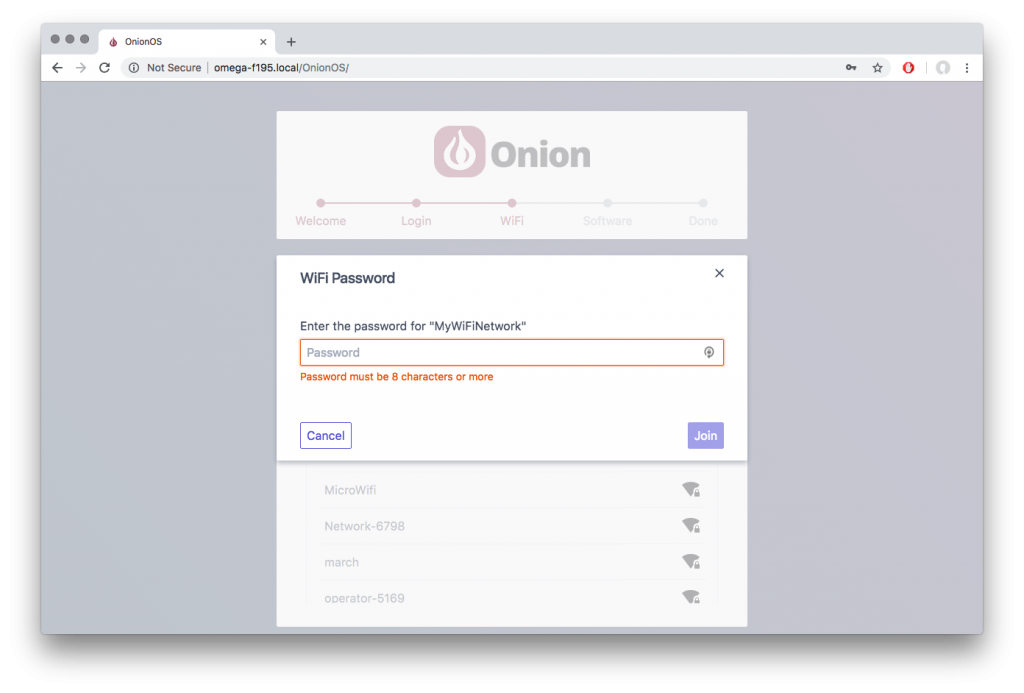
Notice how you’ll only be able to click Join when the password length requirements have been met:
Once you click Join, your Omega will attempt to join the network. This might take up to a minute.
It’s possible that your computer will disconnect from the Omega’s WiFi Access Point, make sure to reconnect if that happens!
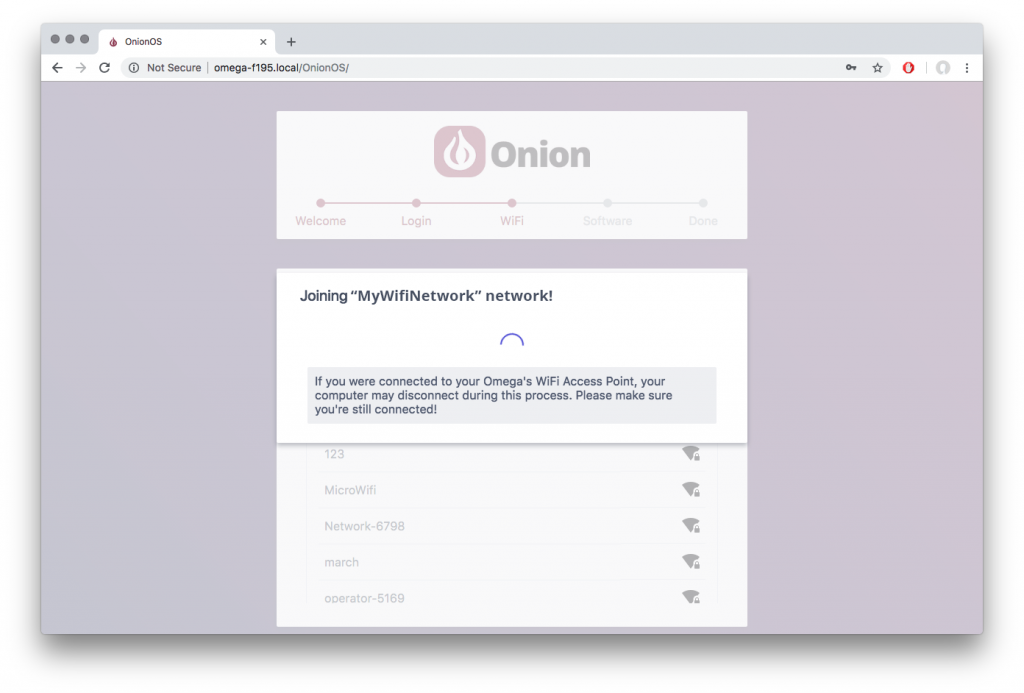
When to Omega starts connecting, the Blue WiFi LED on the Omega2 LTE will start to blink.
When the connection is successful, the LED will turn solid, and the setup wizard will let you know the connection is successful before moving on to the next step.
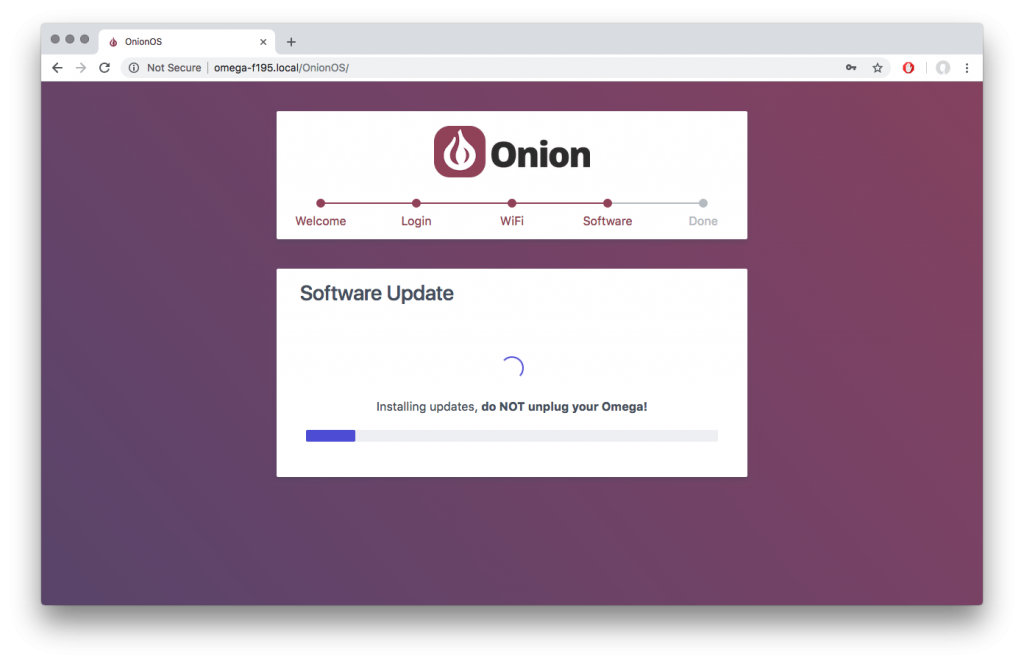
Software Updates
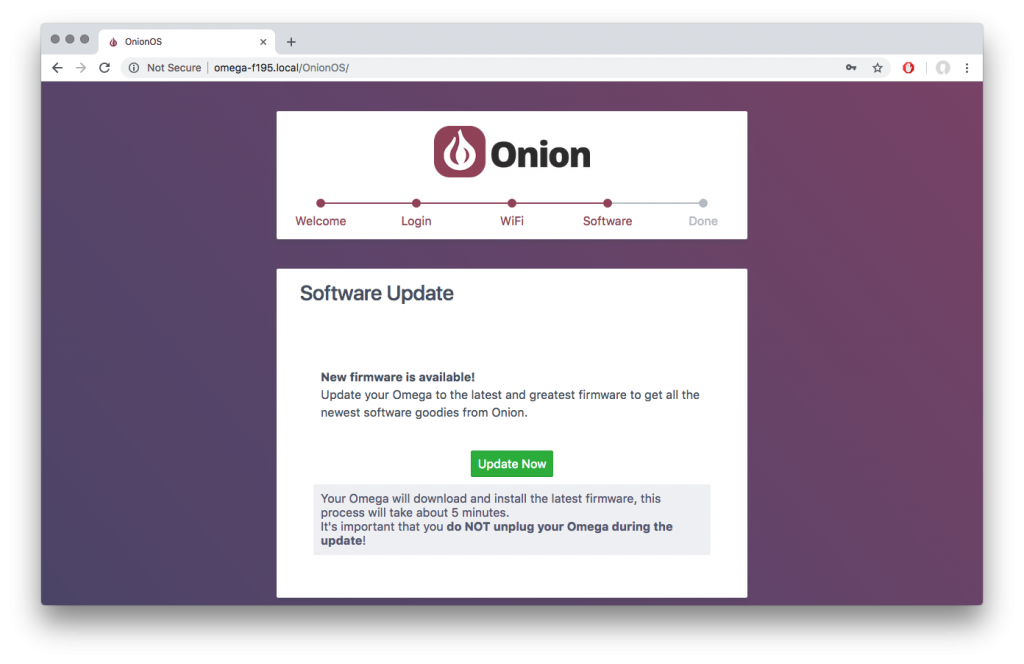
Last step! Now that your Omega is connected to the internet, it will check if software updates are required.
If updates are available, you’ll be able to update by clicking the Update Now button.
Something really important to remember about the update process: it’s absolutely critical that you keep your Omega plugged in and powered on during the update process. The whole process will last about 5 minutes and then you’ll be ready to start making awesome things with your Omega:
Your Omega will download the updates and install them. The amber LED on your Omega will be blinking at this point.
Finally, your Omega will reboot and initialize the new software. You’ll know everything is done when the amber status LED on your Omega stops blinking and remains on.
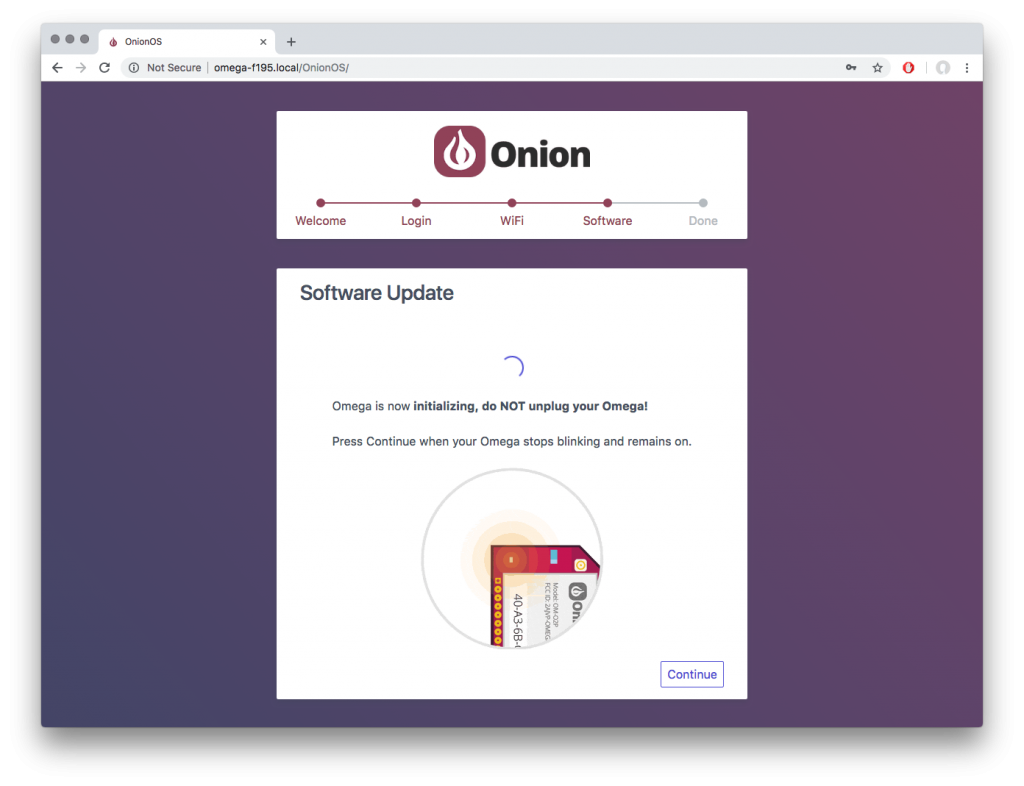
When that happens, press Continue. That brings us to the end of the Setup Wizard, your Omega is now configured and ready to go!
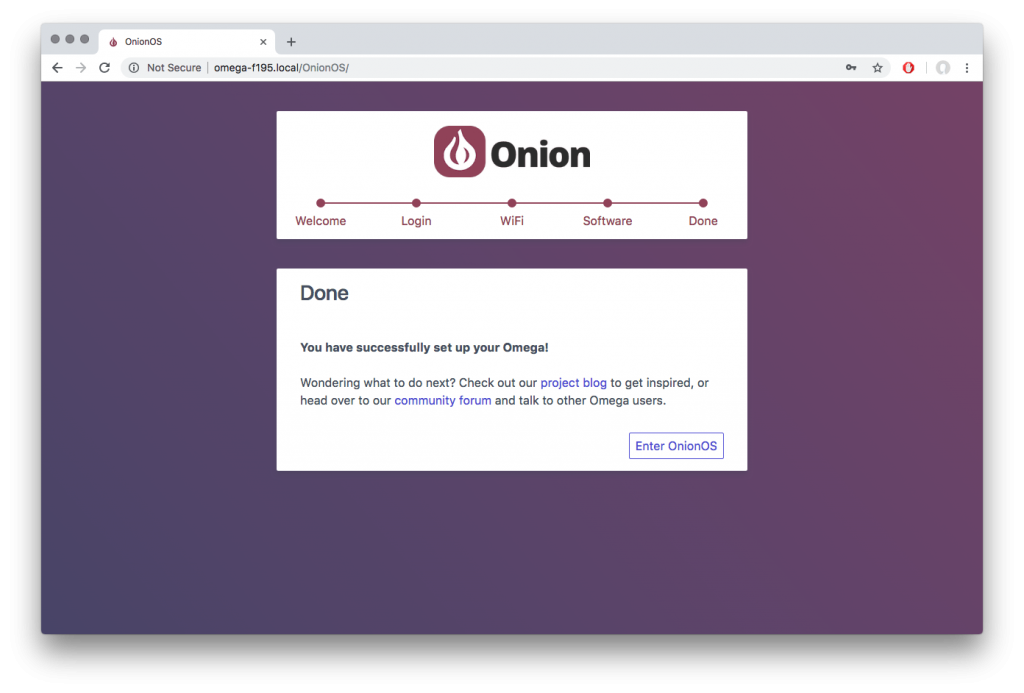
From now on, when you point your browser to your Omega, you’ll be taken directly to OnionOS.
The Setup Wizard Didn’t Work for me!
If for some reason the Setup Wizard wasn’t able to get your Omega up and running, try the steps in the First Time Setup using the Command Line guide or see the Troubleshooting guide.
Setting Up Cellular Data
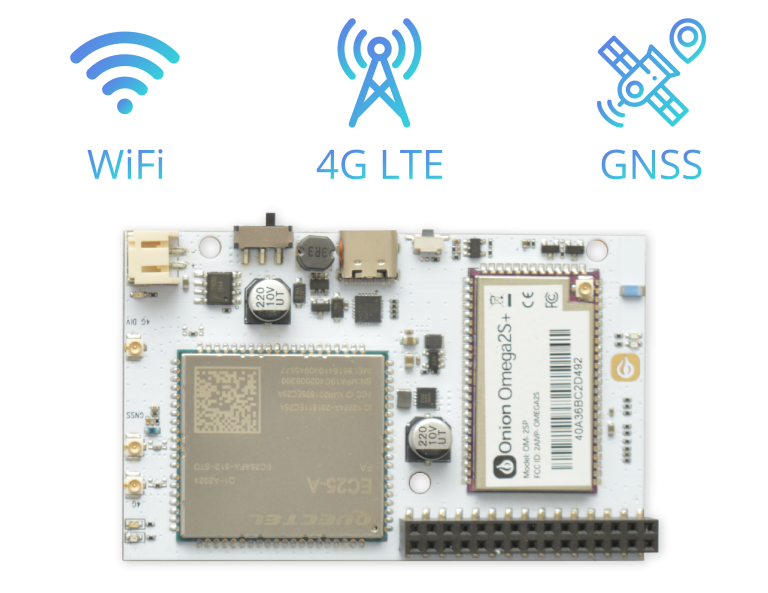
Now that your Omega2 LTE is up to date, let’s get it connected to the cellular network so you can make use of your new-found mobility!
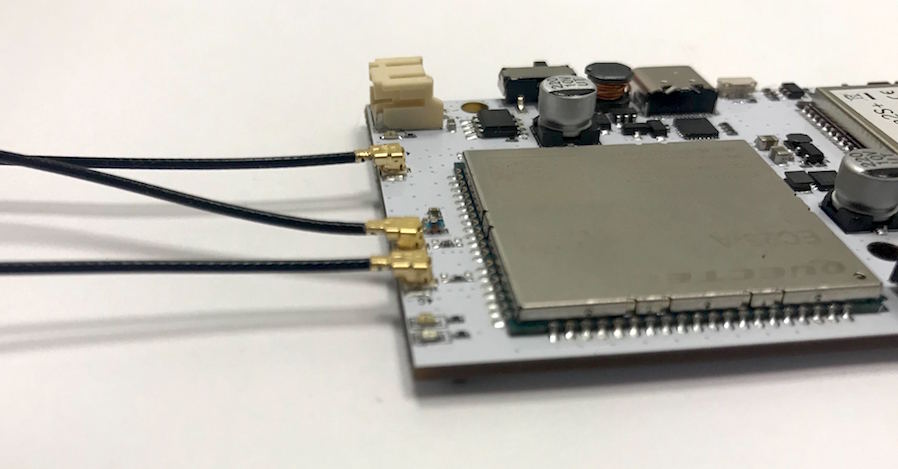
Connecting Antennas
To offer flexibility in choosing antennas, the Omega2 LTE features u.FL antenna connectors for connecting two LTE antennas and a GNSS antenna. The Omega2 LTE needs these antennas to connect to cellular networks and GNSS satellites.
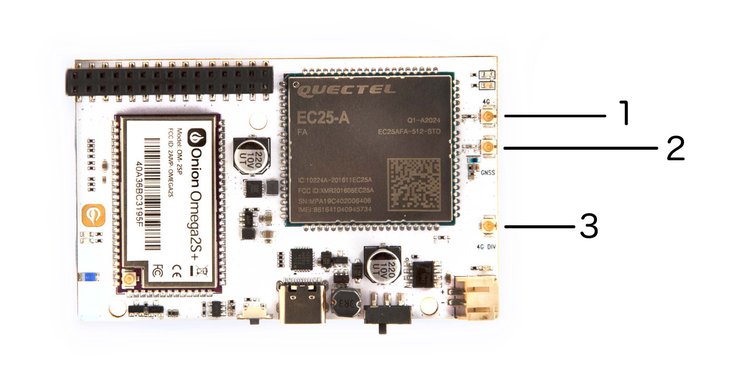
- 4G LTE Main Antenna
- GNSS Antenna
- 4G LTE Diversity Antenna
There are two antennas marked 4G: one is the main antenna, and the other is a diversity antenna. The main and diversity antennas work together to improve the quality and reliability of the wireless link. While it is possible to just use the main antenna and get cellular reception, using the diversity antenna as well will increase reception, especially indoors.
Connect each antenna’s male U.FL connector to the U.FL socket on the Omega2 LTE. Delicately but firmly push the connector down onto the socket until it snaps into place.
Finding your Cellular Provider’s APN
Similar to how WiFi networks have names, cellular networks have Access Point Names (APN). Any devices looking to connect to a particular cellular network will need to know that network’s APN.
Setting the APN
Now that we know the APN, we’ll use a single command to set the APN on the Omega2 LTE.
Connect to the Omega’s command line and run:
o2lte apn [your cellular provider's apn]Enable Cellular Data Connection
Now instruct the Omega2 LTE to connect to the cellular network by running the following command:
o2lte data enableAnd wait a few moments, you’ll see activity on the cellular network indicator LEDs
The cellular status LEDs are by the U.FL antenna connectors. The green LED indicates connection status, and the amber network activity
Learn more about the visual feedback provided by the LEDs in the Status LEDs section below.
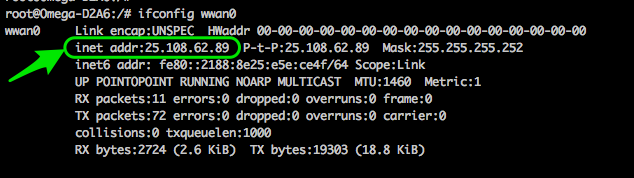
How to Check if Successfully Connected
When the Omega2 LTE successfully connects to the cellular network, it will be assigned an IP address. Check for the IP address by running:
ifconfig wwan0The output will look something like this:
Controlling the Cellular Data Connection
Before using the cellular data connection, make sure:
- An LTE antenna is connected to the antenna connector labelled
4G. We recommend using a diversity antenna as well for better reception. - The Omega2 LTE has been configured with the APN settings for your cellular provider
For details on the setup procedure, see the Setting Up Cellular Data section above.
![]()
Enable the Cellular Data Connection
Connect to the Omega’s command line and run the command to instruct it to connect to the cellular network:
o2lte data enableWait a few moments, you’ll see activity on the cellular network indicator LEDs
The cellular status LEDs are by the U.FL antenna connectors. The green LED indicates connection status, and the amber network activity
Learn more about the visual feedback provided by the LEDs in the Status LEDs section below.
Disable the Cellular Data Connection
Run the following command on the Omega’s command line:
o2lte data disableSharing the Cellular Data Connection
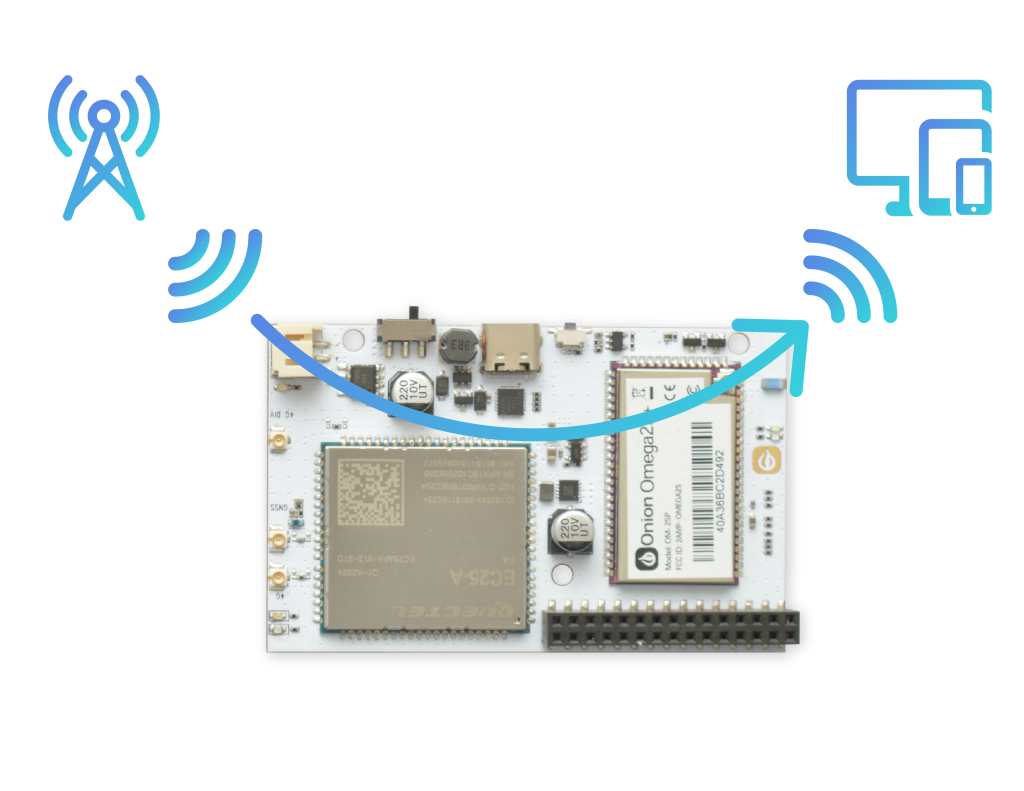
Once your Omega2 LTE has a cellular data connection, it’s possible to share that cellular data using the Omega’s WiFi Access Point network.
With this this network sharing functionality, many devices can connect to the internet with a single cellular connection! Very useful for building a remote sensor hub or a network hotspot when you’re on the go!
Start Cellular Data Sharing on the Omega’s WiFi Access Point
Connect to the Omega’s command line and run the command:
o2lte share enableStop Sharing the Cellular Data Connection
Run the following command on the Omega’s command line:
o2lte share disableUsing the Built-In GNSS Positioning
The Omega2 LTE features a high-sensitivity, multi-constellation GNSS receiver, capable of retrieving positioning and accurate time data worldwide.
It supports all of the common positioning systems:
- GPS
- GLONASS
- BeiDou
- Galileo
- QZSS
Enable the GNSS Receiver
Connect to the Omega’s command line and run the command:
o2lte gnss enableThe GNSS receiver needs to be enabled after every boot. This can be automated using the
/etc/rc.localscript. To learn more, check out our guide on running a command at boot.
Note that enabling GNSS will start the gps daemon which will occupy the serial port. The gps daemon needs to be stopped and disabled before the port can be accessed through other methods.
Reading GNSS Location Data
Once the Omega2 LTE locks to GNSS satellites, location data can be read by running the following command:
ubus call gps info

# sample output:
{
        "age": 0,
        "latitude": "43.727278",
        "longitude": "-79.339722",
        "elevation": "207.9",
        "course": "7.5",
        "speed": "0.0"
}It’s also possible to read the raw NMEA strings generated by the receiver on the /dev/ttyUSB1 serial device.
First disable the gps daemon since it’s occupying the serial port connection to the GNNS receiver:
/etc/init.d/ugps stop
/etc/init.d/ugps disable
Then you can take a look at the GNSS output directly by running:
cat /dev/ttyUSB1Expect to see quite a bit of output:
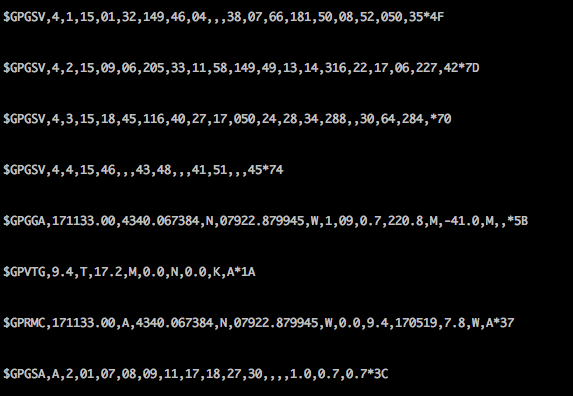
Reading the NMEA message data directly is useful if you would like to do your own additional parsing of the GNSS data, perhaps using Python and the PySerial package.
To use the
ubus call gps info location dataread-out mentioned previously after doing this process, you’ll need to re-run the command mentioned in the Enable the GNSS Receiver section.
Disable the GNSS Receiver
Disable the GNSS receiver by running the following command:
o2lte gnss disableThe Omega2 LTE will consume more power while the GNSS receiver is active, so disabling it when it is not in use is good practise.
GPIOs & Expansion Header
The Omega2 LTE features a 30-pin Expansion Header that gives you easy access to the GPIOs, and allows you to connect Omega2 Expansions directly.
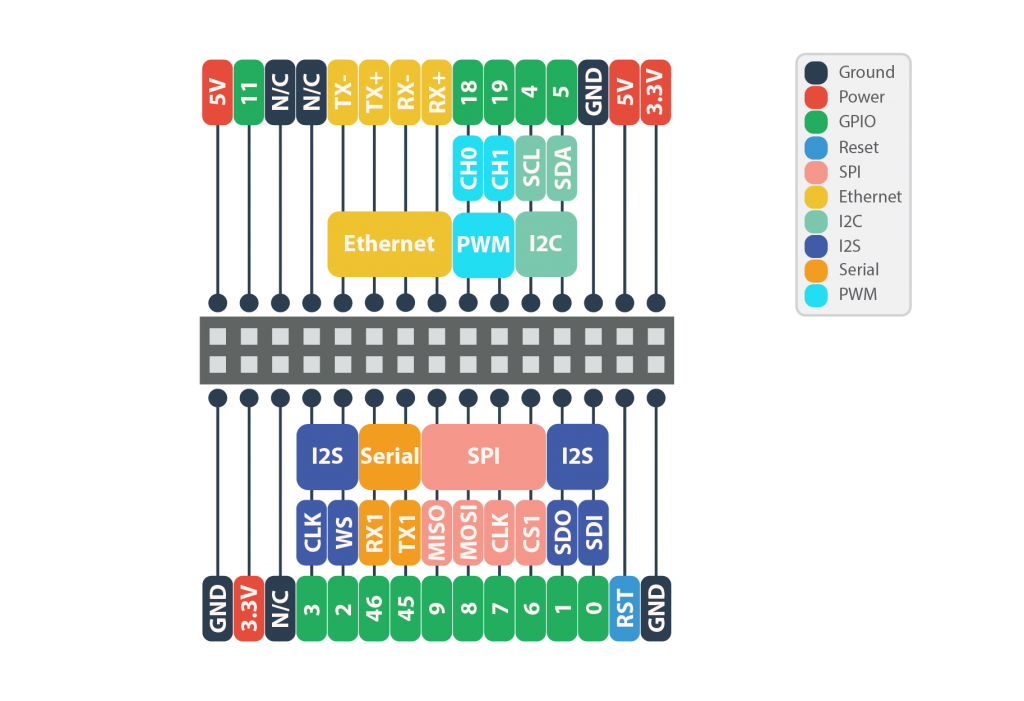
To learn more about using the GPIOs, electrical ratings, and pin multiplexing, see our GPIO documentation article.
The Omega2 LTE is compatible with the existing ecosystem of plug-and-play Omega2 expansions.
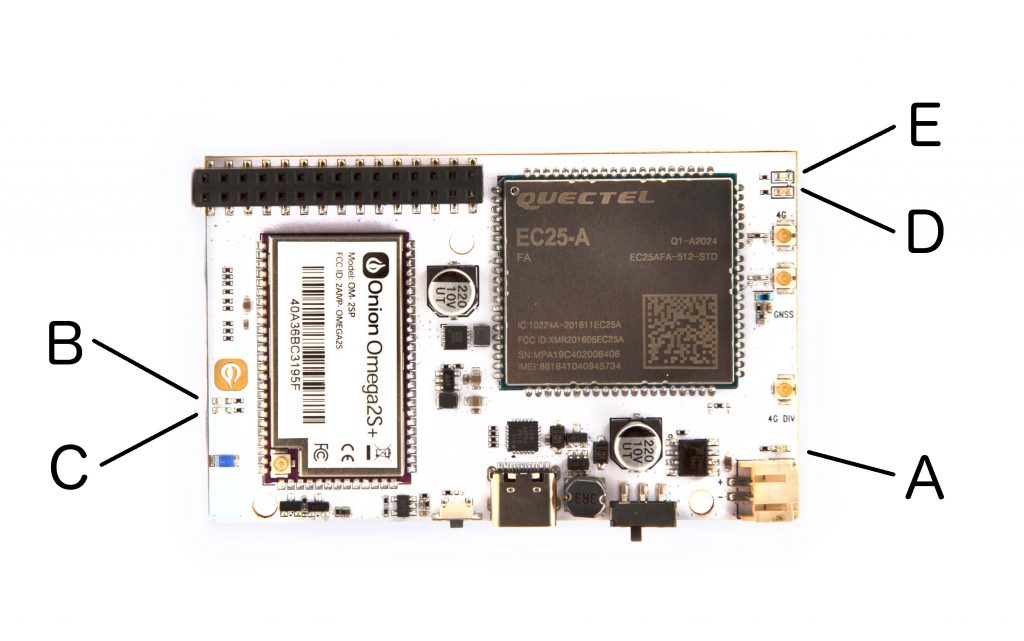
The Status LEDs
The Omega2 LTE uses a series of LEDs to provide visual feedback on the current status of the device:
| Status LED | Indicates |
|---|---|
| A. Green Power LED | Running on battery |
| B. Amber System status LED | Whether Linux OS has booted |
| C. Blue Wi-Fi status LED | Connection to a Wi-Fi network is active |
| D. Green Cellular network status | Connection to cellular network is active |
| E. Amber Cellular network activity | Transmitting and receiving cellular data |
And what the behaviour of each LED indicates:
- System status LED
- Off – Device not powered on
- Blinking – Booting/updating
- On – Up and running
- WiFi status LED
- Off – Not connected to WiFi network
- Blinking – Connecting
- On – Connected
- Cellular network status LED
- Off – Not connected to cellular network
- On – Connection to cellular network established
- Cellular network activity LED
- Slow Blink – Searching for network
- Blinking – Idle
- Flickering – Ongoing data transfer