In this article, we’ll be covering a key cellular IoT use-case: asset tracking!

We’ll show you how to use the LTE data connection and GNSS capabilities of the Omega2 LTE to quickly and easily put together an asset tracking system that works in real time. The Omega will continuously report its location to the Losant IoT platform, and we’ll be able to track the current location and travel history through an online dashboard.


Our work will be divided into three steps:

  1. Setting up the Losant cloud and dashboard
  2. Configuring the Omega2 LTE to report location data 
  3. Actually tracking the location of our asset

If you’re interested in creating your own asset tracking system, this is a good place to start. What’s really cool is that this same project can be extended for fleet management use cases! Both of which are cellular IoT use-cases we’re expecting to see become ubiquitous in the near-term

Let’s dive in!

Set Up the Cloud Dashboard

The Losant platform will be used for collecting and then displaying the asset location data. We’ll first create a Losant device and access key so that the Omega2 LTE can report its location using MQTT through the LTE data connection. Then we’ll create a dashboard that will overlay our device’s location data onto a map.

Head over to Losant.com and register for an account. Once you’re logged in, you’ll want to create your very first Losant Application. 

If you’re feeling a little lost, we suggest taking a look at Losant’s documentation on creating a new application.

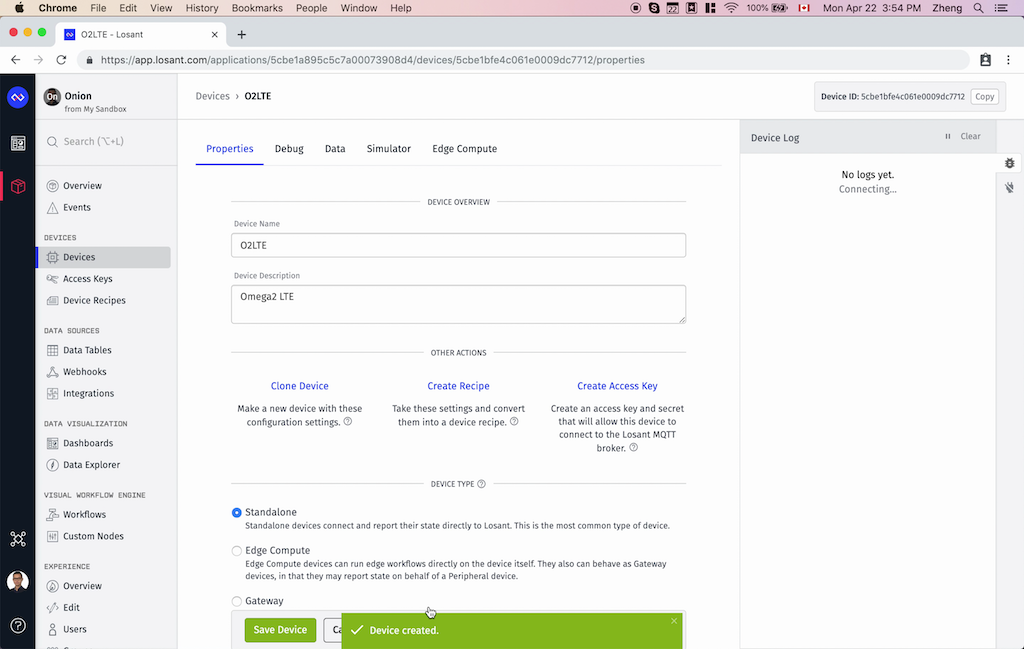
Create a Cloud Device

Now, we’ll need to create a Losant Device: 

  • Add a new device by clicking either the Add button or the Create New Device button
  • Select Create a Blank Device
  • Give your device a name and set it to be a Standalone device
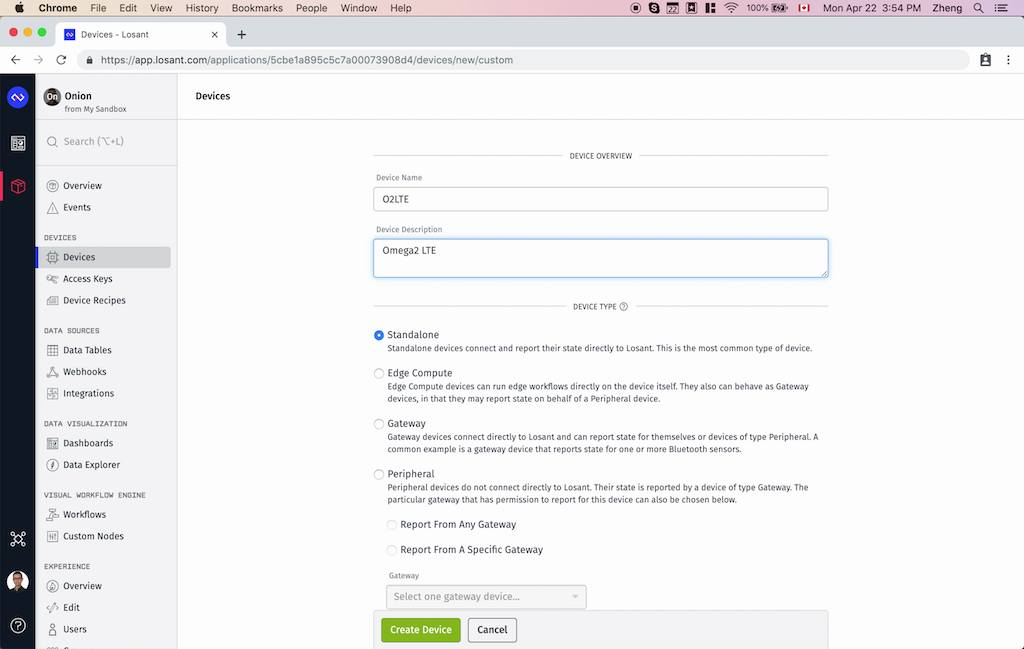
  • Scroll down and add a GPS String attribute to the device. Give the attribute a descriptive name
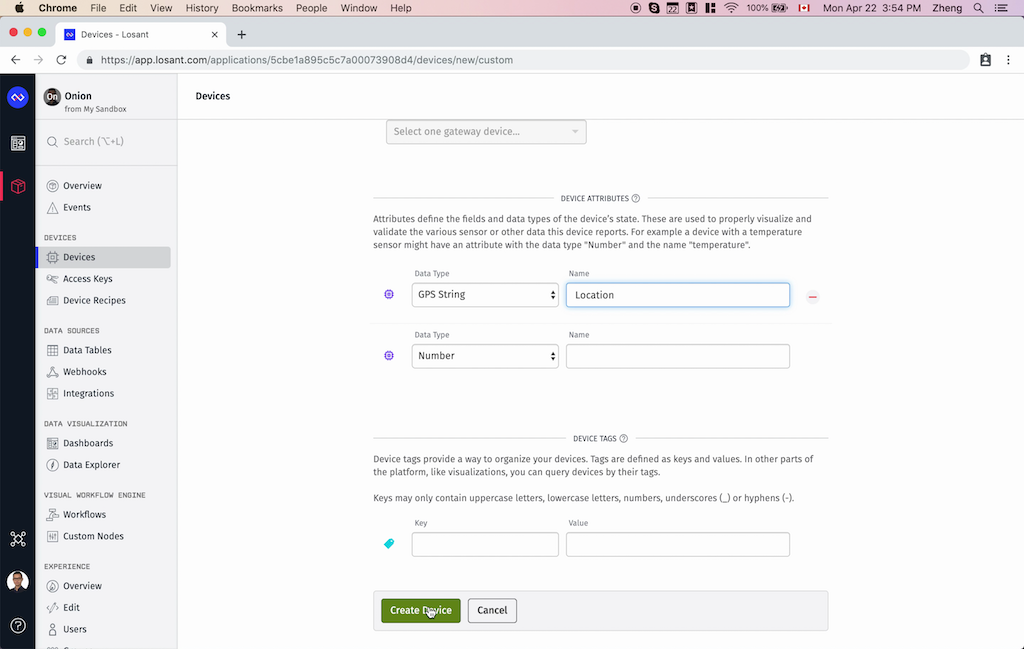
  • Click Create Device to complete the process, make sure to note down the Device ID (top right corner) 

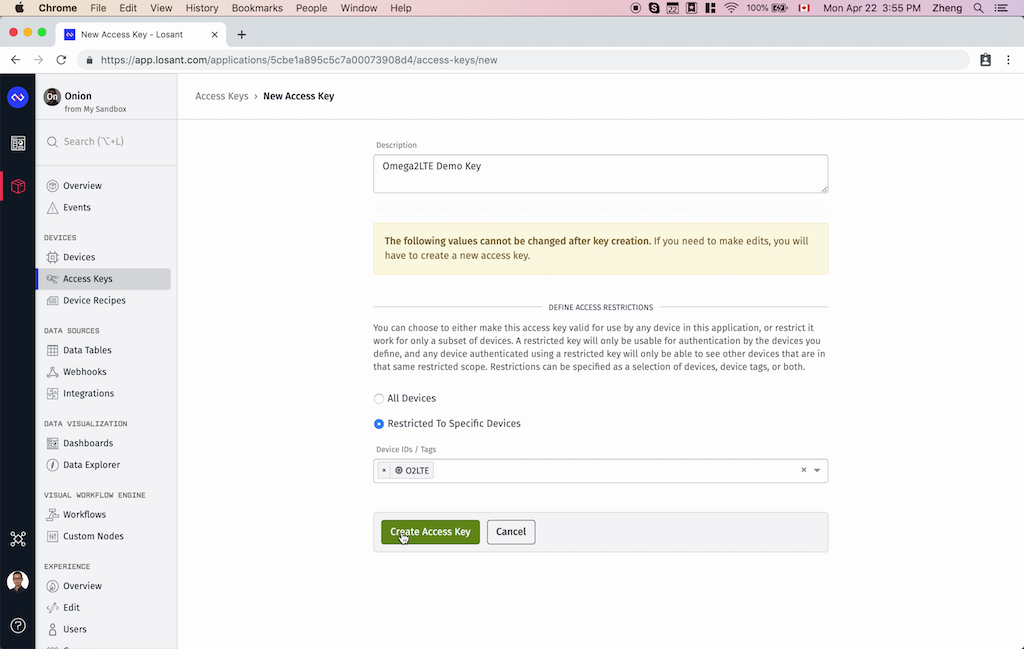
Create an Access Key

Next up, we’ll want to create an Access Key. The Access Key serves to authenticate and secure communication from your Omega2 LTE to Losant. 

  • Click Access Keys on the sidebar and then the Add Access Key button 
  • Give the new key a description and restrict it for use with the device you just created
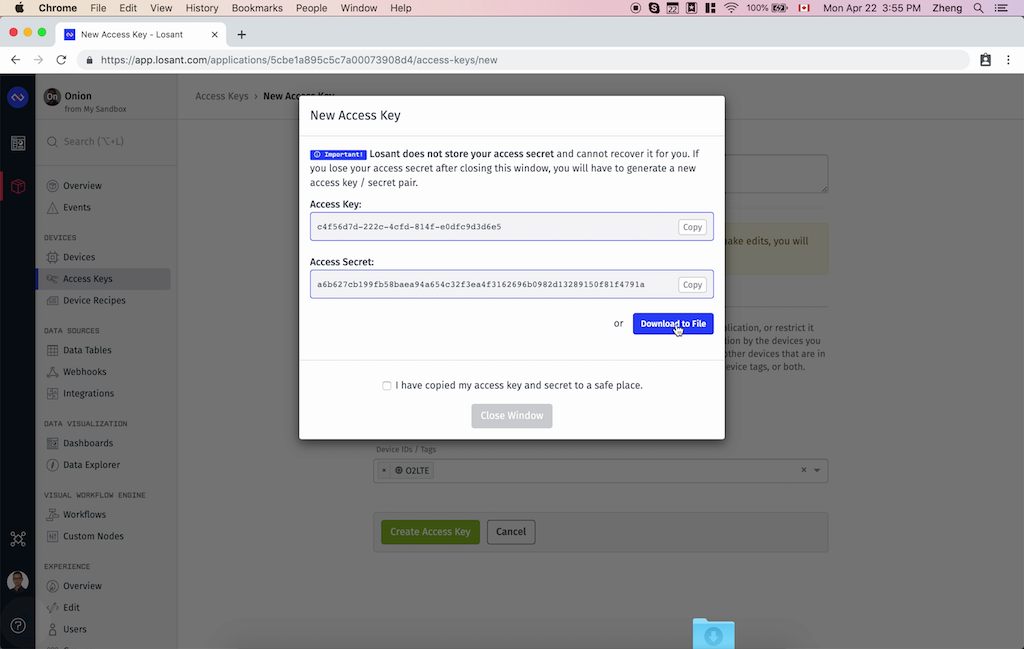
  • The Access Key and Access Secret will then be generated, make sure to record both the key and secret since this is the only time you will get to see the secret! 
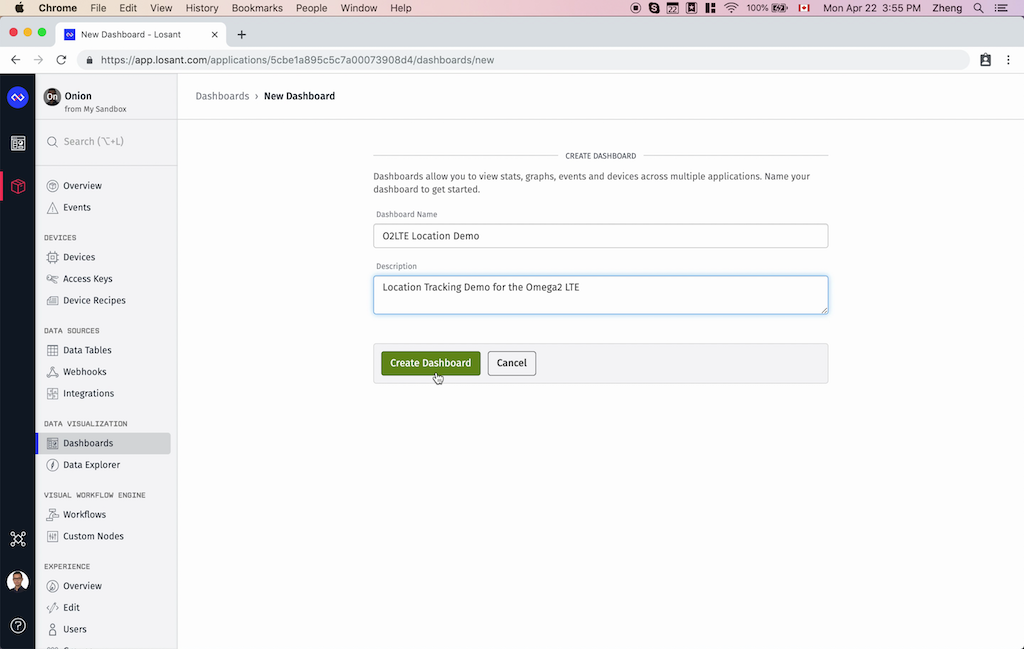
Create a Dashboard

Finally, we’ll create a dashboard to track the location data on a map!

  • Click Dashboards on the sidebar and then the Add Dashboard button
  • Give the dashboard a descriptive name
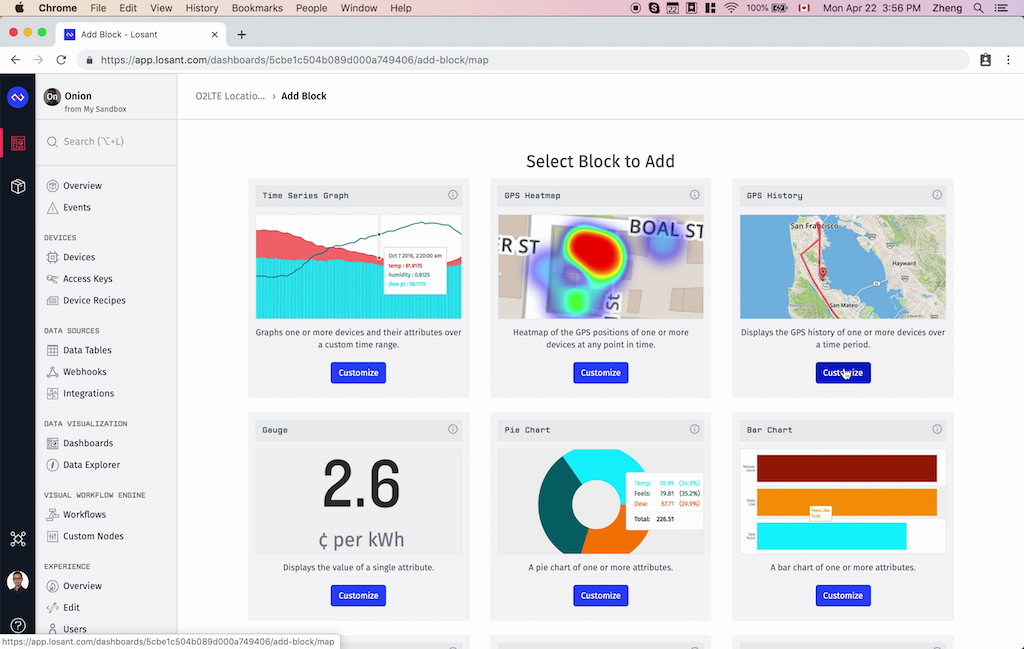
  • Your new dashboard will be empty, click Add Block
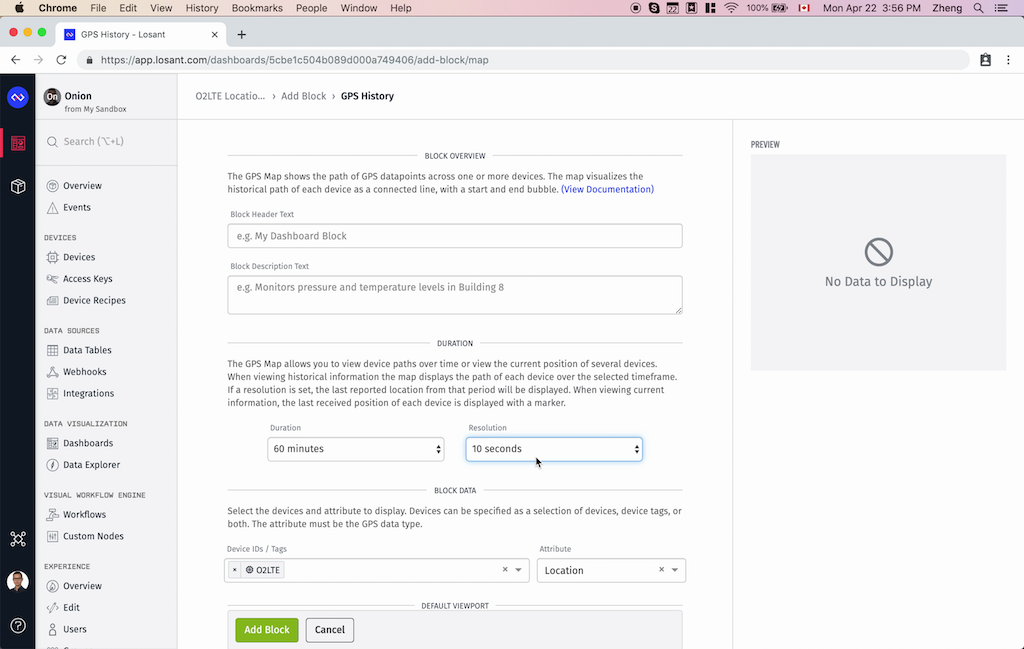
  • Select the GPS History block
  • Customize the block as you see fit, we set the block to show data from the last hour at a 10 second resolution, we left the defaults for the rest of the options 

Ok! The cloud dashboard is ready, we’ll just need some data to display!

Set Up the Omega2 LTE for Location Tracking

Now we’ll work on the Omega2 LTE so that it continuously reports its current location to the cloud platform using the LTE data connection. To make that happen we will:

  • Install Python and the modules we’ll need
  • Write a Python program to retrieve the current geo-positioning data from the GNSS receiver and report it to Losant
  • Additional device setup to make sure our program runs automatically

Before we start, make sure you’ve completed the Omega2 LTE First Time Setup guide. This is important since you’ll want your Omega2 LTE to be running the latest software and configured to be able to connect to your cellular network of choice.

Step 1: Install everything we’ll need

Let’s install Python3, PIP, and the module needed to talk to the Losant platform over MQTT. For more details on Python and PIP on the Omega, see our Python guide.

To save data, we recommend doing this step while the Omega2 LTE is connected to WiFi.

Connect to the Omega2 LTE’s command line and run the following commands:

opkg update
opkg install python3-light python3-pip pip3 install pyserial
pip3 install losant-mqtt

And that’s it for this step.


Step 2: Write the Asset Tracking Program

Now go ahead and create a file called /root/location.py to hold our script.

Copy in following code:

Make sure to set the deviceIdaccessKey, and accessSecret variables to what you noted down when you configured Losant.


Step 3: Automation

Next, we’ll need to make sure our Python program runs automatically and restarts if it happens to crash. To make that happen, let’s write a procd init script so that the Python program runs as a service.

If you’re curious about running programs as services, see our blog post on the subject.

Create a file called /etc/init.d/location, and make sure it’s executable:

touch /etc/init.d/location
chmod +x /etc/init.d/location

And then copy the following code:

Notice how we’re referencing the /root/location.py file, so you’ll need to adjust accordingly if you’ve put your Python script in a different place.

Then we’ll need to start & enable the service so that it will start automatically on boot:

/etc/init.d/location enable
/etc/init.d/location start

Finally, let’s make sure the GNSS receiver on the Omega2 LTE is enabled every time it boots up by adding the following line:

o2lte gnss enable

to the /etc/rc.local file. Just make sure it’s above the exit 0 line.

To learn more about running commands at boot, see our documentation.

And let’s shut down the GPS daemon since our program will be reading the GPS data directly:

/etc/init.d/ugps enable
/etc/init.d/ugps start


Step 4: Test!

Before you deploy your new asset tracker to the field, try disconnecting from your WiFi network, connecting to the cellular network, and checking that location data is making its way to Losant.

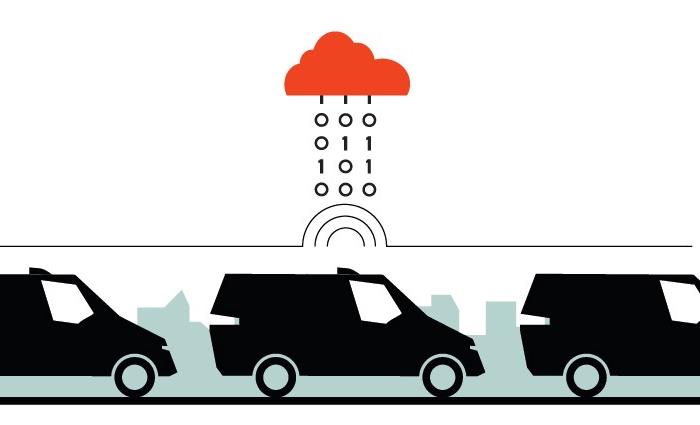
Track Assets in Real Time!

And now the fun part! We’ve gotten the cloud dashboard ready, and the Omega2 LTE ready, and were ready for real time asset tracking!

First, you’ll want to secure the Omega2 LTE to the asset you would like to track and provide power.

Next, mount the LTE and GNSS antennas to the asset. For the best reception, try to mount the antennas so that they’re not obstructed and are as elevated as possible.

The magnetic mounts of the antennas in the Omega2 LTE Pro Antenna Kit come in very handy when we tested with a team member’s car

Then the asset can continue to go about its business, and you can rest assured, knowing  the location and location history can be tracked through the cloud dashboard:


Wrap-Up

And there we have it! We’ve created a mobile asset tracking system in no time at all thanks to the Omega2 LTE and the Losant platform. 

Feel free to use this as an example for creating your asset tracking system, or extending it for fleet management, both of which are cellular IoT use-cases that we’re predicting to see used quite a lot in the next few years.