Omega Tip
Last week we guided you through writing a C program that uses sysfs for edge detection interrupts on the Omega’s GPIOs. This week, we’ll build on this topic and write a program that executes a terminal command specified by the user when a rising or falling edge is detected on a GPIO. To show you how this can be used in real life, we’ll also build a push-button circuit that we’ll use as the trigger for our new program!

You can freely re-use this program to make all sorts of button triggered projects with your Omega: IoT buttons, motor controllers, light controllers, and so on.
The Game Plan
Last week we got familiarized with the how the GPIO edge detection code works, the C makefile, and cross-compilation for the Omega. Since our code doesn’t use any external C libraries, we’re going to shake it up and compile the new program on the Omega2!
If you haven’t installed gcc, the C/C++ compiler onto the Omega, please follow our earlier 2 Bullet Tuesday, Compiling C & C++ Applications.
A Look at the Code
Now, it’s the time to start preparing our code! On your Omega, create a directory named something like projects in the /root directory. To get the code, we’ll need to clone the gpioIrqTrigger GitHub Repo (see our guide on using git on the Omega if you need some pointers)
Let’s take a brief look at the code, specifically the gpioIrqTrigger.c file. It relies on command line arguments to define which GPIO to track for edges, what type of edge to look out for (rising, falling, or both), and the action that should happen when the specified edge is detected:
Usage: gpioIrqTrigger <gpio> <edge> <action>
If the arguments are all present and make sense, the program then make the GPIO available for use with sysfs, set the GPIO edge we are interested in, and start an infinite loop that uses pollfd for edge detection. If an edge (a change in the GPIO value) is detected, the new value of the GPIO will be read and the program will make a system call to perform the action specified by the command line arguments. Since this is in an infinite loop, this will continue indefinitely – executing the specified action every time the button is pressed.
Compiling the Code
Now that we’ve gotten the source code and taken a peek at it, we’ll use gcc to compile the program! Go to the gpioIrqTrigger directory and issue the following command:
gcc gpioIrqTrigger.c -o gpioIrqTrigger
You will notice a couple of warnings while compiling the code. You can safely ignore them as they won’t affect the program’s operation. Also, you will notice a new file: an executable called gpioIrqTrigger!
Building the Circuit
Now it’s the time to build our push-button circuit. When the button is pressed, it will cause our GPIO to change value, thus creating an edge, which will trigger the action to be executed!
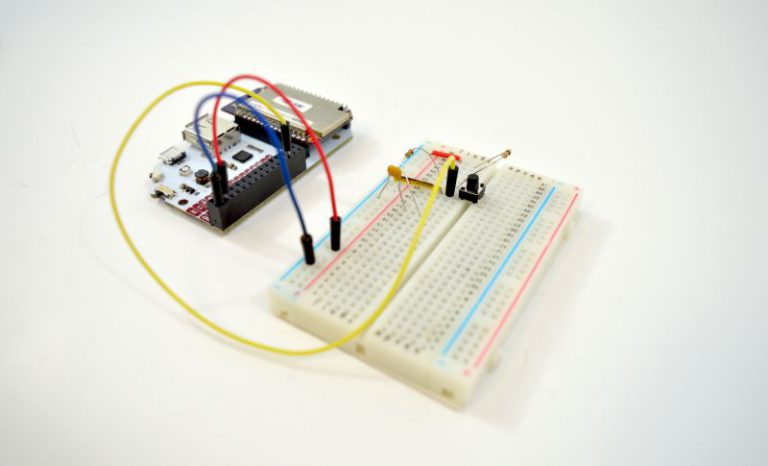
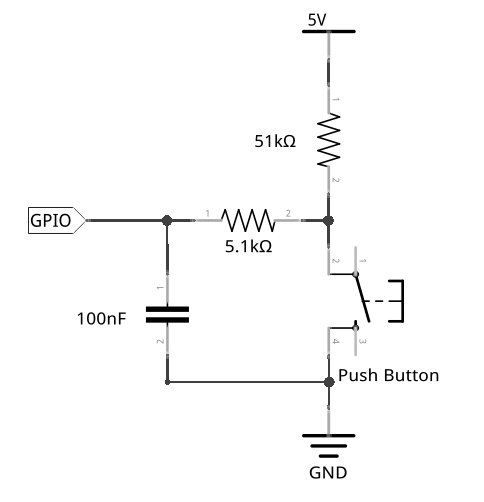
We’ll use the same de-bounced push button circuit that was featured in our Arduino Dock Starter Kit:
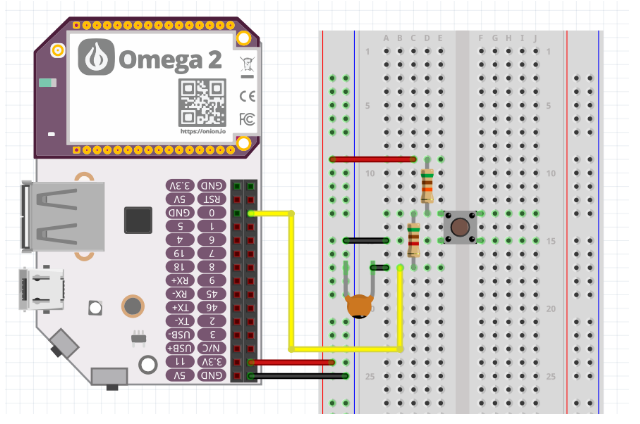
Here’s how everything should look when it’s all put together:
If you get stuck with the circuit at any point, check our our Arduino Dock Starter Kit push button experiment.
Running the Program
Now, you are all set to run your program! The syntax of the program is the following:
./gpioIrqTrigger <GPIO-Number> <EDGE> <ACTION>
In our case, we chose to test it with GPIO0, falling as our edge and echo a message:.
./gpioIrqTrigger 0 falling ‘echo “Hello World”’
If your <ACTION> argument contains any spaces, make sure to wrap it in quotes so the program knows to treat it like a single argument!
So let’s break down how this works. Because of the design of the push-button circuit, the GPIO is held high when the button is not pressed. Pressing the push button completes the circuit, meaning that the GPIO will go from High to Low, creating a falling edge. Our program will react to the falling edge, and execute our action, you should see Hello World pop up on your screen. When we release the button, the GPIO goes from Low High again (rising edge), but will not trigger our action since we’ve specified we only care about the falling edge.
To exit the program and end the loop, hit Ctrl+c.
The same concept applies for rising and both edges, try it out!
Going further
Now, it’s your turn to make some awesome, button-controlled projects and share them with us! Try using some of the C Libraries we’ve put together! Happy Hacking!