
HI EVERYONE!
Welcome back to 2-Bullet Tuesday, where we’ll share useful tips and awesome stuff sent in by Omega2 users all around the world. Check out very creative projects and tutorials that will benefit your day!
Favorite Project
Our favorite project this week is an AC Current Meter that uses MQTT to publish the readings to the Losant IoT platform. Bas Rijniersce used his Omega2 and National Control Devices boards to measure the current and push the available results to Losant, allowing him to access the values of the current remotely!
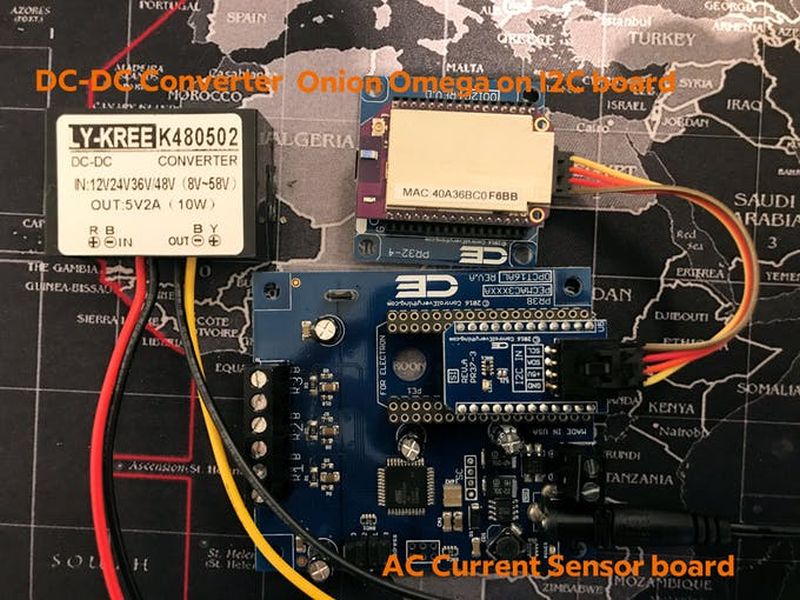
Bas wrote a Python program that grabs the sensor’s readings and publishes them to the Losant IoT platform via MQTT. It has a great feature that collects the data even when an internet connection is not available and pushes it to Losant when the device comes back online. To measure the current values, he used a NCD 3-channel current sensor to obtain the values and make them internet accessible!
Awesome project Bas! It is a pleasure to see more and more Omega2 MQTT projects!
Omega Tip
In this week’s tip, we’ll guide you through setting up a browser-based text & code editor on your Omega with minimum work! This will streamline your development experience when making projects for the Omega. Before we proceed to the actual installation procedure, let’s go over what exactly an IDE is and an overview of Codiad. IDE is an abbreviation for Integrated Development Environment and Codiad is an open source browser-based IDE and code editor that will facilitate your programming and developing process on the Omega.

This tool requires a server like uhttpd, lighttpd, or Apache2, to be running on your device, luckily, the Omega2 comes with uhttpd already installed. This IDE does not require a database, just install PHP7, configure the web-server, and you are good to go!
Installation
In short, we are going to place all the Codiad contents into a web accessible folder on your Omega2, install and configure PHP7 and its required modules. So, let’s dive in! First of all, you will need to install PHP7 and configure it to play nice with uhttpd. To do so, please follow our guide on Installing and Using PHP.
Now, let’s install the additional tools and packages that Codiad requires:
opkg update
opkg install git-http ca-bundle ca-certificates
opkg install php7-mod-session php7-fastcgi php7-mod-json php7-mod-curl curl php7-mod-xml php7-mod-simplexml php7-mod-mbstring php7-mod-openssl php7-mod-zip
The next step is to download the Codiad IDE software and launch the server! Go to the /www directory and clone the Codiad Git Repo by issuing the following command:
git clone https://github.com/Codiad/Codiad.git
The last step is to relaunch the UHTTPD and PHP servers to apply the configuration changes done previously:
/etc/init.d/uhttpd restart
/etc/init.d/php7-fastcgi restart
Accessing the IDE
Now your server is up and running! You can go to your browser and navigate to the /codiad page on your Omega (You’ll need the Omega’s IP address or Omega’s name)
http://192.168.1.163/codiad
Please note, this was our Omega’s IP address on our network, it may look completely different on your end!
You should be able to see a page that looks something like this:
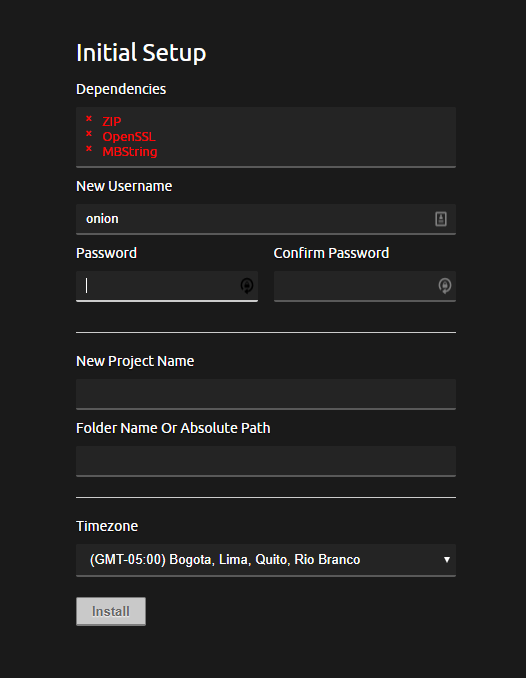
Create your Codiad login and password, project name and Absolute Path. The Timezone is optional but nice to have it corresponding to your location. After you have created an account, you can login!
Creating and Saving Project Files
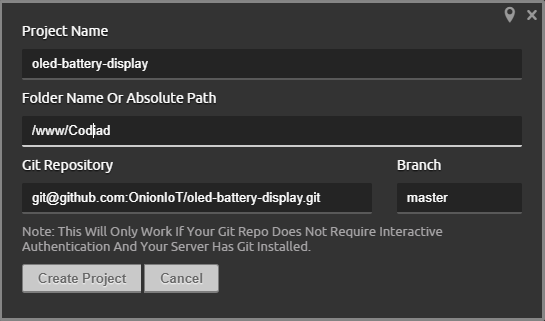
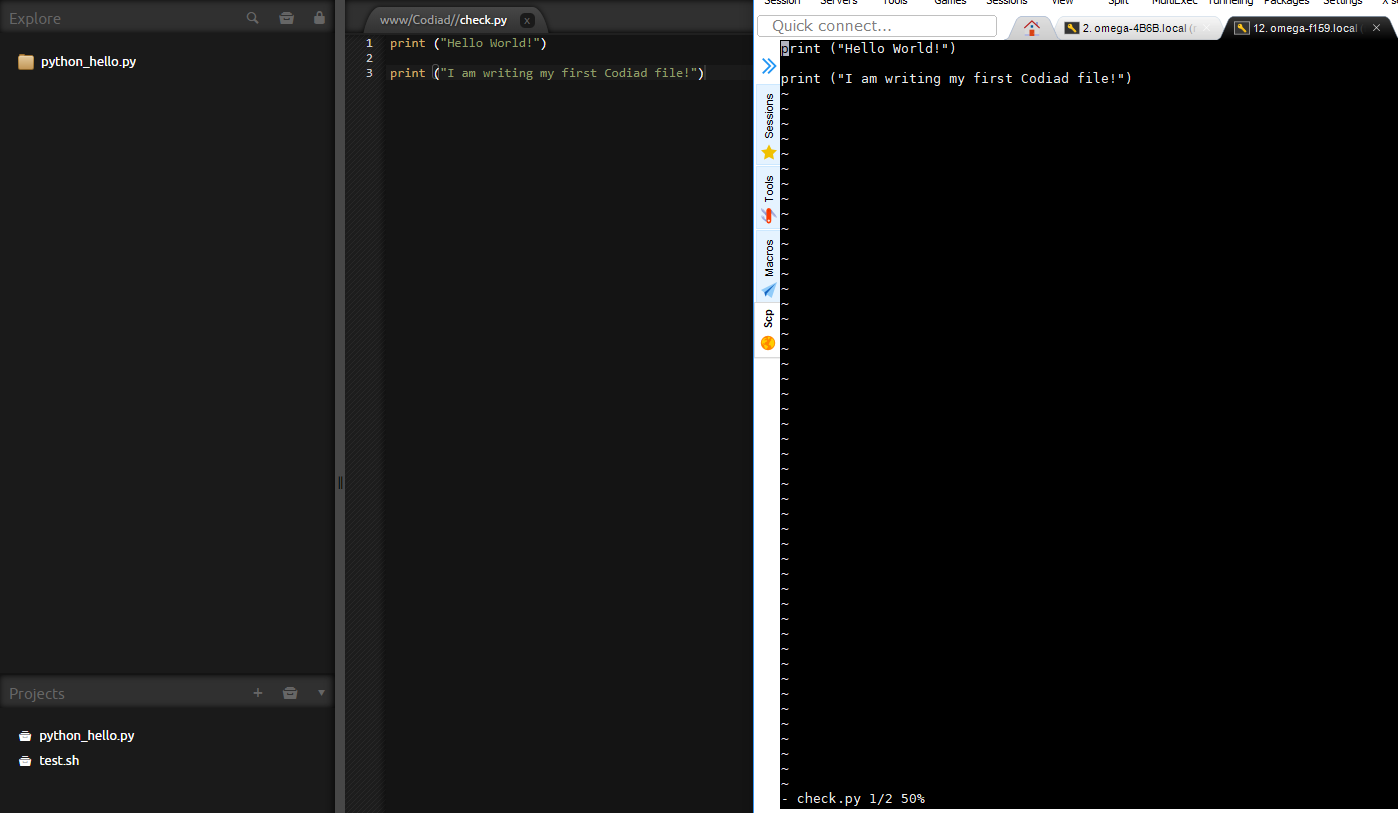
Pretty cool interface, right? You can go ahead and create your first project by clicking on the + button in the bottom left panel titled Projects. Give your project a name, provide the path to the code directory on the Omega, or alternatively, load the project code directly from GitHub.
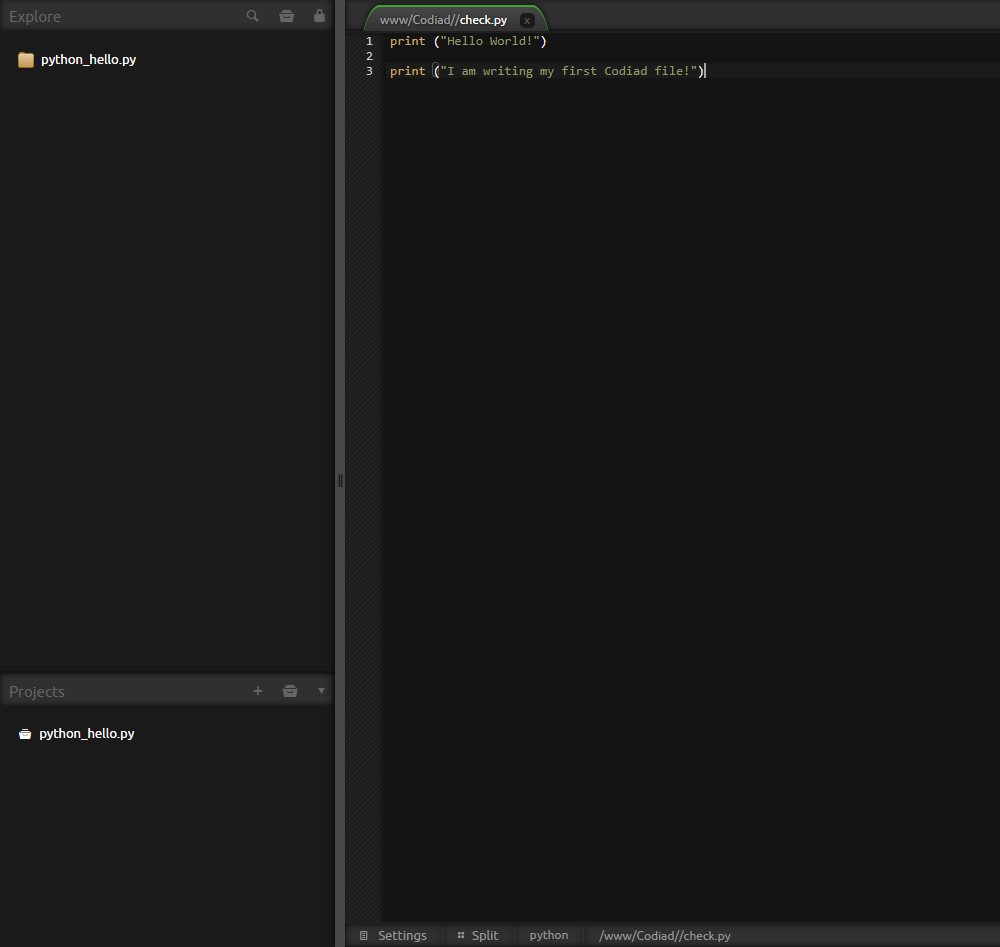
You can see the files on the Omega are being modified when you make any changes in Codiad in your Browser:
Codiad In a Nutshell
You can access, create, and edit your files and code directly on the Omega2 through the user-friendly Codiad IDE. This will save time and your fingers from typing the same rsync commands over and over on the command line. A nice bonus is that many of the regular keyboard shortcuts are available as well.
Happy hacking!