
The second bullet of this week’s 2-Bullet Tuesday! Check out the first bullet here. Subscribe to receive the newsletter on the 2-Bullet Tuesday page!
Omega Tip
This week we are going to show you how to flash the Omega with new firmware through the Omega’s bootloader. Since this method uses the Omega’s Bootloader, it will be able to flash new firmware to the Omega even if it cannot successfully boot into its OS. This allows you to “de-brick” an Omega that cannot successfully boot!
Let’s dive in! We’ll need the following ingredients:
- The Omega2 or Omega2+ that needs to be flashed with new firmware
- Expansion Dock
- Must be the Expansion Dock since we will need to connect the Ethernet Expansion and connect to the Omega’s command line via serial
- Ethernet Expansion
- Ethernet Cable
- MicroUSB Cable
Before we proceed to the actual flashing process, we need to download the firmware we wish to flash on the Omega to your computer. Open your web browser and go to the Onion firmware repo. We will flash firmware v0.1.10 b160, which is the latest at the time of writing.
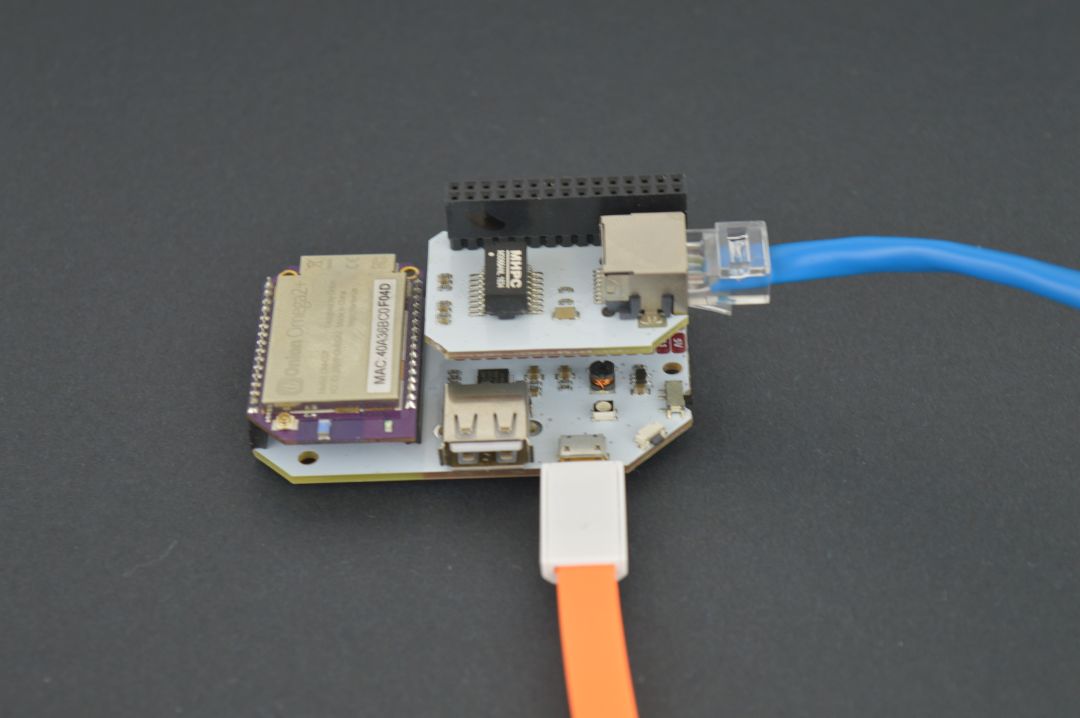
Now, plug your Omega and Ethernet Expansion to the Expansion Dock and connect the Omega to your computer with the ethernet cable. But do not power on the device just yet!
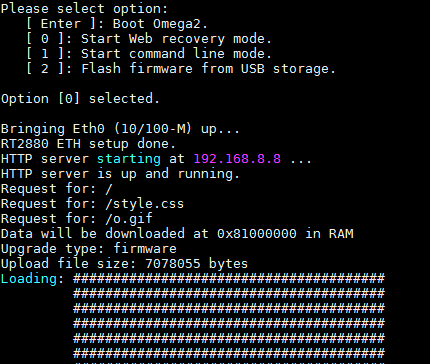
First, connect to the Omega’s command line through serial. Then, power on the device and press the Reset button on the Expansion Dock at the same time. This will get you to the bootloader and you’ll see the following menu:
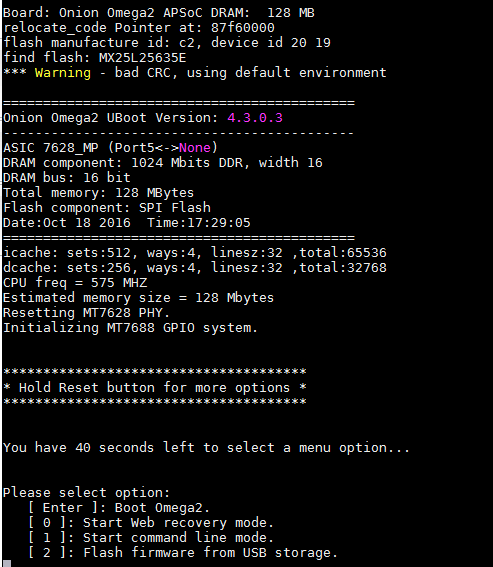
We need to activate Web Recovery Mode by pressing 0. Be quick, you only have 40 seconds until the Omega reboots and tries to boot normally. After pressing 0, you should see the following output:
Bringing Eth0 (10/100-M) up...

RT2880 ETH setup done.

HTTP server starting at 192.168.8.8 ...

HTTP server is up and running.
Our next step is to configure your computer’s ethernet network to set it to an IP address that can reach the Omega’s Web Recovery IP, 192.168.8.8. The following outlines the instructions for Windows:
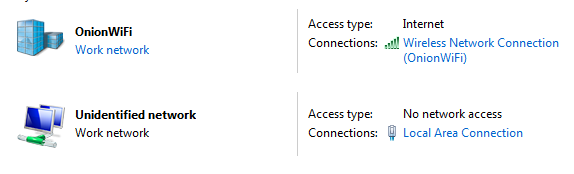
You should notice a new device in the Network and Sharing Center:
Now we need to set up an IP address corresponded to our ethernet-wired Omega’s settings. Click on Local Area Connection, under the Undefined Network and select Properties.
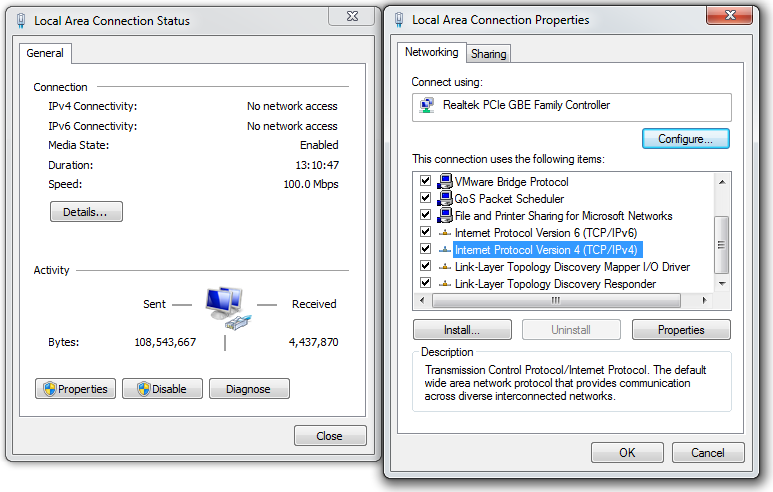
Select Internet Protocol Version 4 (TCP/IPv4) and click Properties.
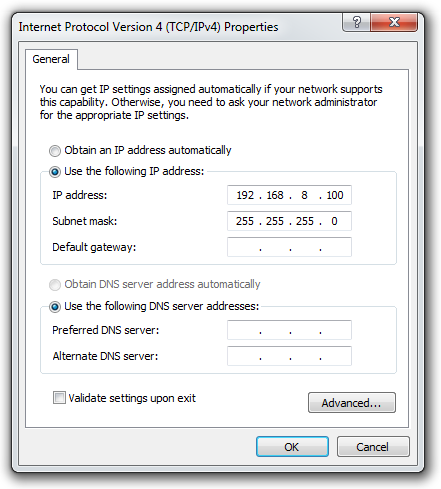
Click Use the following IP address: radio button and manually type in 192.168.8.100. Once you finished, the subnet mask will be created automatically and click Ok. Now you are all set!
Ok, now we’re back on track to reflash the Omega. Open your Browser and type 192.168.8.8 in the search window. This the web recovery page! Use it to choose the firmware to be flashed on your Omega. We’ll want to choose the .bin file we downloaded previously and start the flashing process.
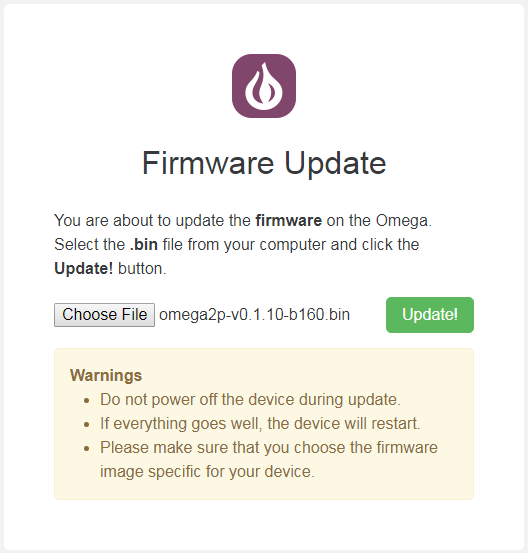
When you hit the Update! button you will the following output in your serial screen:
Sit tight, as it will take several minutes to reflash and reboot your device! Once it’s done, you will see Onion Omega Logo and the version number.
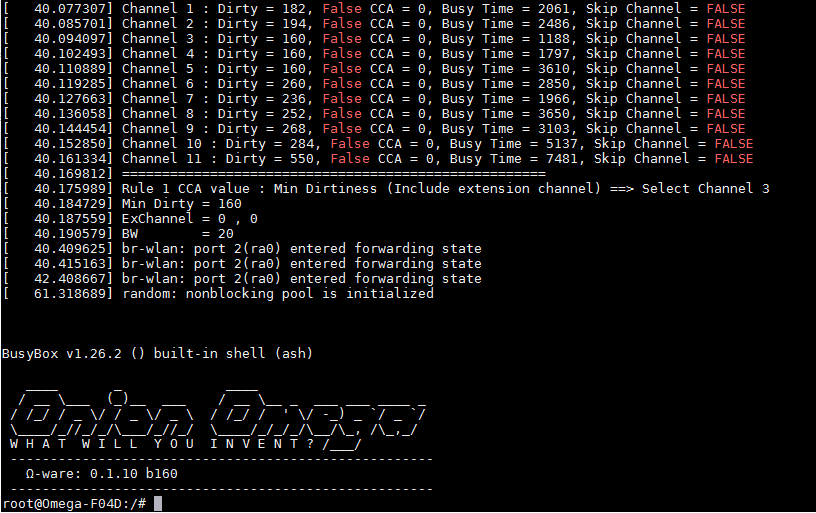
Note that it matches the firmware we downloaded: Ω - ware: 0.1.10 b160. And that’s it! We’ve learned how to re-flash, aka de-brick, your Omega’s firmware.
Having an Ethernet Expansion is handy since not only can it allow you to de-brick your Omega, but also enable you to make some pretty cool projects. Check our Docs on how to use the Ethernet Expansion and the Wireless Projects from the Omega2 Project book.
Happy Hacking!
Thanks for reading & have a great week!
Have you seen the Omega2S, the smaller and surface-mount version of the Omega2 for high volume commercial and industrial OEMs? See our Omega2S page for more details!
Let us know what kind of stuff you would like to see featured on 2-Bullet Tuesday! Send a tweet to @OnionIoT with your suggestions!
P.S. We’re beyond excited to announce that the Omega2 family is now available on SparkFun!


© 2017 Onion Corporation