New OnionOS App
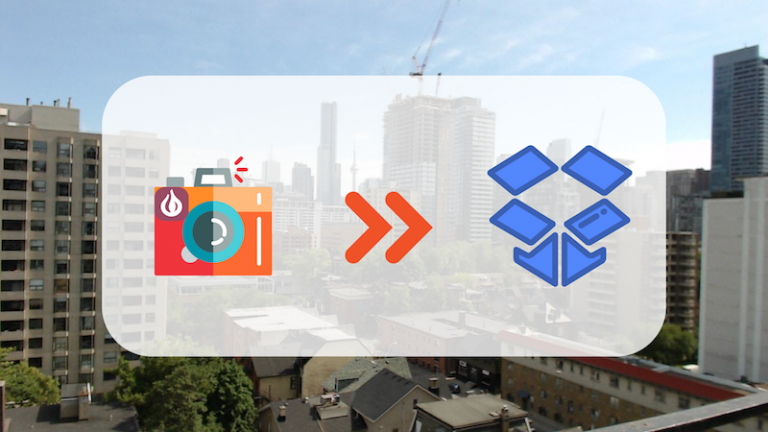
Automatically capture your very own timelapse photos and send them straight to Dropbox using the Omega2 and the new OnionOS Camera App.
The App
The new Camera App on OnionOS is accessible through your browser! In order for the App to do it’s business, you’ll need to connect a USB camera or webcam to your Omega. The App will then display a live stream of camera.
You’ll notice at the bottom, there’s an interface to configure Timelapse captures. When this is enabled, the Omega will take a photo once a minute and upload the image to Dropbox, find out how below!
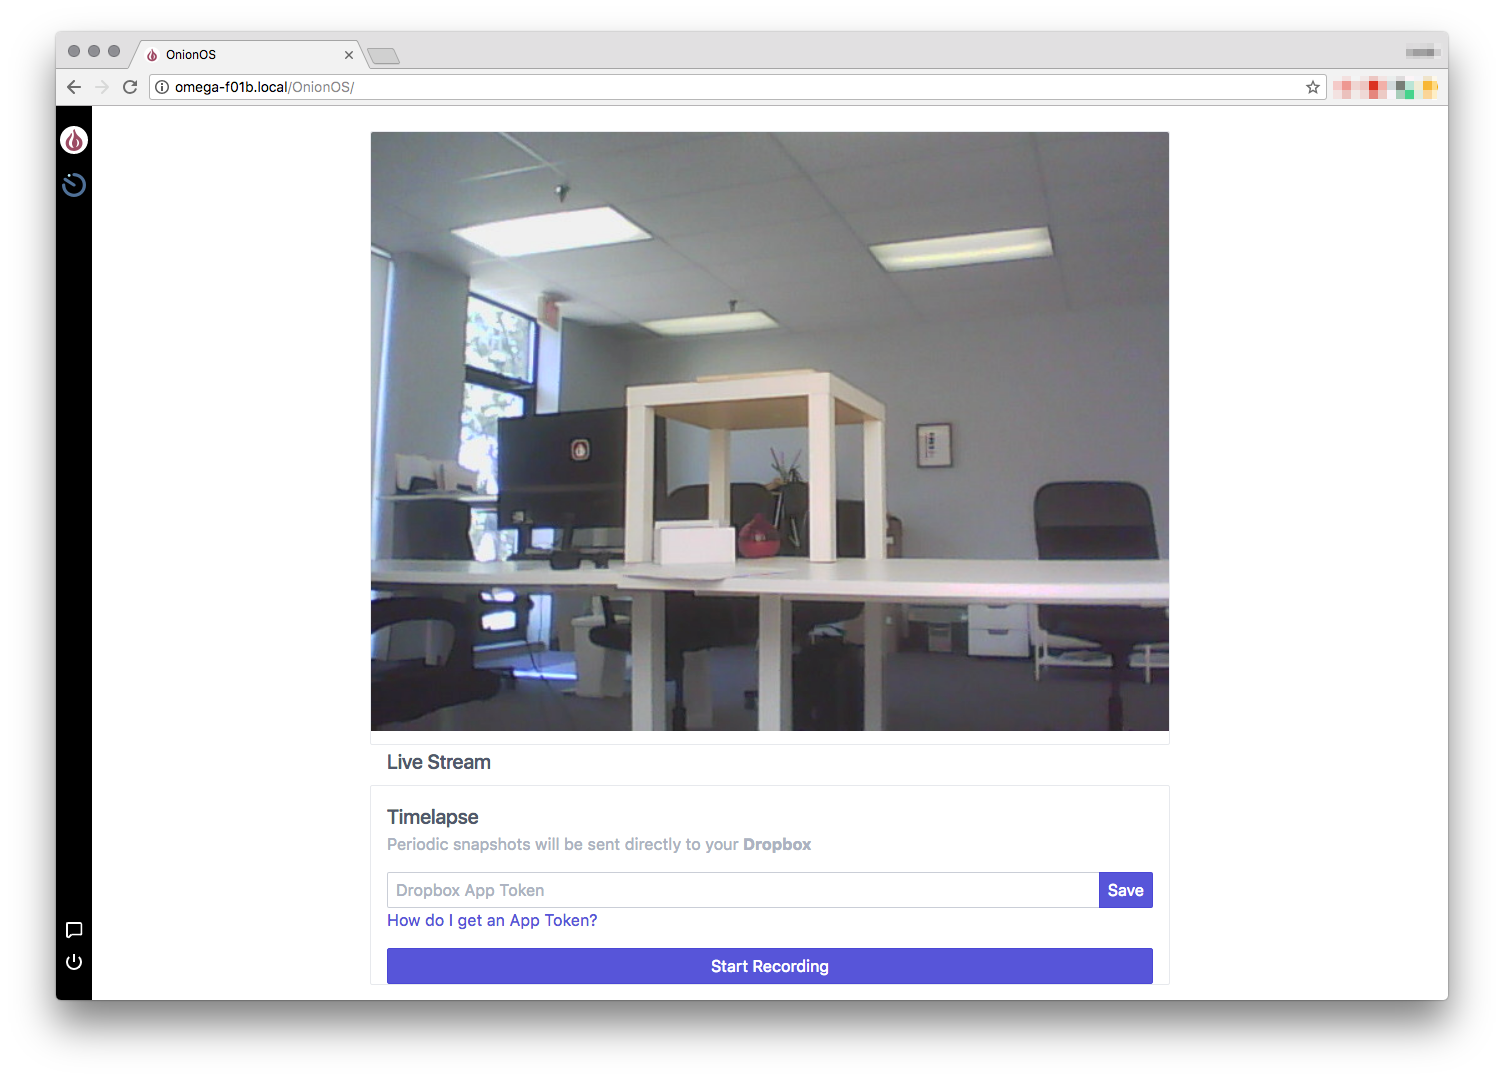
The OnionOS is hosted on your Omega and can be accessed from pointing a browser to the Omega’s webpage at:
http://Omega-XXXX.local/where theXXXXare the last four digits from the your Omega’s sticker. Note that you’ll need to be on the same network as your Omega to access the OnionOS.
Installation
To install the Camera App and update OnionOS on your Omega, run the following:
opkg update
opkg upgrade onion-script onion-os
opkg install oos-app-camera
Stay tuned for a more streamlined way to update OnionOS and to manage your Apps 😉
Capturing Timelapse Photos on Dropbox
When Timelapse recording is enabled, the Omega will capture a photo once a minute and then upload it directly to your Dropbox. For this to work properly, the Omega will need:
- An internet connection and
- An App Token to access your Dropbox
Let’s get you a Dropbox App Token!
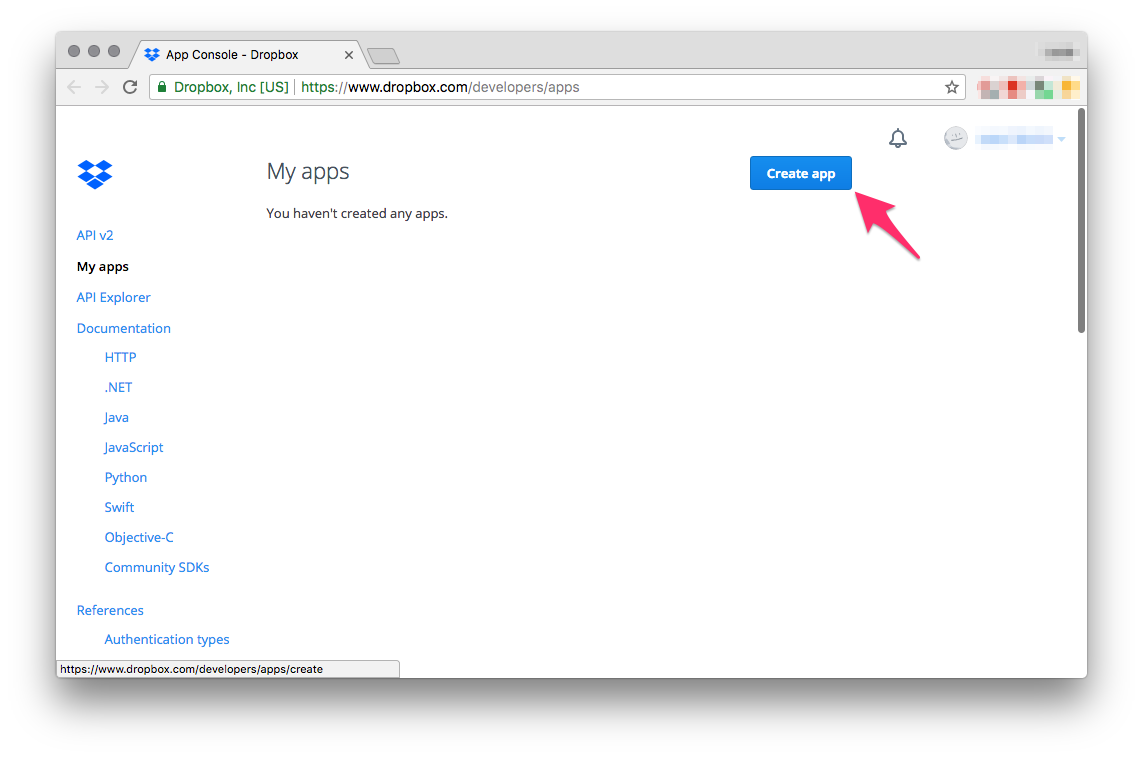
First, make sure you have a Dropbox account and you’re logged in, then head to https://www.dropbox.com/developers/apps. Once you’re there, hit Create App:
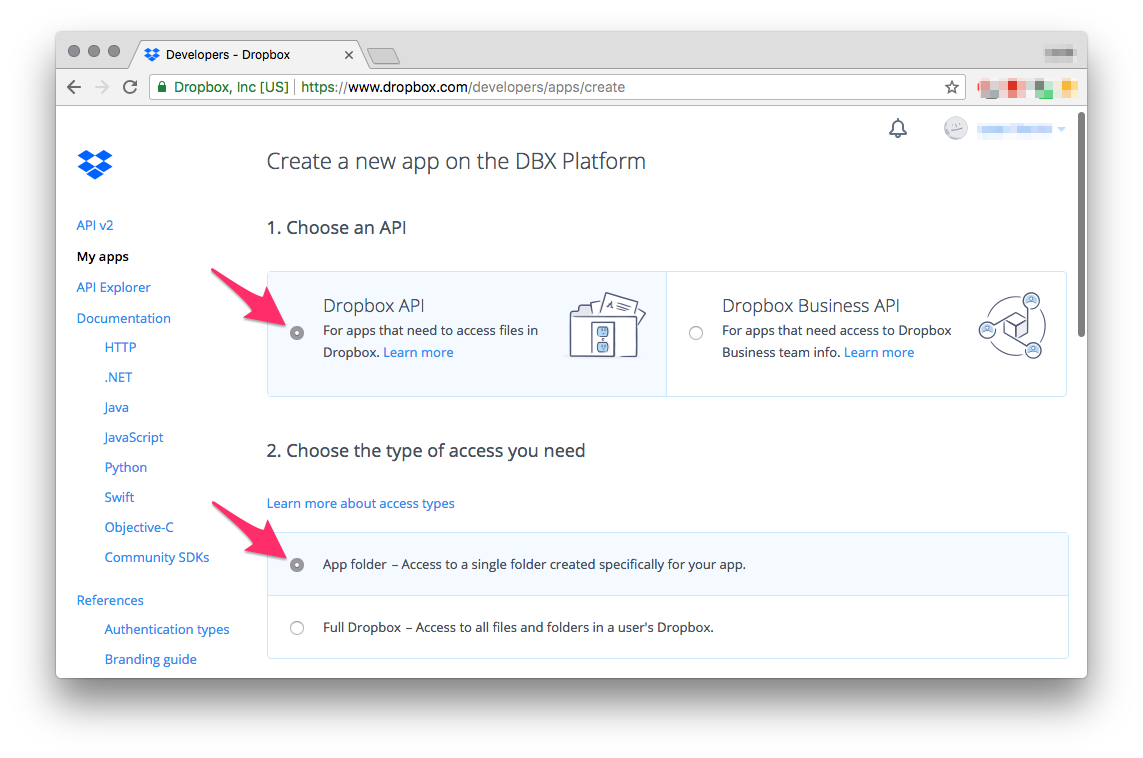
Configure the app to use the Dropbox API and to give access only to the App Folder:
Give your app a name, this will also be the name of the folder where your timelapse photos will be stored. We were incredibly creative and name our app Omega2-Timelapse. Agree to the Dropbox API Terms and Conditions (make sure you give them a read) and then hit Create App:

Hooray! Your Dropbox app has been made!
On the next page, you’ll be able to generate the App Token needed by OnionOS. Scroll down to the OAuth 2 section and hit the Generate button under Generated Access Token:
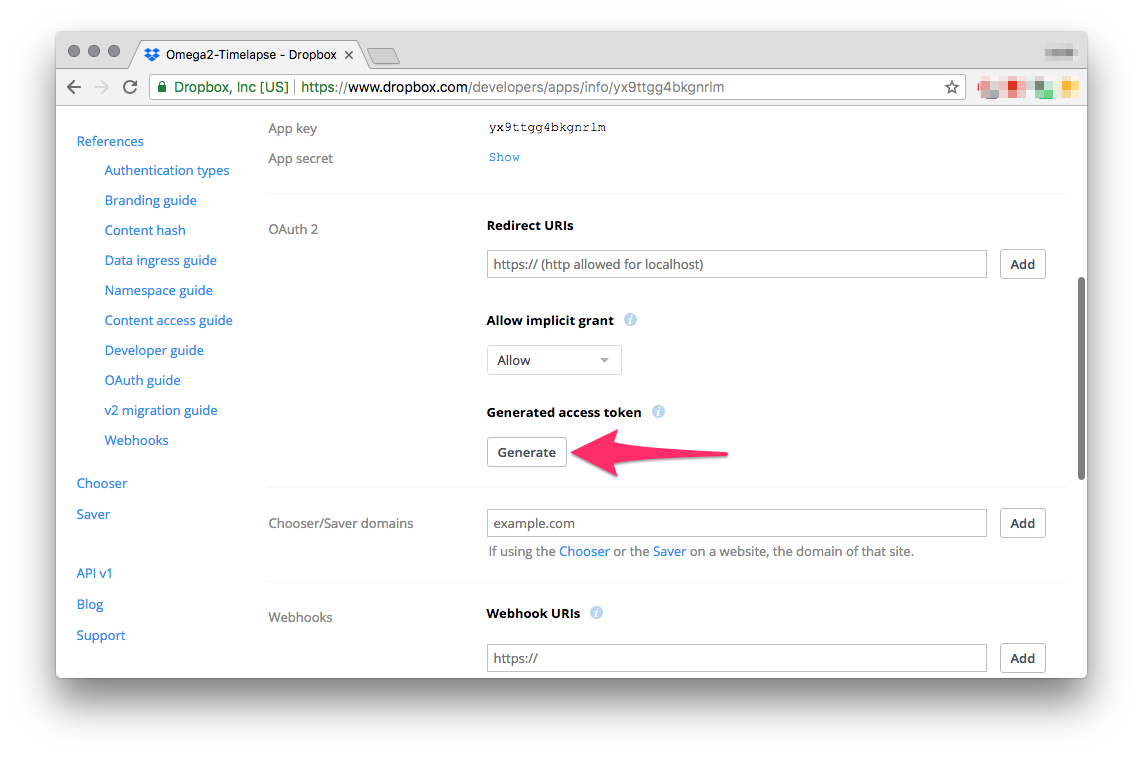
The token will be displayed on your screen, copy it and head back to OnionOS.
Paste the App Token into the input box in the Timelapse section and hit Save. Then you can hit Start Recording.
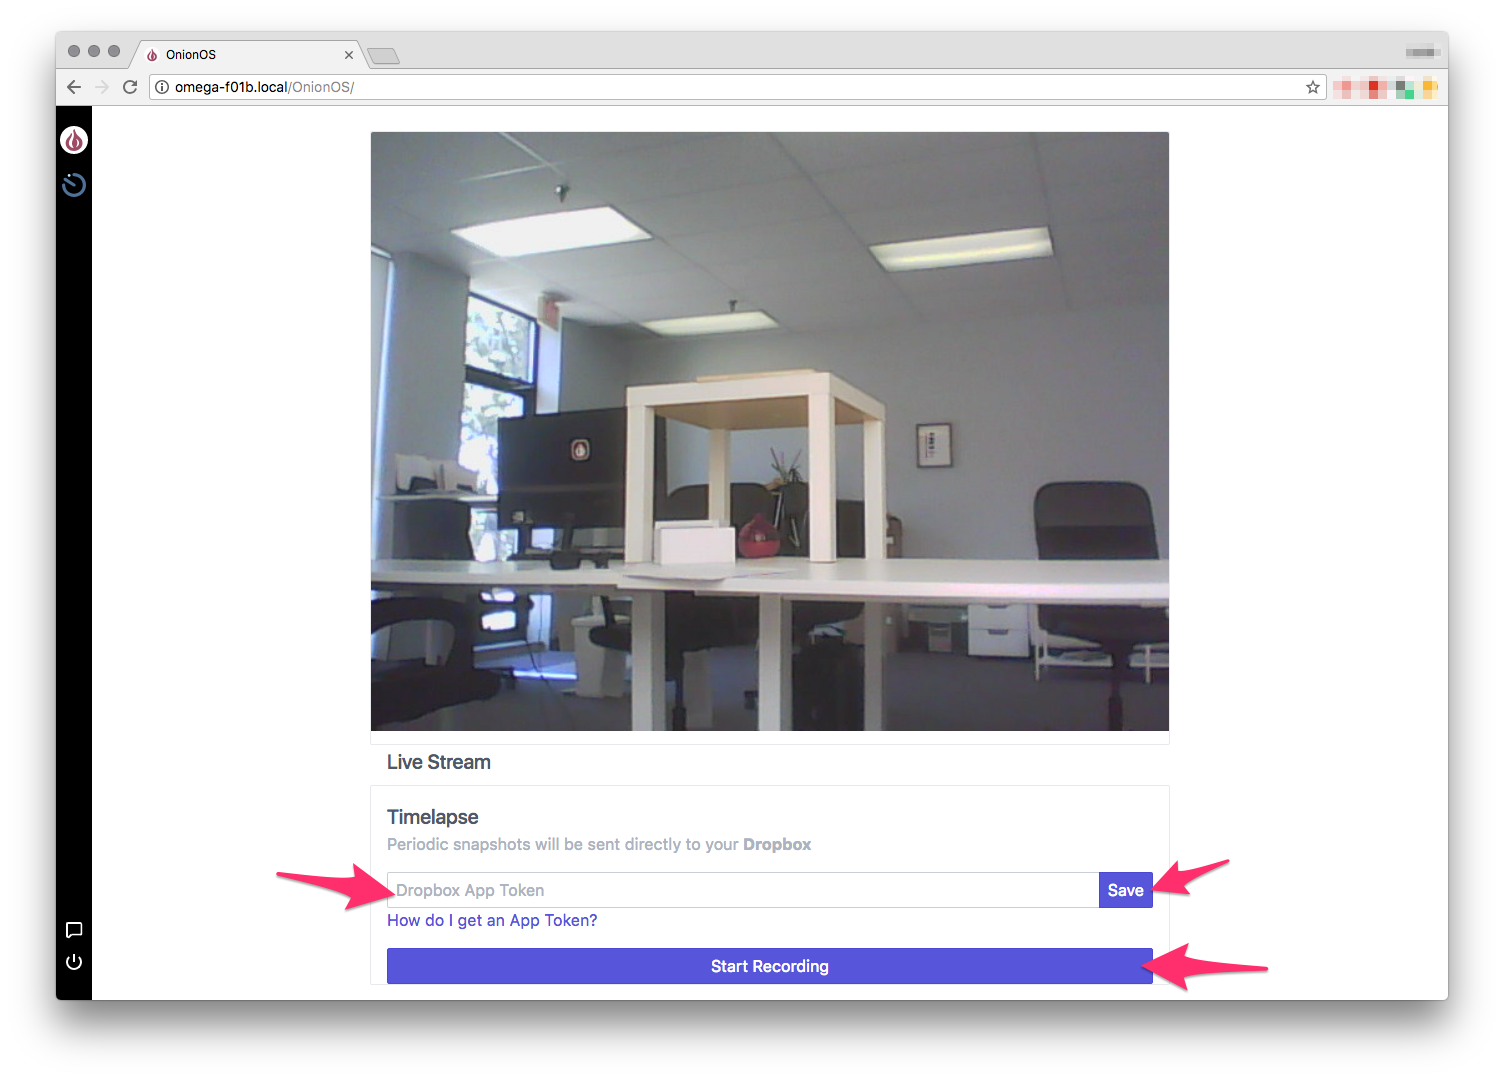
Now your Omega will capture a photo every minute and upload it automatically to Dropbox!
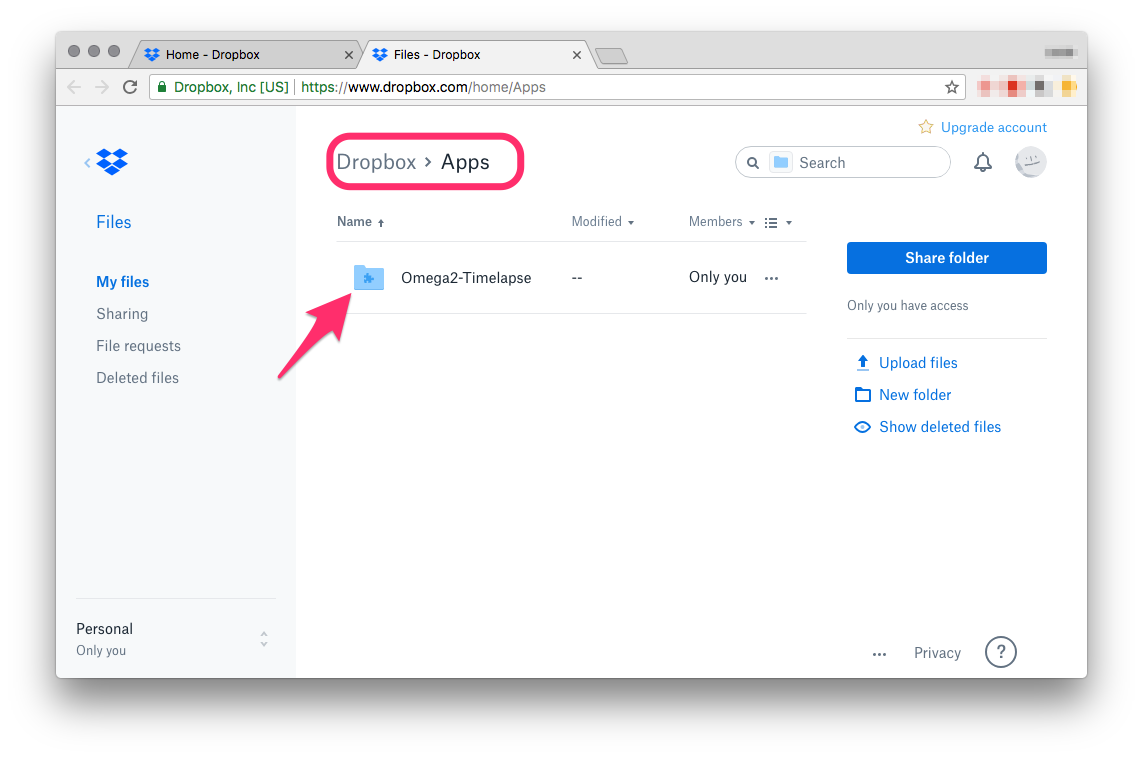
Head back to your Dropbox and you’ll see a new Apps folder. Inside Apps, there will be a new folder named the same as the app you just made, in our case, it’s Omega2-Timelapse.
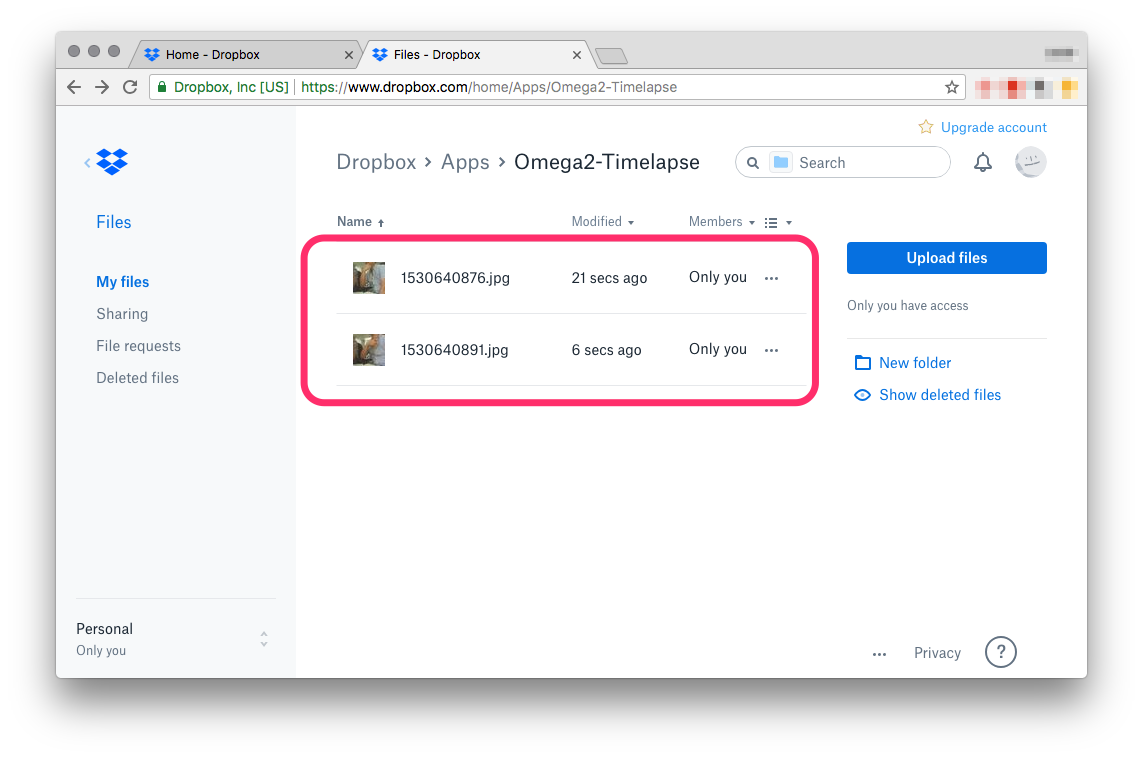
Wait a few minutes and you’ll see photos being added almost as if by magic!
You can now setup your Omega to capture timelapse photos with just a few clicks! We can’t wait to see the awesome timelapses you make, share them with us by Tweeting to @OnionIoT!
Happy timelapsing!