Omega Tip
This week, we’re going to be making an IoT button using the Omega’s Reset button to trigger an action when pressed.
This is similar to last week where we guided you through writing a C program to trigger an action based on GPIO edge detection. The difference is, instead of building our own implementation and writing a program, we’re going to reuse something that already exists on the Omega’s Operating System.
![]()
Sometimes it may seem easier to build your own way to achieve a goal, but often times, what you are looking for may already be implemented and available. All you have to do is look around and reuse things in creative ways. In this case, you can setup your Omega in about a minute to trigger different actions (motor control, light control, publish MQTT messages, send HTTP requests and more) with a single button press! We’ll also show you how to modify a Dock to add an external reset button so you’re free to build your IoT button in any form-factor you see fit!
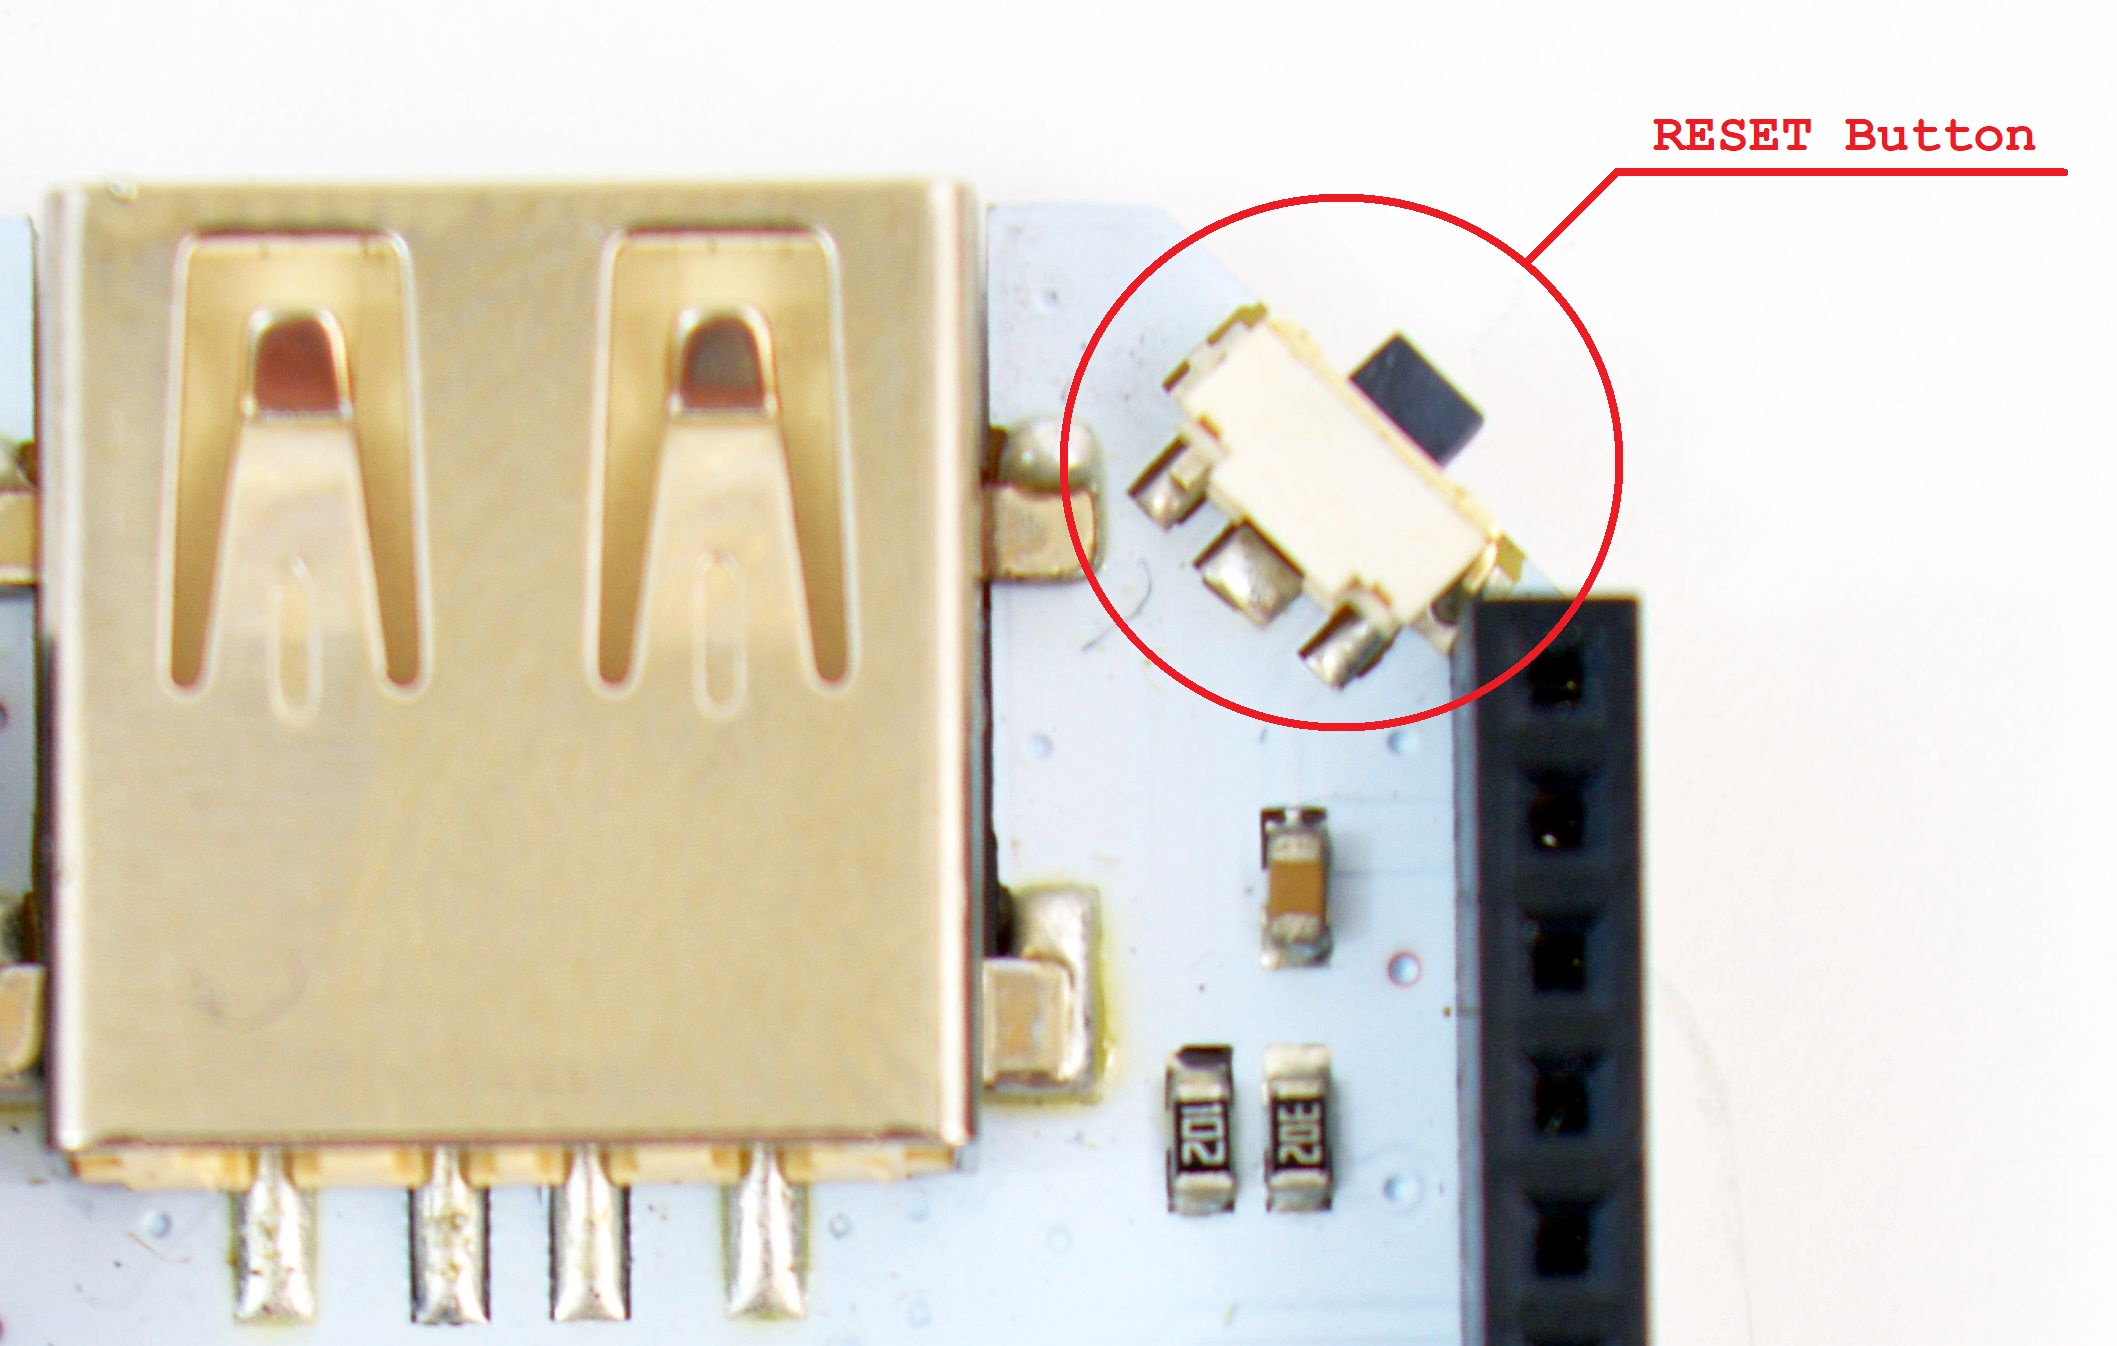
Getting to Know the Reset Button
Every Onion Dock has a push button that servers as a reset button, since they are all connected to GPIO38, the designated reset GPIO on the Omega. When the button is pressed and released soon after, the OS triggers certain events. By default, pressing the button will reboot the OS.
Breaking Reset Button Stereotypes
The behaviour of the button is controlled by the /etc/rc.button/reset file. If you’re wondering why it’s called reset, it’s because the the signal coming from GPIO38 was named reset in the Omega2 device definition.
Warning: please back up the default code in case something goes wrong with your modifications!
By modifying the/etc/rc.button/resetfile, it is possible that you might disable resetting the Omega with the button as well as factory restoring it. Proceed at your own risk.
Let’s take a look at the existing behaviour,
open the reset script and look at the lines 18-22:
if [ "$SEEN" -lt 1 ]
then
        echo "REBOOT" > /dev/console
        sync
        reboot
When the button is pressed and released within one second, it will trigger a reboot. Taking a look further down the script, you’ll see that if the reset button is pressed for more than 5 seconds, it will trigger a factory reset!
Now we’ll change the behaviour of our reset button to do something completely different! As an example, we’ll print the current date and time to the command line. Let’s rock!
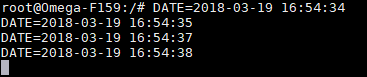
We no longer want to sync and reboot our Omega so we’ll delete those lines and change the echo command to print the following:
echo DATE=`date '+%Y-%m-%d %H:%M:%S'` > /dev/console 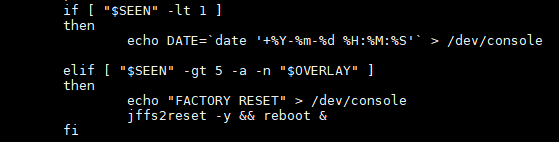
Save the file and we can go ahead and test it! Press and release the reset button and you should see similar output:
The Hardware Modification
It’s very handy to control your own things with the button on board. We’ll show you how to make this even easier by adding an external push-button that can be placed wherever you want for full freedom on the form-factor of your IoT button. For this modification we’ll need the following:
- Any Onion Omega Dock with a reset button
- 2 x male-to-male wires
- Soldering iron
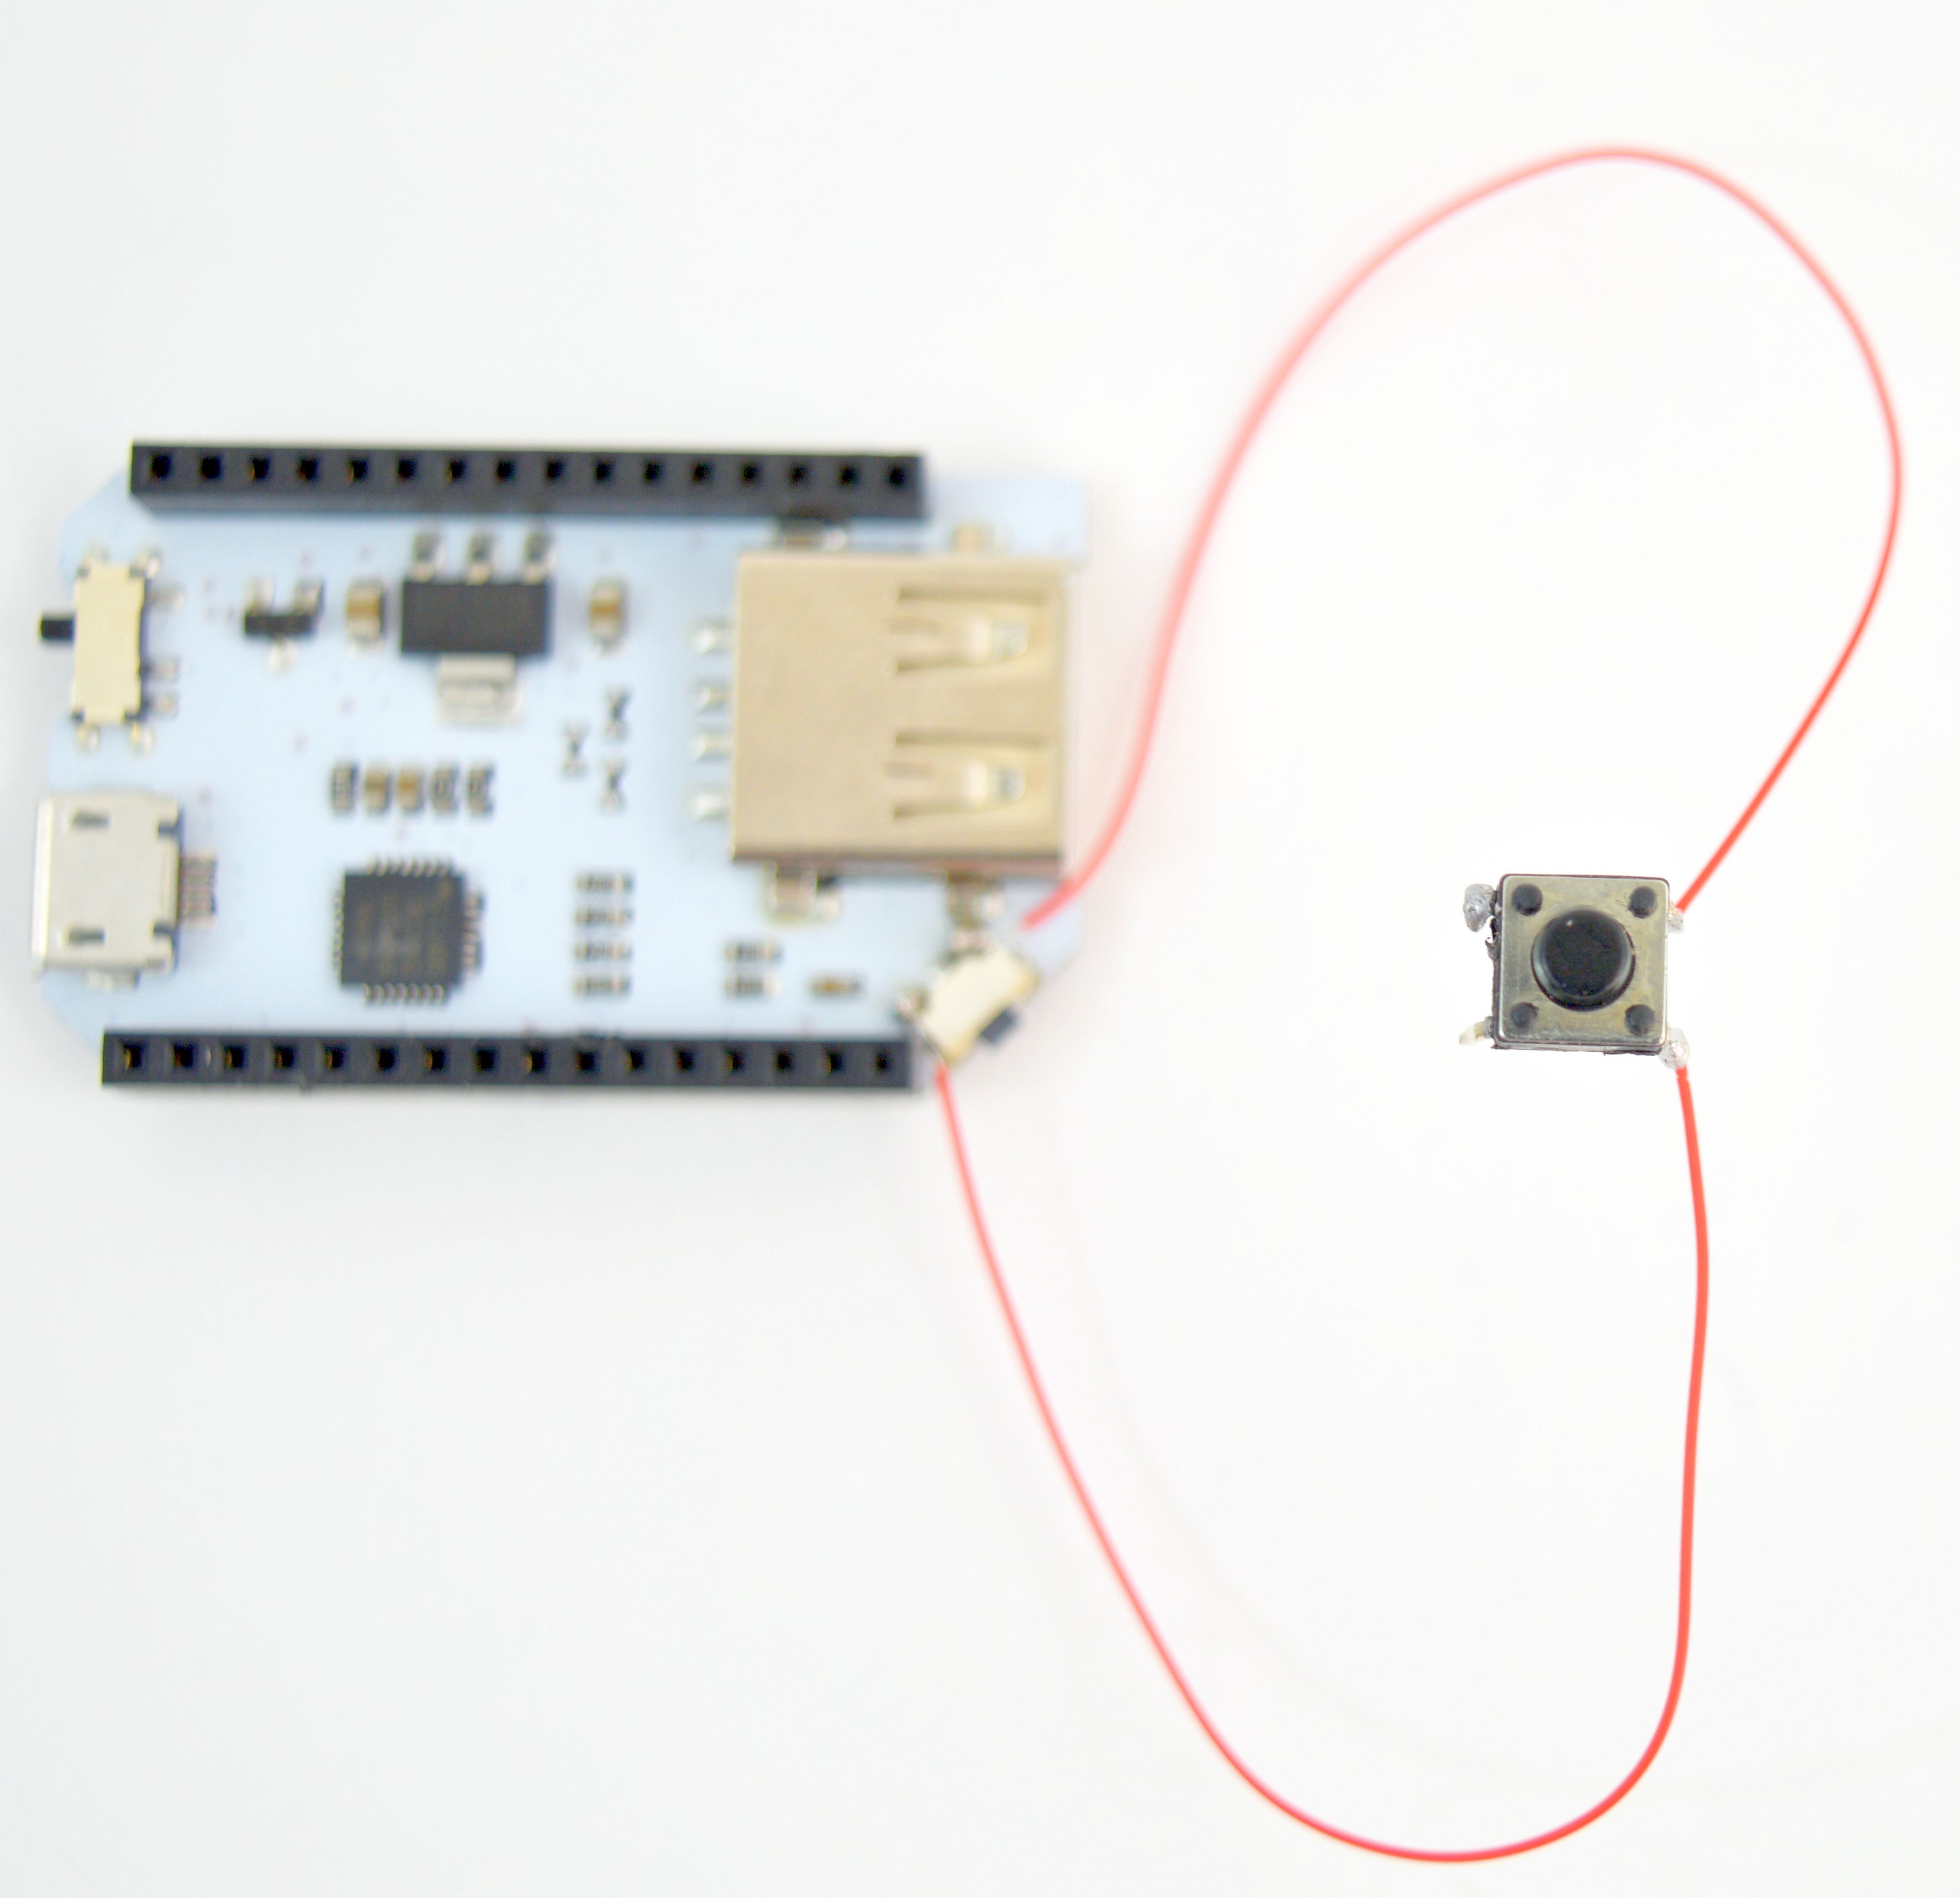
So, heat up your soldering iron and prepare two male-to-male wires and solder each wire to one side of the existing push button:
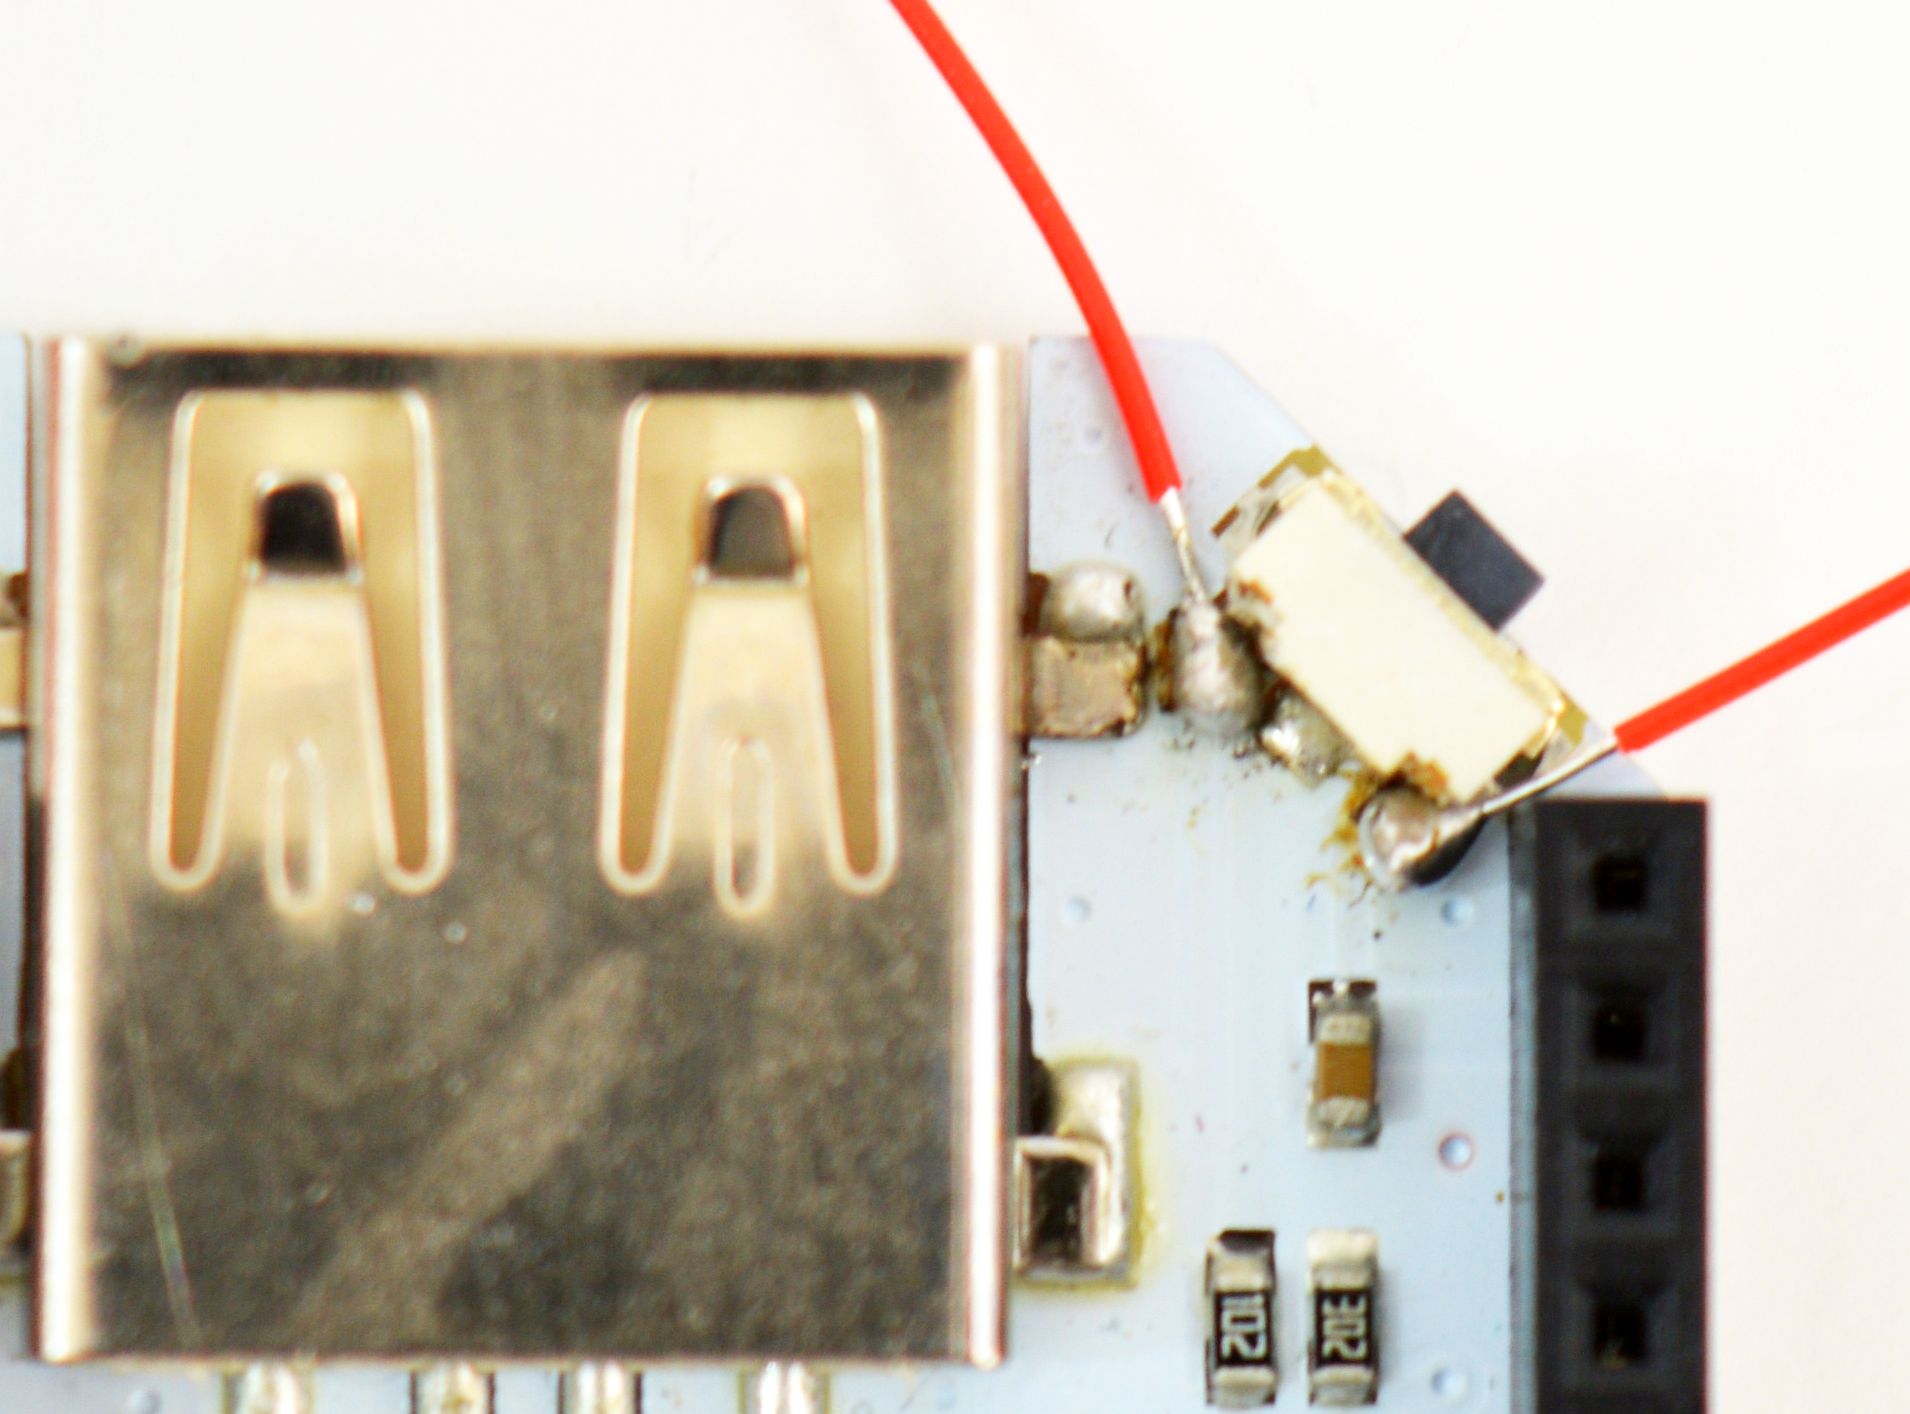
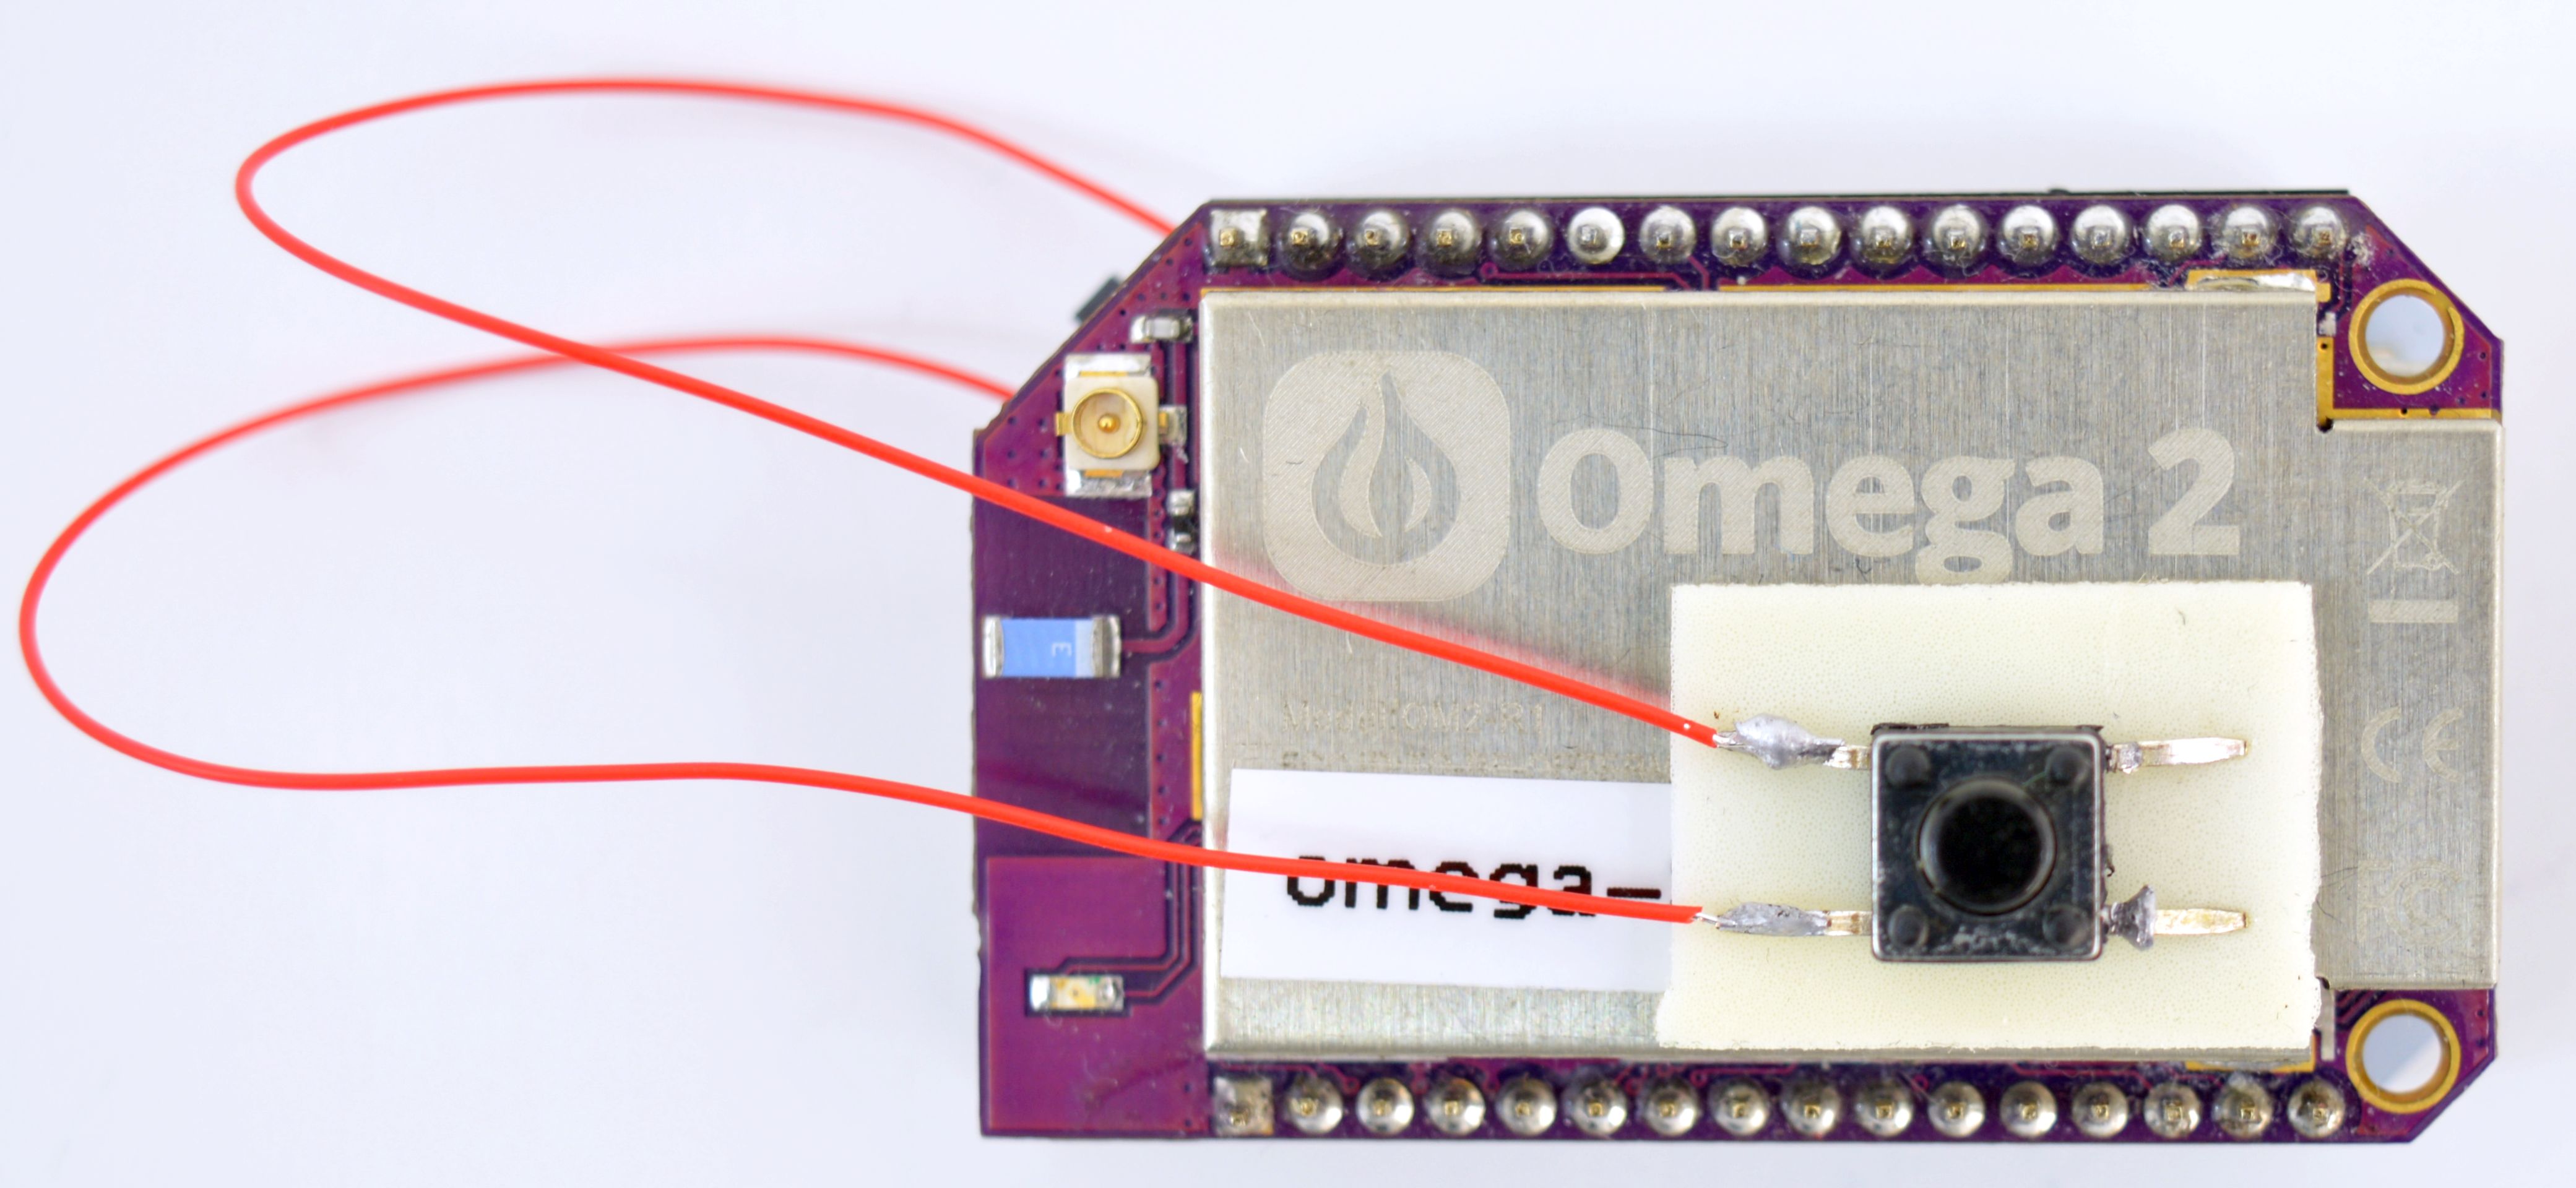
Solder the other ends of wires to the corresponded switch terminals, so this should look similar to the image below:
Now, you can plug the Omega to the dock and position the button however you like. Just note if you’re putting it on the Omega’s shielding, make sure to add an insulating layer! We found double-sided tape to be very effective.
And there you have it, an Omega2 IoT button! Send HTTP requests or publish to MQTT topics with a single press of a button!
Going further
Now, it’s your turn to build on our example and make some awesome, button-controlled projects. We would love to see them!