Omega Tip
This week we’ll guide you through writing a C program that uses sysfs for edge detection interrupts on the Omega’s GPIOs. In essence, we’ll be writing code that waits until a GPIO changes from low to high (rising edge) or high to low (falling edge) before it continues executing. We’ll get familiarized with the source code, makefile, and cross-compilation for the Omega’s MIPS processor architecture
![]()
In order for this program to execute properly on the Omega, it will need to be compiled for the Omega’s MIPS processor. To do that, we’ll use the Omega2 build system’s cross-compiler. If you haven’t setup our build system yet, please go ahead and follow our earlier 2 Bullet Tuesday post on how to setup an Omega2 build system. If you’ve encountered any errors while compiling, we’ve got you covered!
Preparing the Build System
Note: this assumes you’re using our
onion/omega2-sourceDocker image to compile our build system
Compiling the entire build system requires quite some time since there’s a lot that needs to get built. But really, the build system compilation time mostly depends on your CPU (e.g. if you have a Core I5 wire 4 cores, then the command to compile should be make -j4).
After the system has finished compilation, you may have encountered the following error:
make -r world: build failed. Please re-run make with -j1 V=s to see what's going
 on
/root/source/include/toplevel.mk:198: recipe for target 'world' failed
make: *** [world] Error 1
In order to see the error log, we need to run the suggested make -j1 V=s command. After this completes, you will see that several mosquitto packages along with libwebsockerts were not successfully compiled. Since we’re not going to be using these packages, we can deselect them inmenuconfig. Ensure that you are in the source directory and run the following command:
make menuconfig
You will be presented with the following menu:
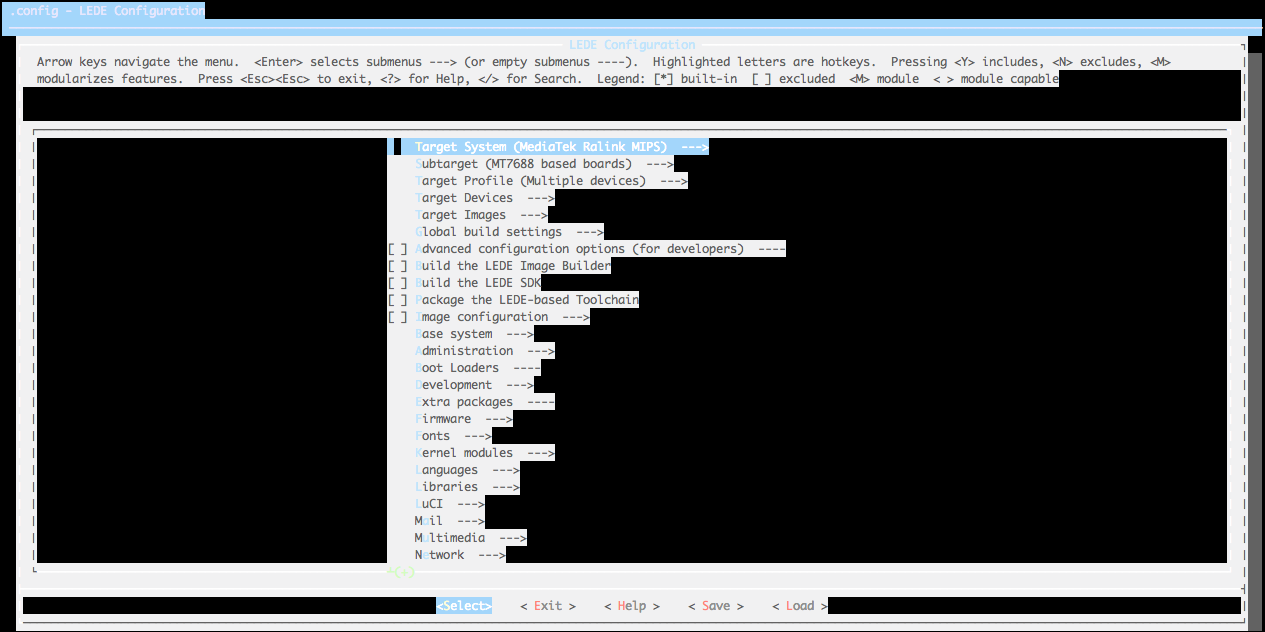
From the error log, you will see exactly which packages failed to compile. You can look them up using the search utility that is accessed with /. In the search box, type in the desired package name and you’ll be able to see in which sub-menu it’s located. When you find it in the submenu, deselect it using space button on your keyboard. This is what you need to look for while the menuconfig:

![]()
![]()
After you un-check them, exit and save your changes. You’ll be back in the /source directory, try compiling again with the make command.
Preparing the Code
Now, it’s the time to start preparing our code to be cross-compiled. Go to the /root directory and create a directory named something like projects. To get the code, we’ll need to clone the gpioIrq GitHub Repo:
git clone https://github.com/OnionIoT/gpioIrq.git
Let’s take a brief look at the code, specifically the
gpioIrq.cfile. It expects an integer argument that specifies the GPIO on which we’ll be doing the edge detection. It will then make the GPIO available for use withsysfs, set the GPIO to output, and configure the edge detection to look forbothtypes of edges, rising and falling.
It will then start an infinite loop that usespollfdfor edge detection. Thepollfdcall is set to time-out if there are no detected edges within three seconds, this will result in a.being printed. If an edge is indeed detected, the new value of the GPIO will be read and displayed on the terminal. Since this is in an infinite loop, this will continue indefinitely!
Now, go into the gpioIrq directory and download our handy cross-compilation script:
wget https://raw.githubusercontent.com/OnionIoT/c-cross-compile-example/master/xCompile.sh
Actual Cross Compilation
Now that all of the code and scripts have been collected, let’s explore them:
gpioIrq.c– is the C source code that we’ll be cross-compilingmakefile– provides the compilation command to create our binary file. Notice how the compiler, and compilation flags are variables and are therefore configurablexCompile.sh– the scripts that will invoke themakefilewith the mips cross compiler.
We’ll start our cross-compilation journey by calling the xCompile.sh script and indicating the path to the buildroot:
sh xCompile.sh -buildroot /root/source
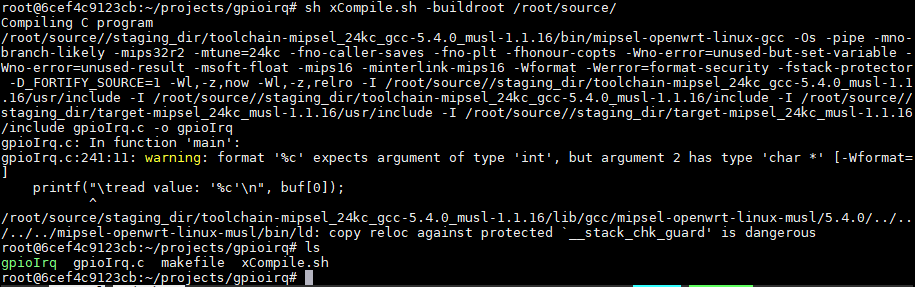
You will notice a new file: an executable called gpioIrq! We can ensure that this was successfully cross-compiled for the MIPS architecture by issuing the following file gpioIrq:
![]()
And voila! It’s a MIPS executable!
Copying the Executable to the Omega
The final destination of the gpioIrqs journey, will be your Omega2. We’ll copy it over using the scp command. You just need to know the Omega’s IP address, please follow our guide on how to find Omega’s IP address. On your Omega2, create a directory in /root, name it something like gpioIrq or anything you prefer. The following is the syntax of the scp command:
scp <PATH-TO-gpioIrq-EXECUTABLE> root@<OMEGA’s-IP-ADDRESS>:<DESTINATION-ON-THE-OMEGA>
So, in our case it will look like this:
scp /root/projects/gpioirq/gpioIrq root@192.168.1.163:/root/gpioIrq
Please note, our IP address will likely differ from yours. While copying the file over to the Omega, you’ll be prompted for the Omega’s password (by default its onioneer). You will get the similar output:
The authenticity of host '192.168.1.163 (192.168.1.163)' can't be established.
RSA key fingerprint is SHA256:66xVPU43Fn+zUGA0D/jI+asz8Zxg2uNXG1EFGGa1aA8.
Are you sure you want to continue connecting (yes/no)? yes
Warning: Permanently added '192.168.1.163' (RSA) to the list of known hosts.
root@192.168.1.163's password:
gpioIrq                                       100%   14KB  14.3KB/s   00:00
The last step of our gpioIrq trip is to change the downloaded file’s permissions to make it executable:
chmod +x gpioIrq
Running the Program
Now, you are all set to run your cross-compiled program! The syntax of the program is the following:
./gpioIrq <GPIO-Number>
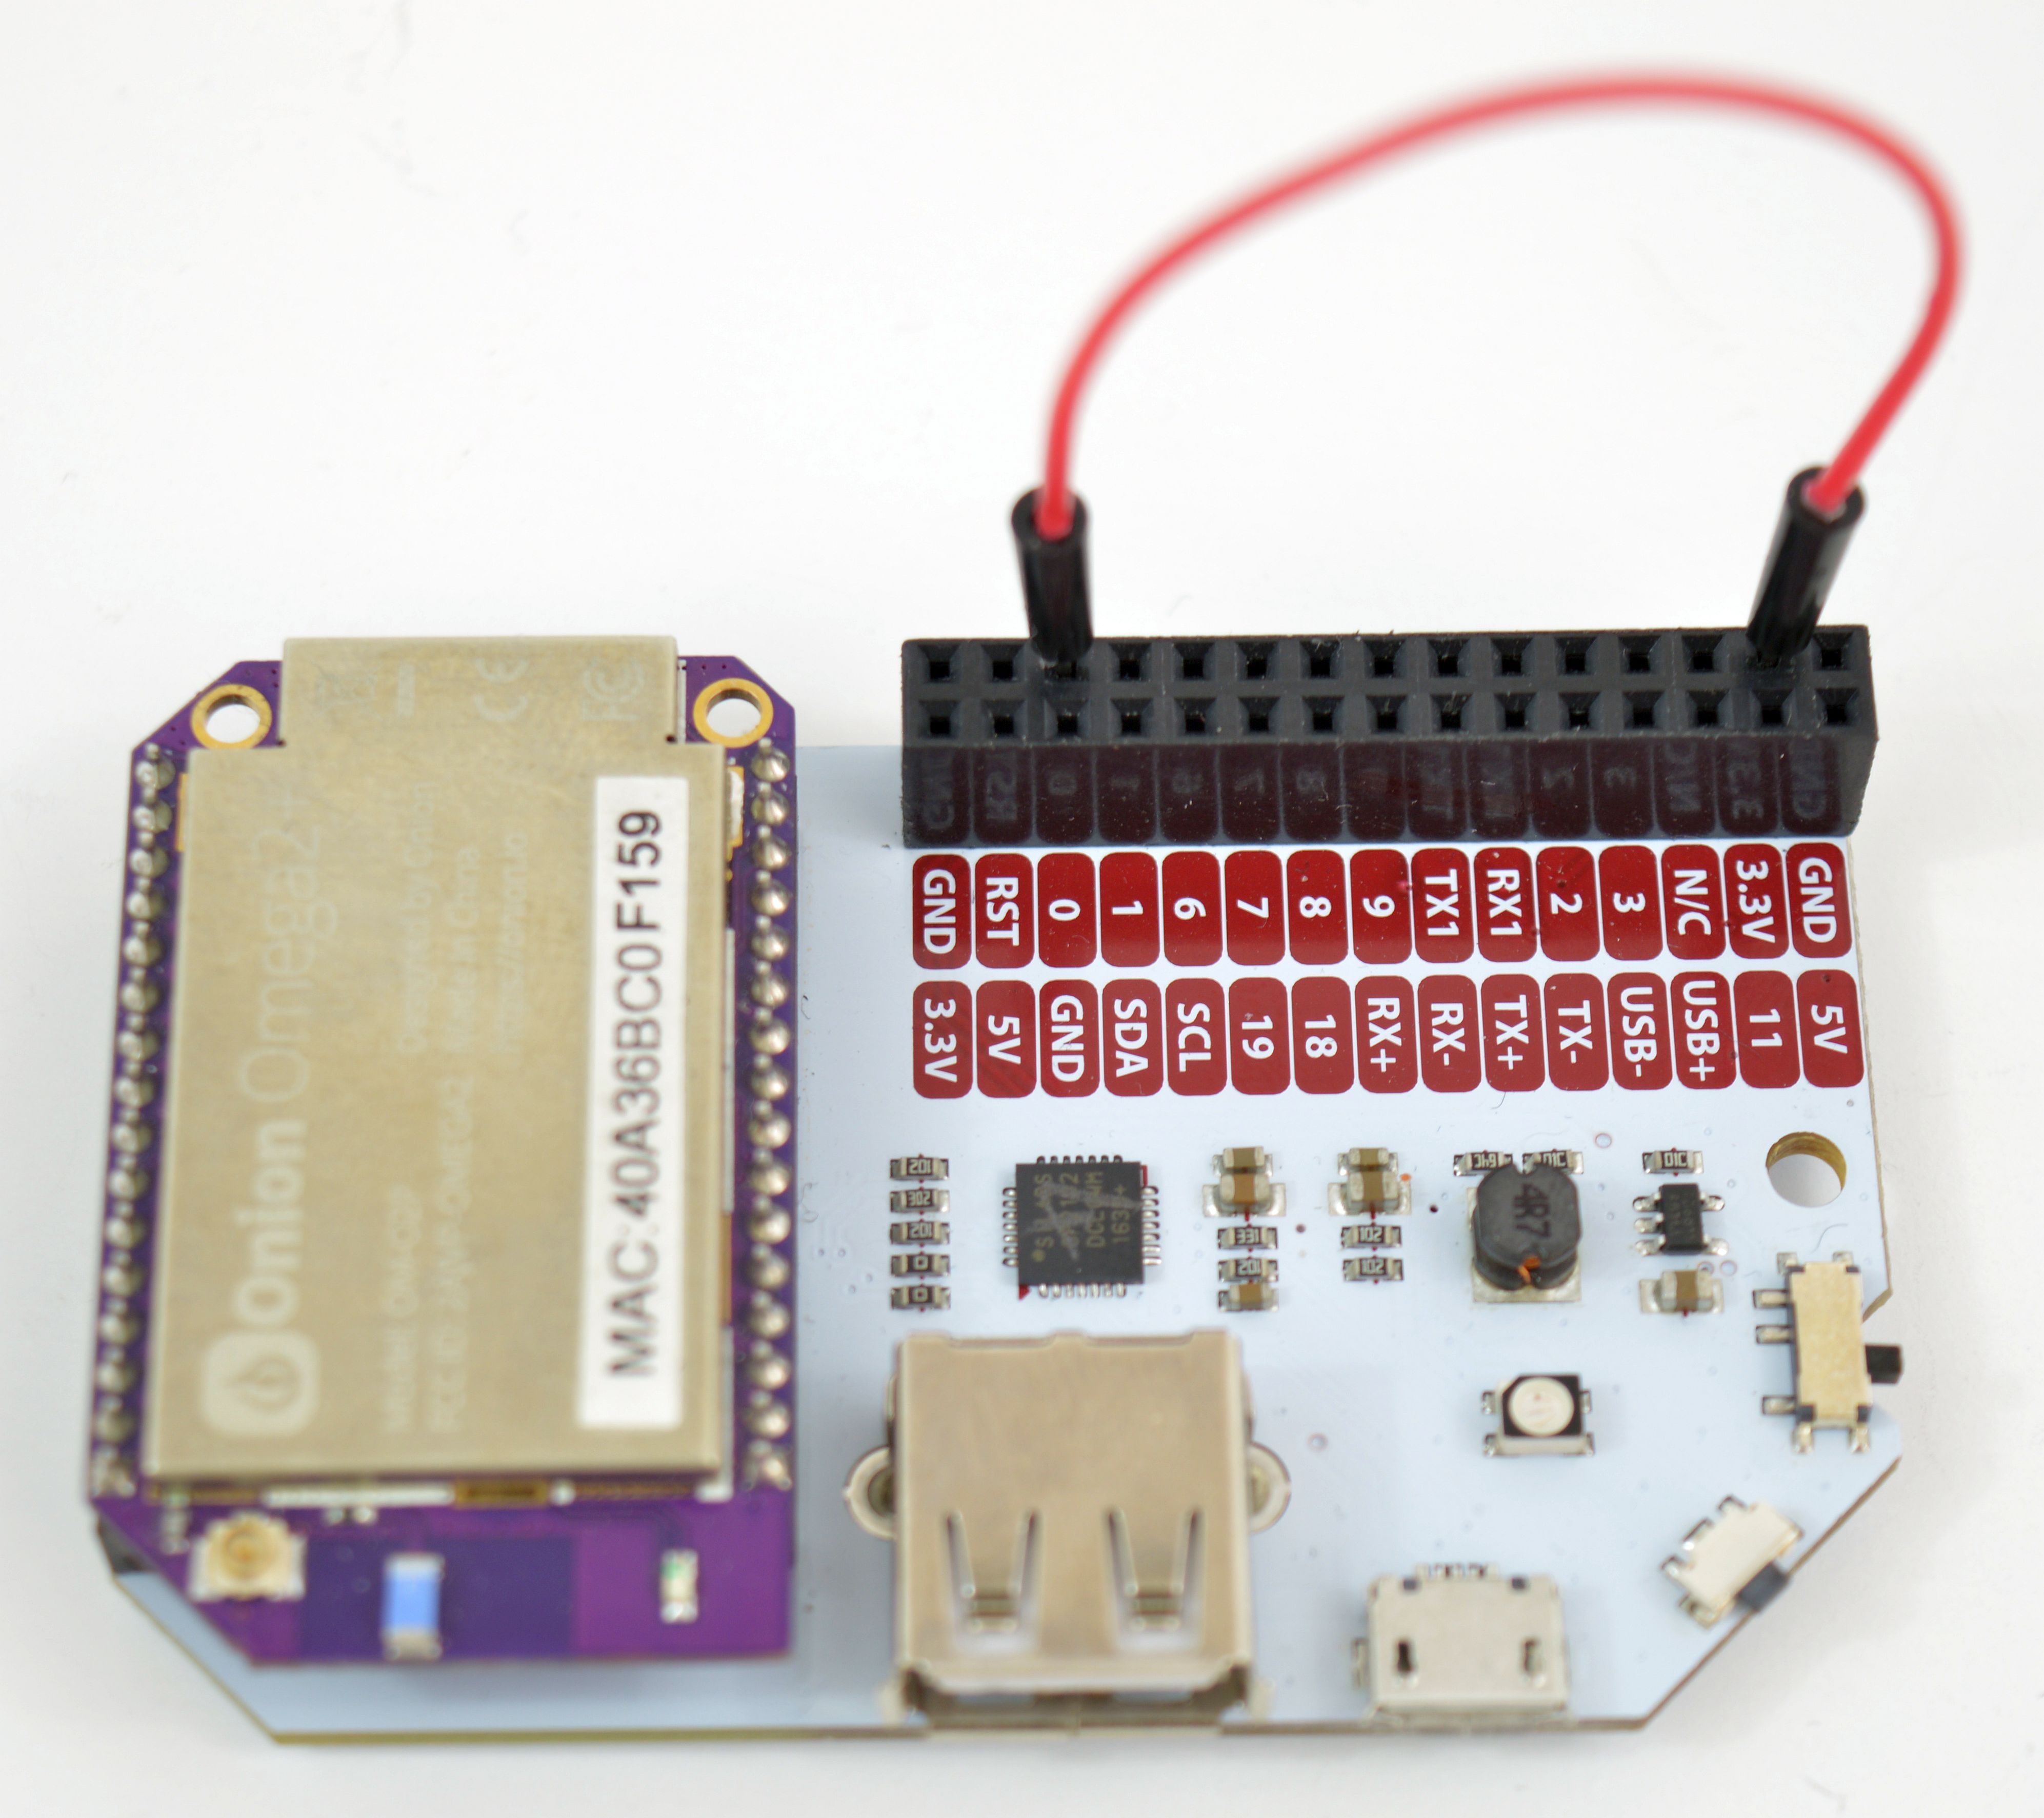
In our case, we chose to test it with GPIO0. So, run the program, grab a male-to-male jumper wire and connect the selected GPIO to the GND and then 3.3V. Monitor the output of the program and you should see something similar to:
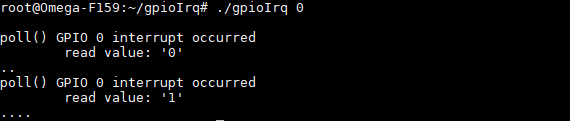
When read value: ‘0’ shows up, that means that an edge (high to low) was detected on the GPIO, triggering the program to continue and read the GPIO’s current value.
When you switch from GND to 3.3V (a low to high edge) it reads 1 and again triggers action in the script.
The dots show up periodically since our edge detection is configured to time out after 3 seconds, however, since the edge detection code is in an infinite loop, the program will continuously wait for edges on the specified GPIO. This is actually a pretty good way to implement blocking edge-detection on the Omega.
To exit the program and end the loop, hit Ctrl+c.
Going further
So now you’ve successfully cross compiled your third program, one that has a makefile! Now, it’s your turn to make some awesome projects and share them with us! Try using some of the C Libraries we’ve put together! Happy Hacking!